|
|
|
|
| Operation |
How To Set The Parking Brake |
| Reverse Mowing Option (RMO) | |||
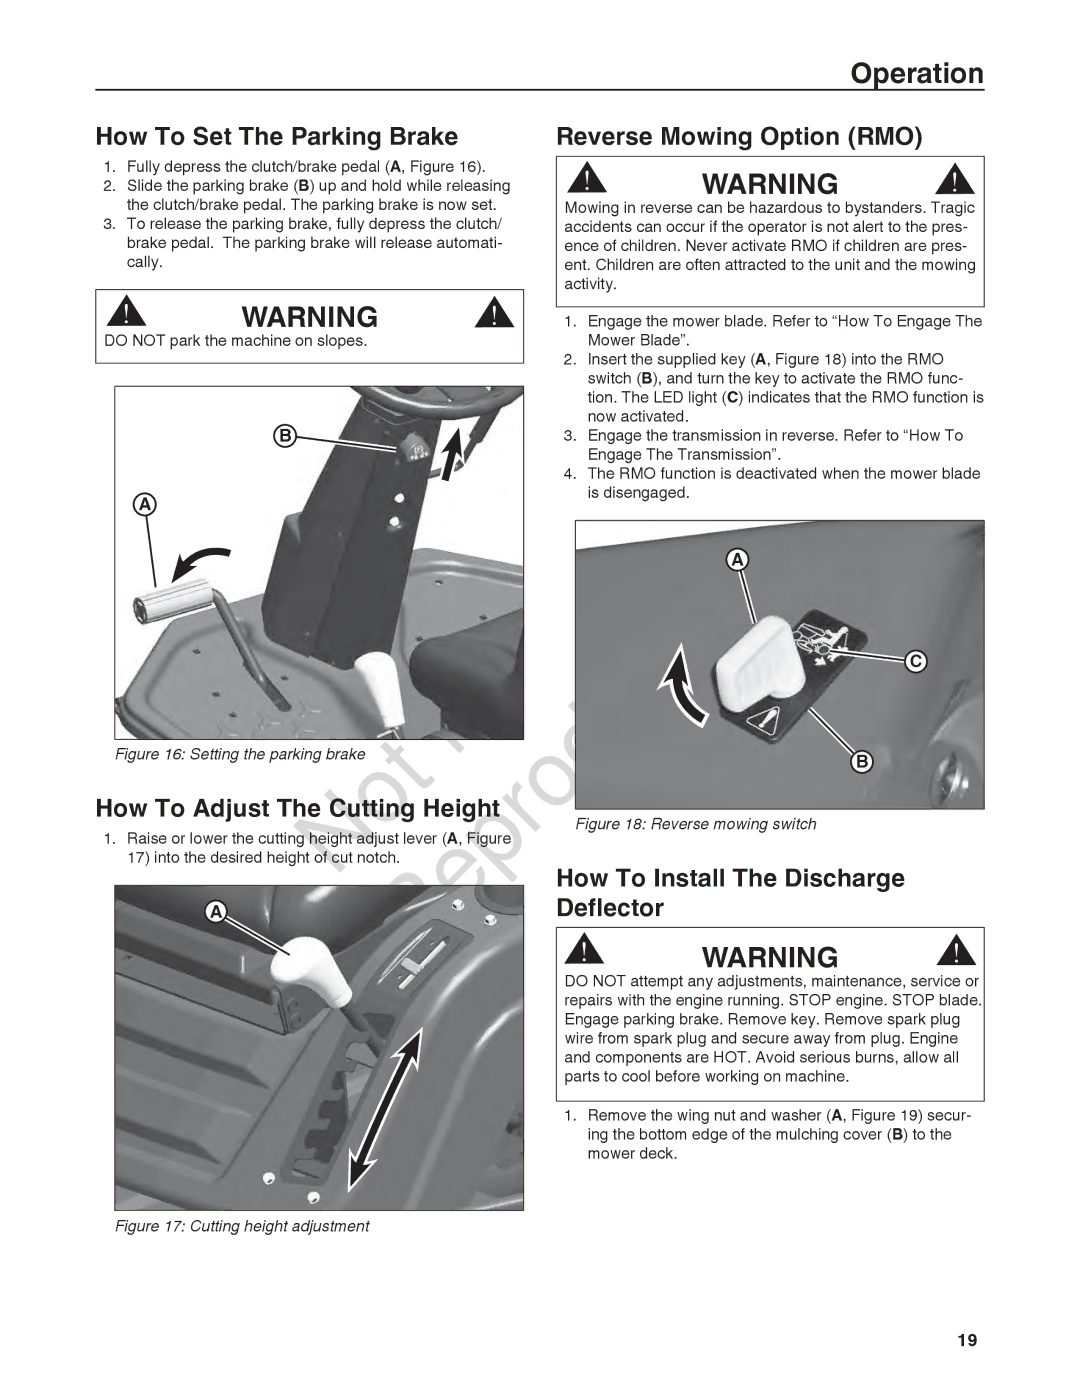
1. | Fully depress the clutch/brake pedal (A, Figure 16). | ! | WARNING | ! | |
2. | Slide the parking brake (B) up and hold while releasing | ||||
3. | the clutch/brake pedal. The parking brake is now set. |
| Mowing in reverse can be hazardous to bystanders. Tragic | ||
To release the parking brake, fully depress the clutch/ |
| accidents can occur if the operator is not alert to the pres- | |||
| brake pedal. The parking brake will release automati- |
| ence of children. Never activate RMO if children are pres- | ||
| cally. |
| ent. Children are often attracted to the unit and the mowing | ||
|
|
| activity. |
|
|
! | WARNING | ! | 1. | Engage the mower blade. Refer to “How To Engage The |
DO NOT park the machine on slopes. |
| 2. | Mower Blade”. | |
|
|
| Insert the supplied key (A, Figure 18) into the RMO | |
|
|
|
| switch (B), and turn the key to activate the RMO func- |
|
|
|
| tion. The LED light (C) indicates that the RMO function is |
| B |
| 3. | now activated. |
|
| Engage the transmission in reverse. Refer to “How To | ||
|
|
| 4. | Engage The Transmission”. |
|
|
| The RMO function is deactivated when the mower blade | |
| A |
|
| is disengaged. |
|
|
|
| |
|
|
|
|
|
|
|
| A |
|
|
|
|
| for |
|
|
|
| C |
| Figure 16: Setting the parking brake |
|
|
|
| B |
| ||
|
| Not |
|
|
|
|
|
| |
How To Adjust The Cutting Height |
|
| Figure 18: Reverse mowing switch |
| |||||
1. Raise or lower the cutting height adjust lever (A, Figure |
|
|
|
|
| ||||
| 17) into the desired height of cut notch. |
|
| How To Install The Discharge |
| ||||
| A |
|
|
|
| Deflector |
|
| |
|
|
|
|
|
| ! | WARNING | ! | |
|
|
| ReproduDO NOTctioattempt anynadjustments, maintenance, service or | ||||||
|
|
|
|
|
| repairs with the engine running. STOP engine. STOP blade. | |||
|
|
|
|
|
| Engage parking brake. Remove key. Remove spark plug | |||
|
|
|
|
|
| wire from spark plug and secure away from plug. Engine | |||
|
|
|
|
|
| and components are HOT. Avoid serious burns, allow all | |||
|
|
|
|
|
| parts to cool before working on machine. |
| ||
|
|
|
|
|
|
| |||
|
|
|
|
|
| 1. Remove the wing nut and washer (A, Figure 19) secur- | |||
|
|
|
|
|
|
| ing the bottom edge of the mulching cover (B) to the | ||
|
|
|
|
|
|
| mower deck. |
|
|
|
|
|
|
|
|
|
|
| |
| Figure 17: Cutting height adjustment |
|
|
|
|
|
|
| |
19
