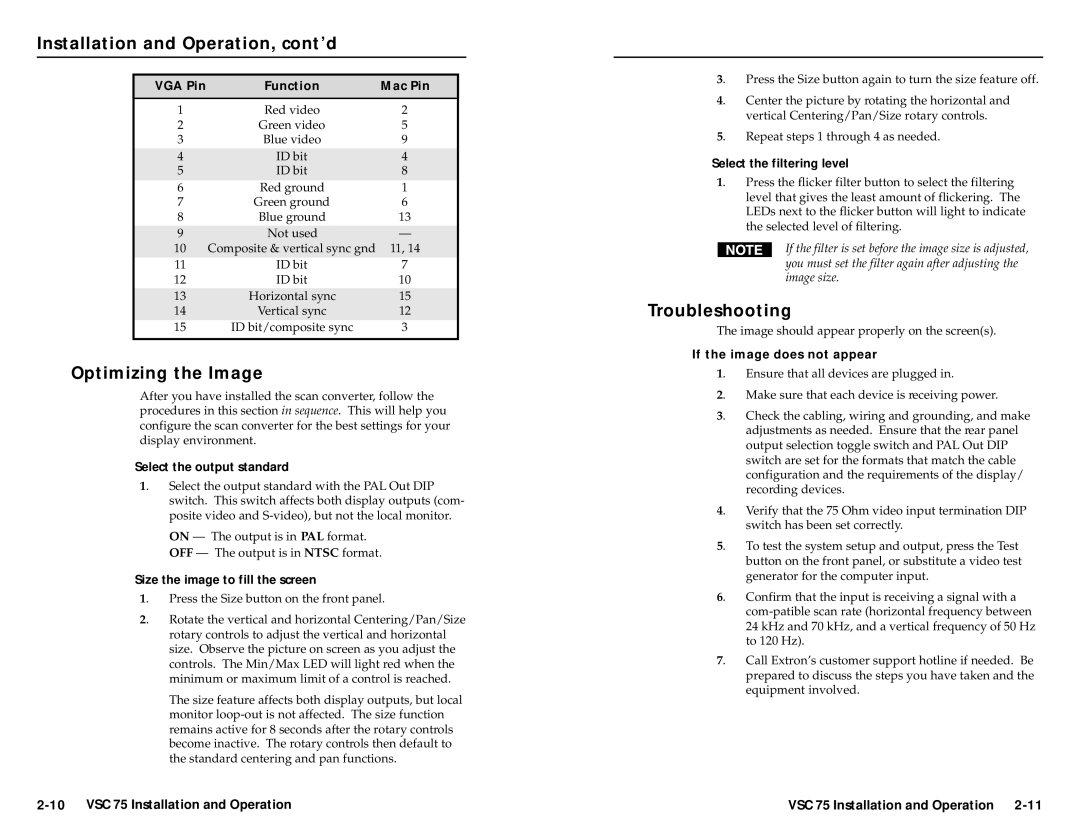
VSC 75 specifications
The Extron VSC 75 is a versatile and powerful video scaling solution designed for a variety of professional AV applications. This device is particularly suited for environments such as classrooms, conference rooms, and auditoriums, where high-quality video is crucial for effective communication and presentations. The VSC 75 offers an impressive combination of features and technologies that enhance its functionality and ease of use.One of the main features of the VSC 75 is its advanced video scaling capability. The device can accept a wide range of input resolutions, including standard and high-definition video sources, and transform them to fit the desired output format. This makes it a flexible solution for integrating various AV sources into a single system. The VSC 75 supports video formats up to 1080p, ensuring crisp and clear image quality across all applications.
The Extron VSC 75 utilizes state-of-the-art processing technologies to deliver high-performance video scaling. It features a 10-bit video processing engine that ensures smooth and accurate scaling, reducing artifacts during the transition from one resolution to another. This level of processing is particularly important for professional presentations, where visual fidelity is paramount. Additionally, the device incorporates sophisticated algorithms for noise reduction and image enhancement, which improve the overall picture quality.
Another key aspect of the VSC 75 is its user-friendly interface. The device includes an intuitive front panel with a variety of buttons and indicators that facilitate easy operation. Furthermore, it supports multiple control options, including RS-232 and contact closure, allowing for seamless integration into existing AV systems. This flexibility makes it a popular choice for system integrators.
In terms of connectivity, the Extron VSC 75 offers a comprehensive range of inputs and outputs. It features HDMI, VGA, and composite video inputs, as well as a loop-through output for connecting additional displays. This range of connectivity options ensures compatibility with most AV equipment, making the VSC 75 a highly adaptable solution.
In conclusion, the Extron VSC 75 is a powerful video scaler that combines advanced scaling technologies with a user-friendly design. Its ability to accept multiple input formats, support for high-definition resolutions, and various connectivity options make it an excellent choice for enhancing video presentations in any professional environment.