Nova specifications
Faber Nova is an innovative range hood designed to revolutionize the kitchen ventilation experience. Known for its blend of cutting-edge technology and sophisticated design, Faber Nova not only elevates the aesthetic of any kitchen but also ensures exceptional air quality and comfort during cooking.One of the main features of the Faber Nova is its powerful suction capability. With a high-performance motor, it efficiently removes smoke, odors, and grease from the air, maintaining a fresh environment while you cook. The hood offers various suction levels, allowing users to customize performance based on the intensity of cooking. Whether you're simmering a delicate sauce or searing meat at high temperatures, Faber Nova adapts to your needs.
Another standout characteristic of the Faber Nova is its whisper-quiet operation. It incorporates advanced noise-reduction technologies that ensure minimal sound disturbance, even on higher settings. This feature is particularly advantageous for open-concept kitchens where maintaining a peaceful atmosphere is essential.
The Faber Nova also embraces smart technology with its integrated touch controls and remote operation capabilities. Users can easily adjust settings, including light levels and fan speeds, with just a tap or remotely via a smartphone app. This modern touch makes it simple to manage kitchen environments efficiently.
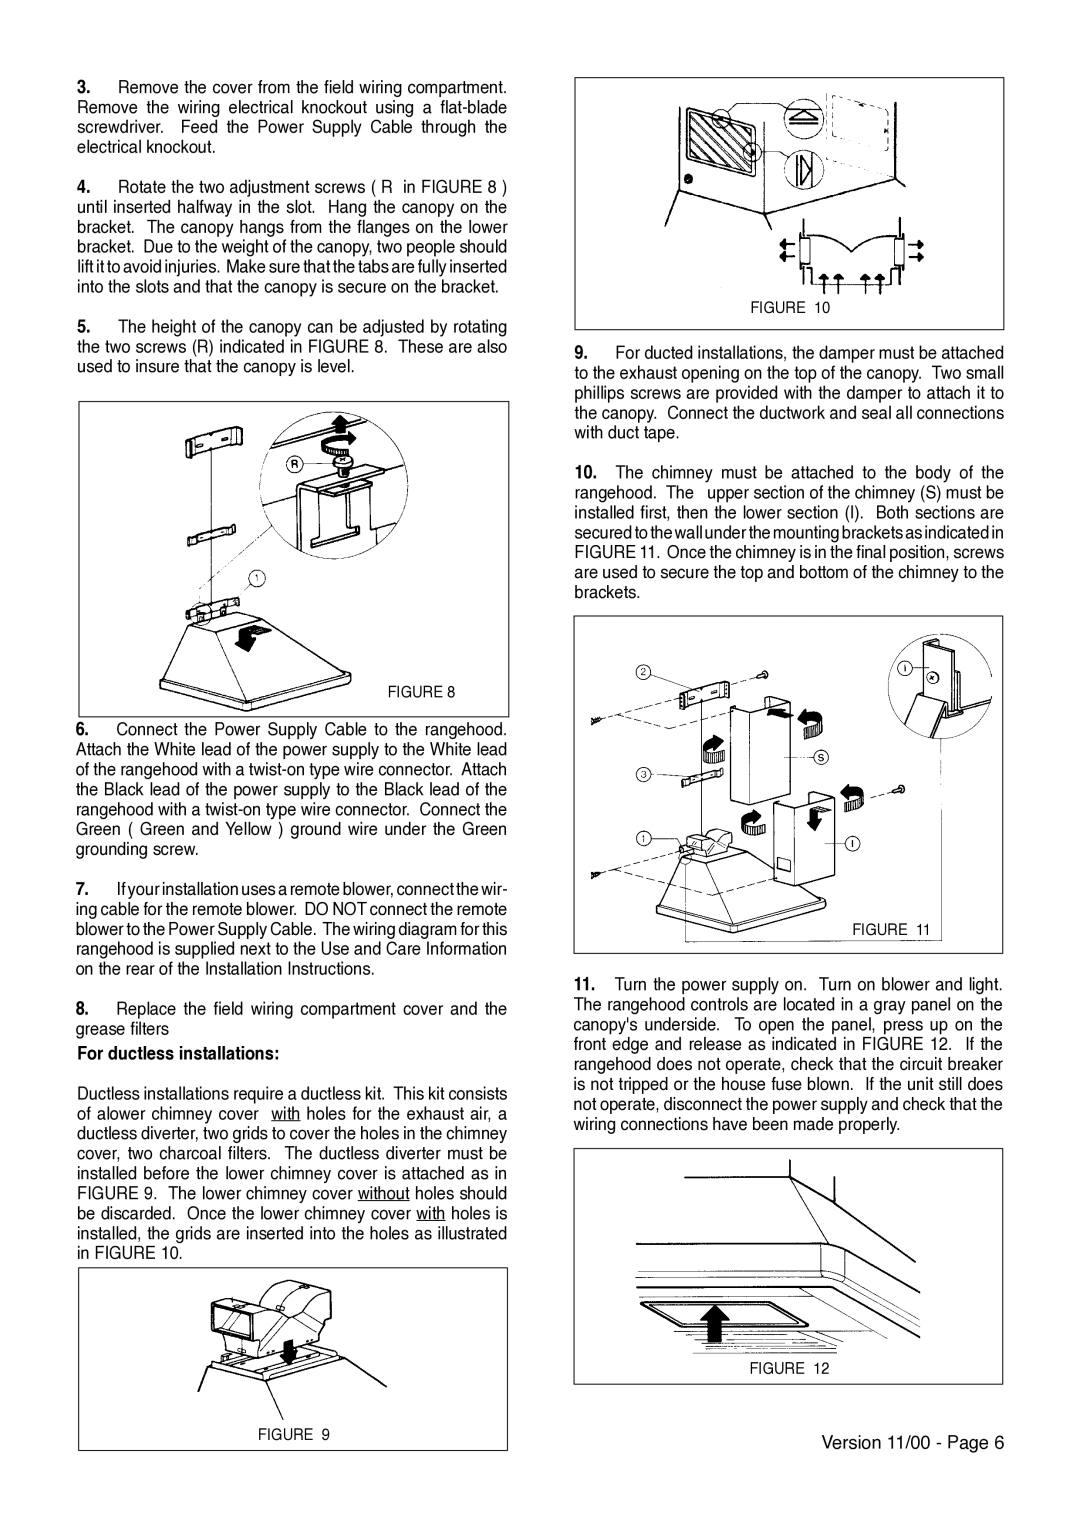
In terms of design, Faber Nova epitomizes elegance. It is available in various finishes, including stainless steel, matte black, and glass, allowing it to seamlessly integrate into diverse kitchen styles. Its sleek and minimalist appearance enhances the overall ambiance of the space.
In addition, the Faber Nova features energy-efficient LED lighting that illuminates the cooking area effectively while consuming minimal power. The lights are designed to provide clear visibility without adding excess heat, ensuring a comfortable cooking experience.
Maintenance is simplified with the Faber Nova, as it includes grease filters that are easy to remove and wash. This feature promotes hygiene and ensures that the appliance remains in optimal working condition over time.
In conclusion, Faber Nova is a versatile and high-performing kitchen hood that combines powerful ventilation, smart technology, elegant design, and user-friendly features. For anyone looking to enhance their kitchen ventilation experience, the Faber Nova stands out as a top choice, promising reliability and sophistication.