KXR 200 REAR PANEL
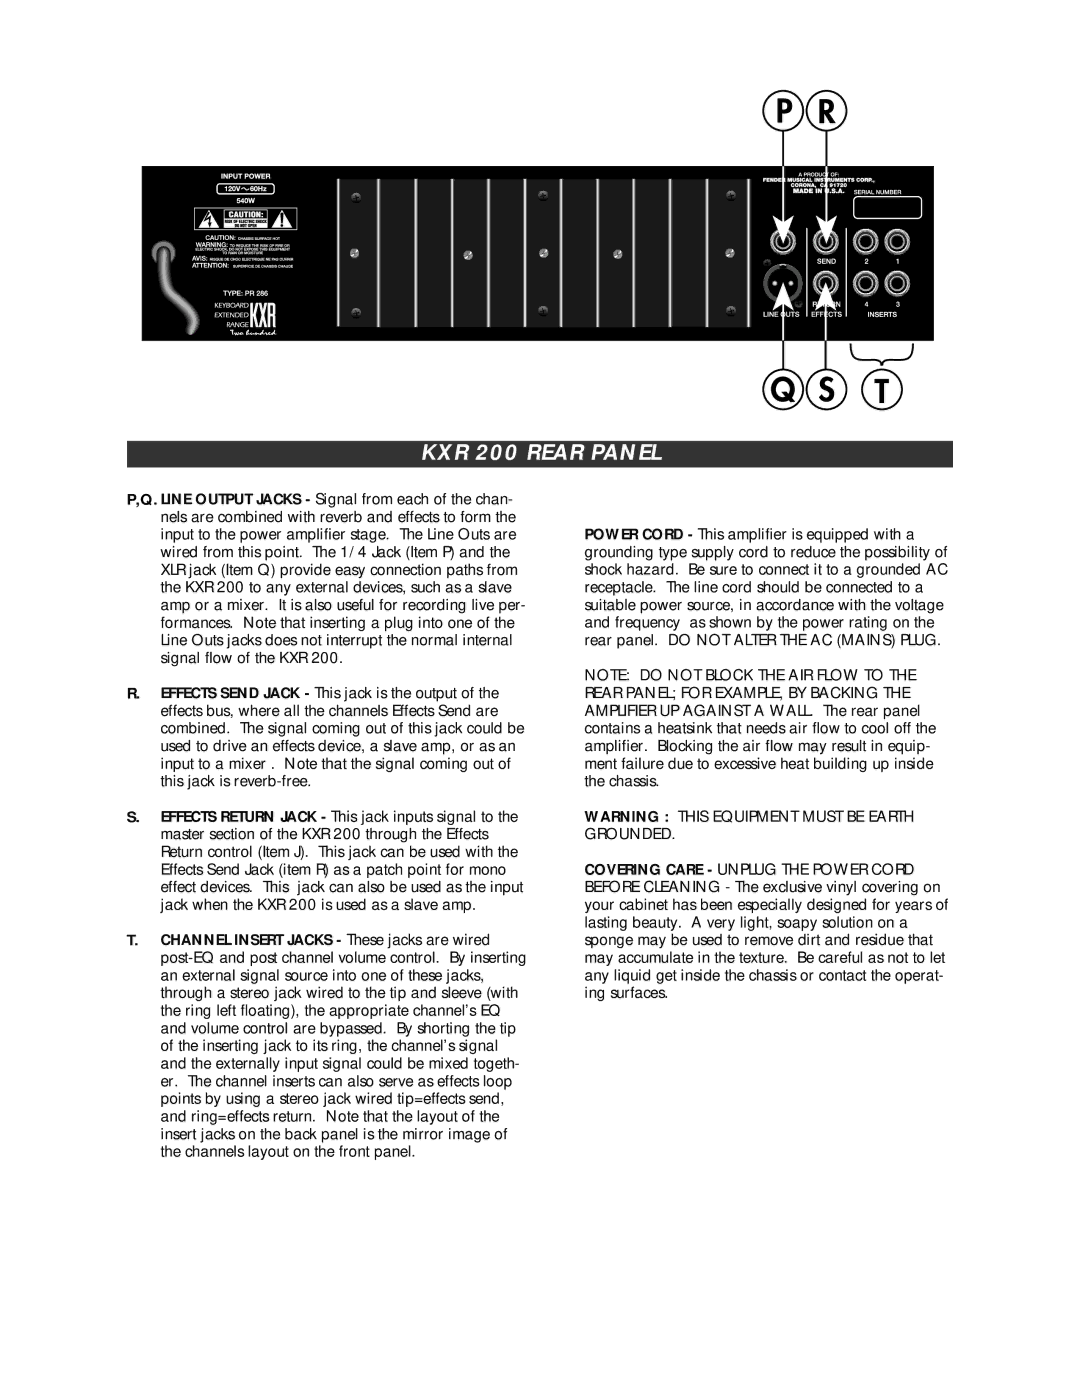
P,Q. LINE OUTPUT JACKS - Signal from each of the chan- nels are combined with reverb and effects to form the input to the power amplifier stage. The Line Outs are wired from this point. The 1/4 Jack (Item P) and the XLR jack (Item Q) provide easy connection paths from the KXR 200 to any external devices, such as a slave amp or a mixer. It is also useful for recording live per- formances. Note that inserting a plug into one of the Line Outs jacks does not interrupt the normal internal signal flow of the KXR 200.
R.EFFECTS SEND JACK - This jack is the output of the effects bus, where all the channels Effects Send are combined. The signal coming out of this jack could be used to drive an effects device, a slave amp, or as an input to a mixer . Note that the signal coming out of this jack is
S.EFFECTS RETURN JACK - This jack inputs signal to the master section of the KXR 200 through the Effects Return control (Item J). This jack can be used with the Effects Send Jack (item R) as a patch point for mono effect devices. This jack can also be used as the input jack when the KXR 200 is used as a slave amp.
T.CHANNEL INSERT JACKS - These jacks are wired
POWER CORD - This amplifier is equipped with a grounding type supply cord to reduce the possibility of shock hazard. Be sure to connect it to a grounded AC receptacle. The line cord should be connected to a suitable power source, in accordance with the voltage and frequency as shown by the power rating on the rear panel. DO NOT ALTER THE AC (MAINS) PLUG.
NOTE: DO NOT BLOCK THE AIR FLOW TO THE REAR PANEL; FOR EXAMPLE, BY BACKING THE AMPLIFIER UP AGAINST A WALL. The rear panel contains a heatsink that needs air flow to cool off the amplifier. Blocking the air flow may result in equip- ment failure due to excessive heat building up inside the chassis.
WARNING : THIS EQUIPMENT MUST BE EARTH GROUNDED.
COVERING CARE - UNPLUG THE POWER CORD BEFORE CLEANING - The exclusive vinyl covering on your cabinet has been especially designed for years of lasting beauty. A very light, soapy solution on a sponge may be used to remove dirt and residue that may accumulate in the texture. Be careful as not to let any liquid get inside the chassis or contact the operat- ing surfaces.