Using the Base Support Bracket
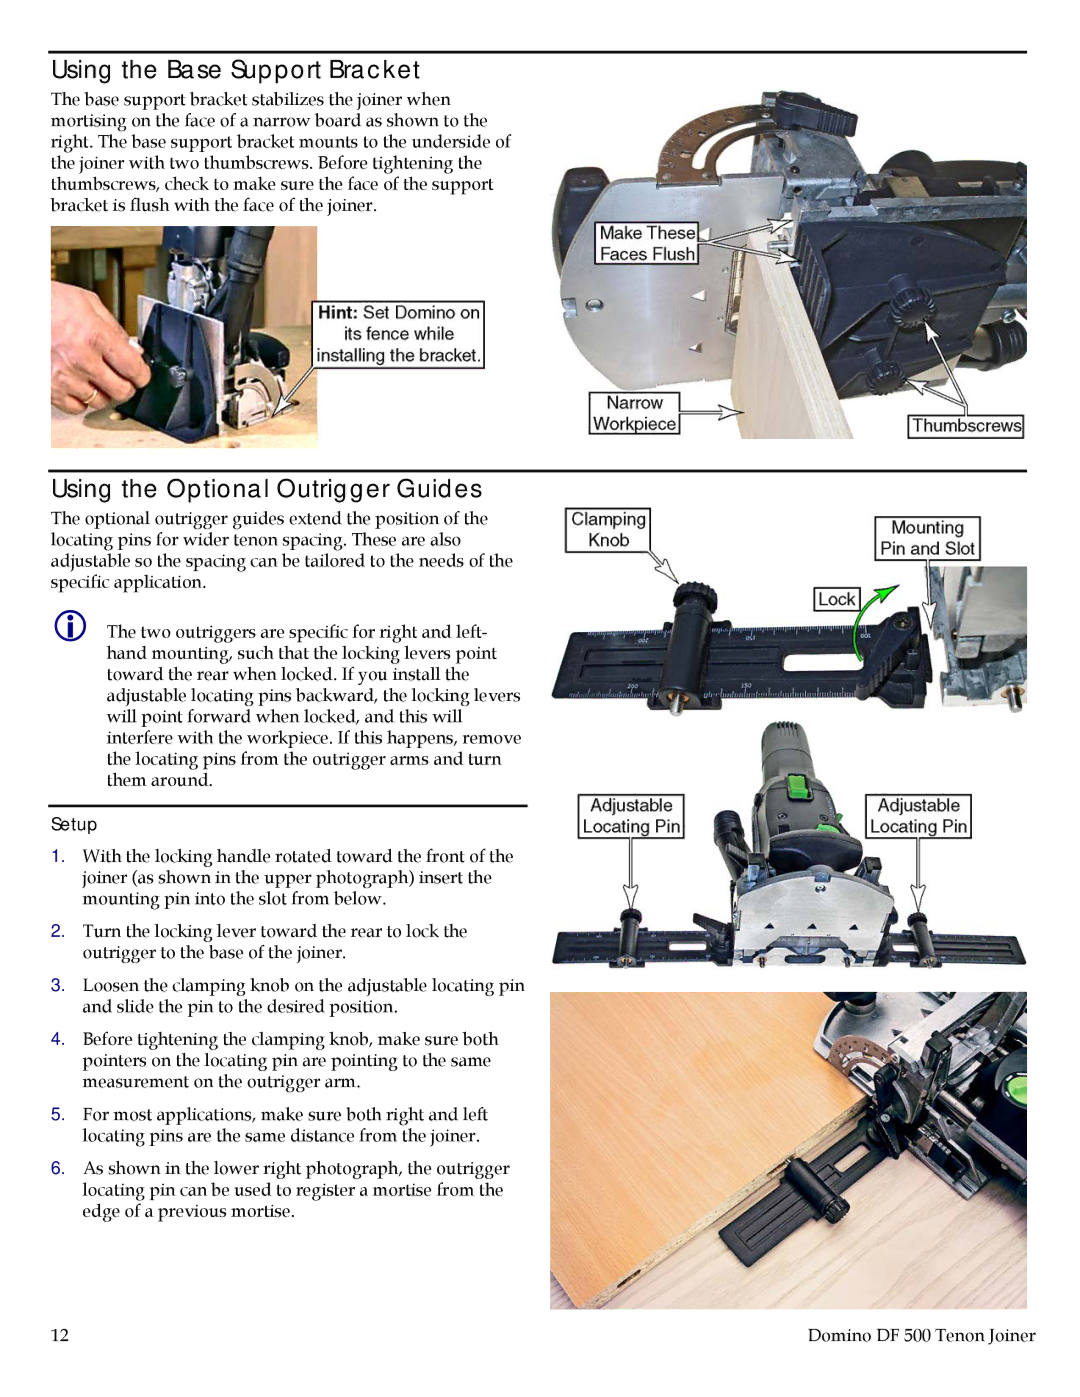
The base support bracket stabilizes the joiner when mortising on the face of a narrow board as shown to the right. The base support bracket mounts to the underside of the joiner with two thumbscrews. Before tightening the thumbscrews, check to make sure the face of the support bracket is flush with the face of the joiner.
Using the Optional Outrigger Guides
The optional outrigger guides extend the position of the locating pins for wider tenon spacing. These are also adjustable so the spacing can be tailored to the needs of the specific application.
The two outriggers are specific for right and left- hand mounting, such that the locking levers point toward the rear when locked. If you install the adjustable locating pins backward, the locking levers will point forward when locked, and this will interfere with the workpiece. If this happens, remove the locating pins from the outrigger arms and turn them around.
Setup
1.With the locking handle rotated toward the front of the joiner (as shown in the upper photograph) insert the mounting pin into the slot from below.
2.Turn the locking lever toward the rear to lock the outrigger to the base of the joiner.
3.Loosen the clamping knob on the adjustable locating pin and slide the pin to the desired position.
4.Before tightening the clamping knob, make sure both pointers on the locating pin are pointing to the same measurement on the outrigger arm.
5.For most applications, make sure both right and left locating pins are the same distance from the joiner.
6.As shown in the lower right photograph, the outrigger locating pin can be used to register a mortise from the edge of a previous mortise.
12 | Domino DF 500 Tenon Joiner |
