Making Carcase Butt Joints
Using tenoned butt joints is an effective method for constructing a cabinet carcase. The tenons provide a strong support for each of the horizontal partitions of the cabinet. The simplicity of this method is that you use the carcase components for aligning the joiner.
Setup and Machining
1.Lay the vertical wall pieces on your workbench, and draw lines across both pieces to indicate where the shelves will be located. Note that it is easier to avoid mistakes later on by drawing double lines, with one line above the shelf and one line below the shelf as shown.
2.For reference, label the top and bottom face of each shelf. This is so your left- and
3.Working with one shelf at a time, lay the horizontal shelf on top of the vertical wall so its edge lines up with the outside pencil line for that shelf location.
Hint: Stand the shelf vertical on the side wall piece and in the position it will eventually be secured (between the double pencil lines), and carefully tip the shelf flat, into
Instruction Manual
the position shown in the photographs below. For greater
►If the shelf is thick (greater than 20mm), tip it down with the
►If the shelf is thin (less than 20mm), tip it down with the
4.Clamp the two pieces together to prevent them from moving.
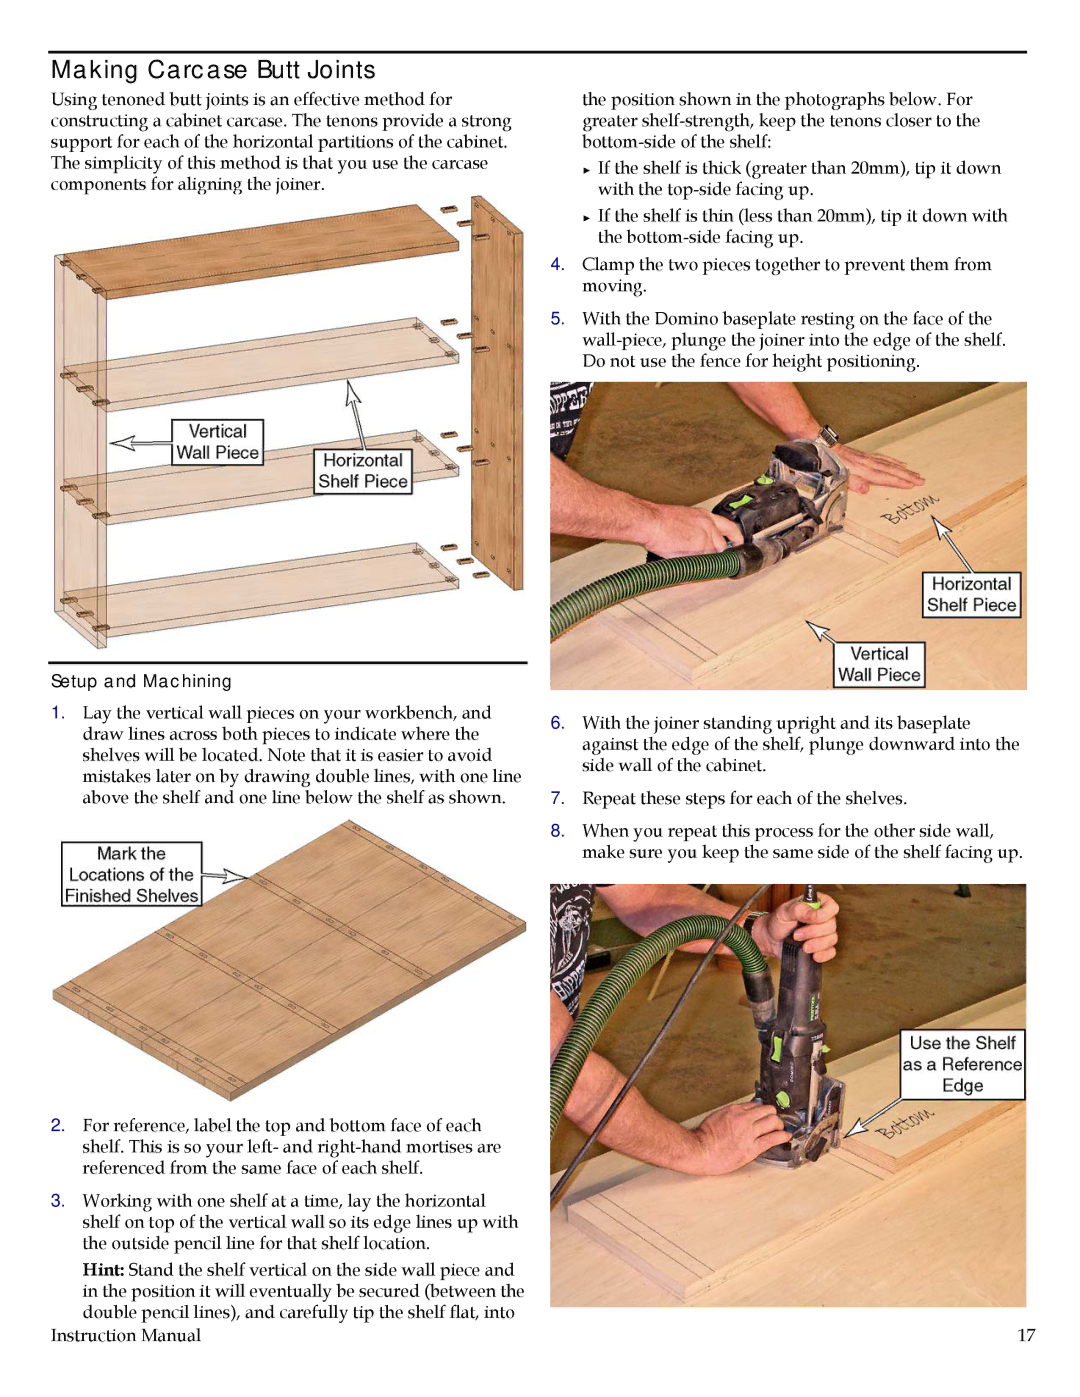
5.With the Domino baseplate resting on the face of the
6.With the joiner standing upright and its baseplate against the edge of the shelf, plunge downward into the side wall of the cabinet.
7.Repeat these steps for each of the shelves.
8.When you repeat this process for the other side wall, make sure you keep the same side of the shelf facing up.
17