
UV-E specifications
Field Controls has introduced the UV-E, a cutting-edge UV-C air purification system designed to enhance indoor air quality and mitigate harmful airborne pathogens. Engineered for residential and commercial applications, the UV-E utilizes advanced ultraviolet light technology that has proven effective in neutralizing viruses, bacteria, and mold spores that can pose health threats to occupants.One of the standout features of the Field Controls UV-E is its high-efficiency UVC lamp, which emits at a germicidal wavelength of 254 nanometers. This specific wavelength is optimal for disrupting the DNA and RNA of microorganisms, rendering them inactive and incapable of reproduction. The UV-E operates continuously, providing 24/7 protection against airborne pathogens, ensuring a healthier indoor environment at all times.
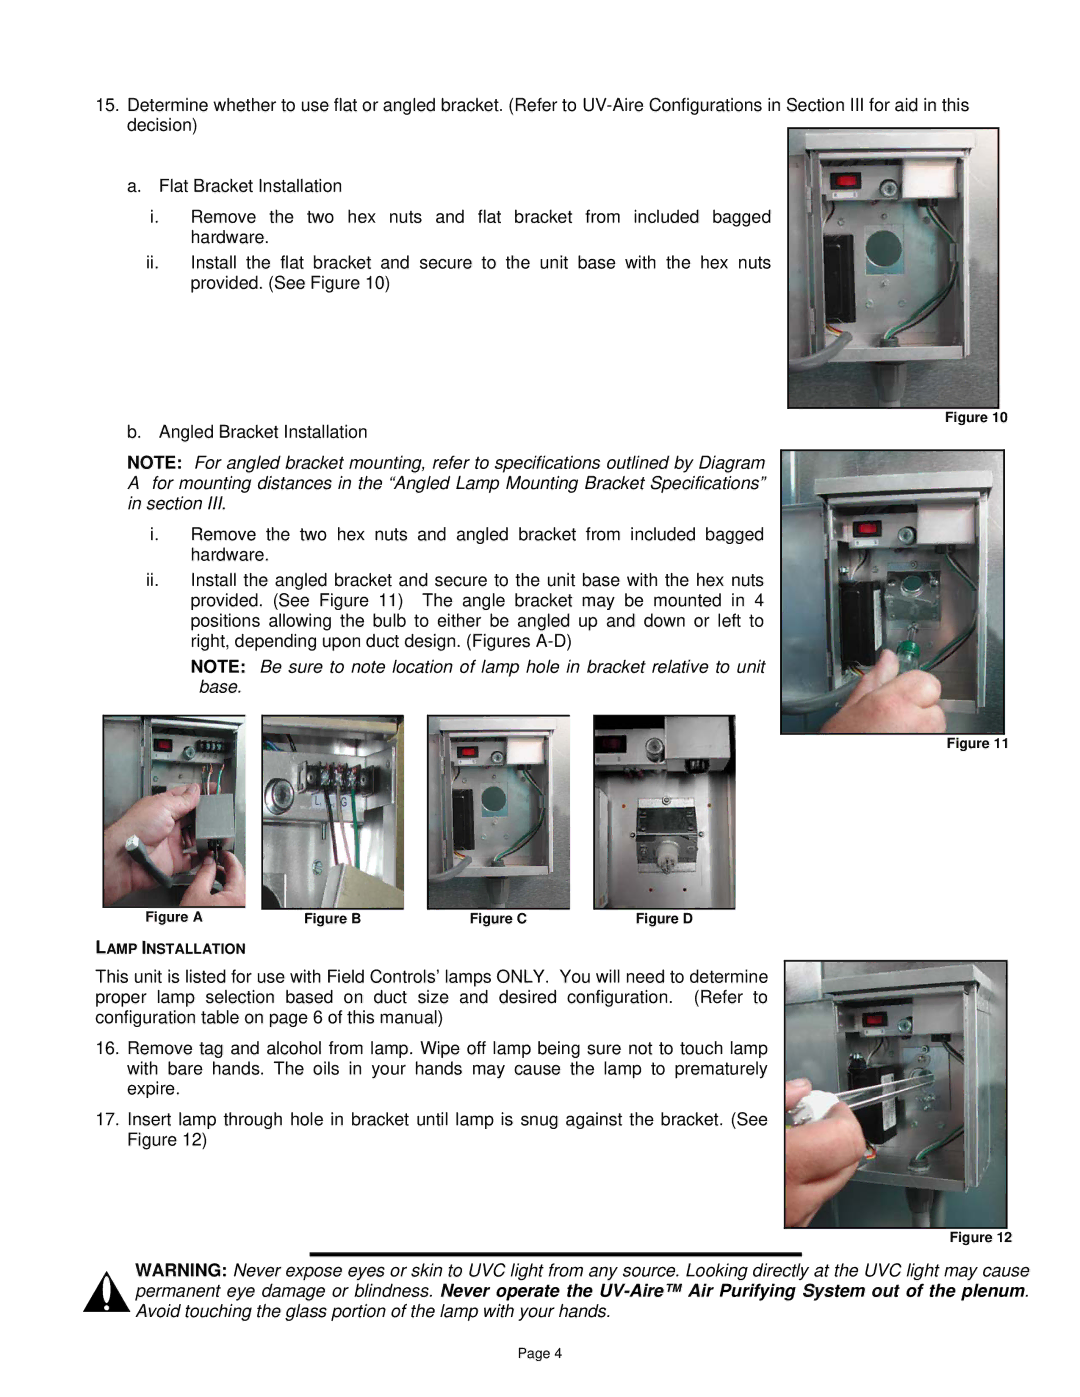
The system is designed with ease of installation in mind, seamlessly integrating into most heating, ventilation, and air conditioning (HVAC) systems. With flexible mounting options, including duct and surface-mounted configurations, the UV-E can be tailored to fit a variety of spaces, making it an ideal solution for both residential homes and larger commercial facilities.
In addition to its practical benefits, the UV-E also incorporates innovative safety features. The lamp is equipped with a safety shield, which prevents UV radiation from escaping the housing and ensures it operates safely in occupied spaces. Furthermore, the system includes a simple to use indicator that notifies users when it's time to replace the UV lamp, ensuring optimal performance and peace of mind.
The UV-E is also notable for its energy efficiency. Utilizing low-energy UV-C lamps reduces energy consumption while offering high levels of purification. This not only contributes to lower utility bills but also aligns with environmentally friendly practices, making it a sustainable solution for indoor air quality management.
In summary, the Field Controls UV-E stands out for its effective air purification capabilities, ease of installation, user-friendly features, and energy efficiency. By employing advanced UV-C technology, the UV-E contributes significantly to creating safer indoor air environments for homes and businesses alike.