Manuals
/
First Alert
/
Lawn and Garden
/
Weather Radio
First Alert
WX-150
user manual
S.A.M.E. Programming, Test Signal From Noaa
Models:
WX-150
1
16
16
Download
16 pages
39.4 Kb
9
10
11
12
13
14
15
16
Troubleshooting
Specs
Install
Setting the Alarm Clock
Battery Installation
Setting the Alert Mode
Setting the Siren Volume
Safety
Connecting the Power
Service Procedure
Page 16
Image 16
Page 15
Page 16
Page 16
Image 16
Page 15
Page 16
Contents
Page
TABLE OF CONTENTS
4.25” Wall MountingTemplate
CHAPTER 1 - BASIC OPERATION
CHAPTER 2 - PROGRAMMING
Important Safeguards
DANGER
Contents in this package
Care and Maintenance
90-DayLimited Warranty
FCC Notice to Users
SERVICE PROCEDURE
WX-150Specifications
Power Requirements
ACCESSORIES
Introduction
Trouble Shooting
Problem
Possible Cause and Solution
Rear Power Jack
Location of Controls
Handicapped Accessories - Appendix B
Wall Mount Installation
Description of controls and functions
1.Speaker
Using the Alarm Clock
WX-150Menu Tree
To Review Alert Messages
Normal Operation
Setting the Siren Mode
Battery Installation
DO NOT CHARGE ALKALINE BATTERIES
ALERT MODE SIREN MODE
2. Connecting the Power
Chapter 1 - Basic Operation
Adding Alerts
ALERT MODE ADD ALERTS NEW EVENT
Setting the Siren Volume
3. Setting the Clock and Calendar
SIREN VOLUME
Siren Test
5. Setting the WB channel for your listening area
Setting the Alarm Clock
4. Selecting the Weather Band Channel
Set Keytone
Setting the Alert Mode
Chapter 3 - Advanced Programming Options
Set Backlight
Specific Area Message Encoding S.A.M.E
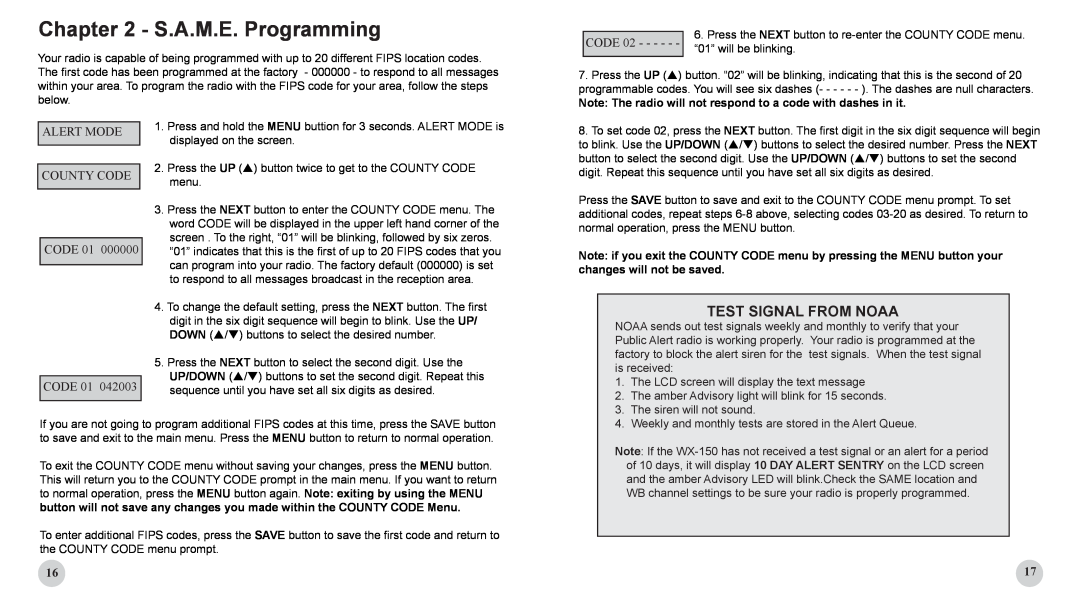
Chapter 2 - S.A.M.E. Programming
TEST SIGNAL FROM NOAA
ALERT MODE COUNTY CODE CODE 01 CODE
Top
Page
Image
Contents