Installation Instructions
12 Turn on main electrical supply and light the burners.
13 Important! Reset the minimum setting (see ‘Minimum Setting or Turndown’).
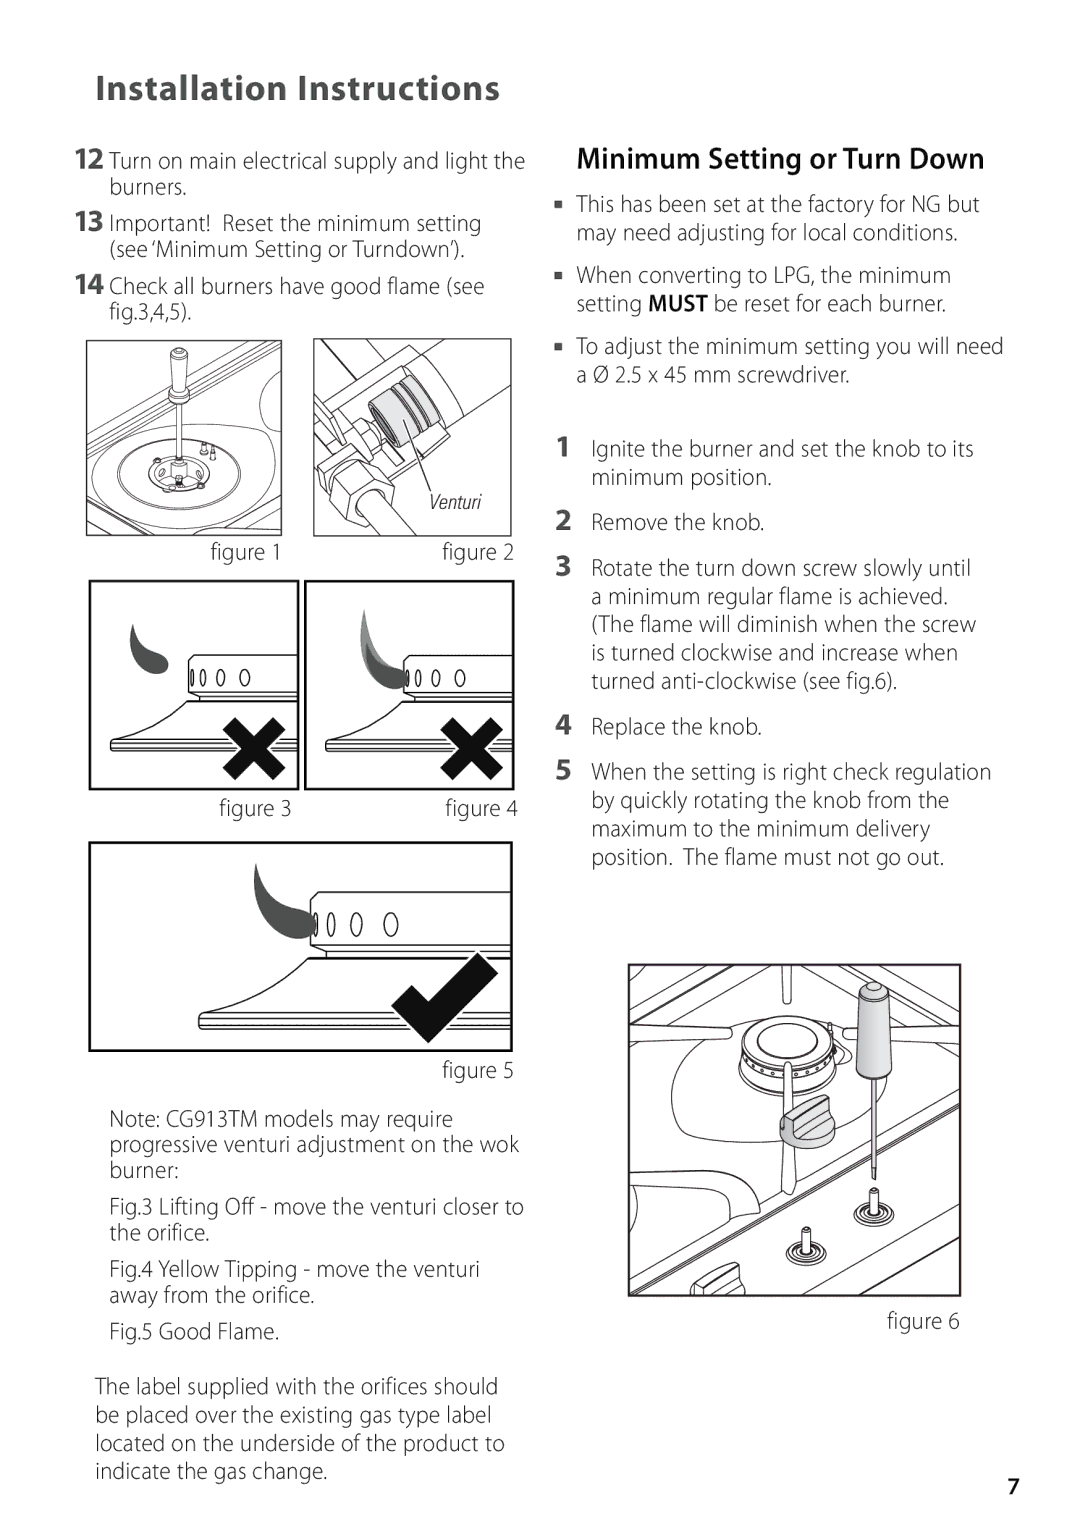
14 Check all burners have good flame (see fig.3,4,5).
Venturi
figure 1 |
| figure 2 |
|
|
|
|
|
|
figure 3 | figure 4 | |
|
|
|
|
|
|
figure 5
Note: CG913TM models may require progressive venturi adjustment on the wok burner:
Fig.3 Lifting Off - move the venturi closer to the orifice.
Fig.4 Yellow Tipping - move the venturi away from the orifice.
Fig.5 Good Flame.
The label supplied with the orifices should be placed over the existing gas type label located on the underside of the product to indicate the gas change.
Minimum Setting or Turn Down
This has been set at the factory for NG but may need adjusting for local conditions.
When converting to LPG, the minimum setting MUST be reset for each burner.
To adjust the minimum setting you will need a Ø 2.5 x 45 mm screwdriver.
1Ignite the burner and set the knob to its minimum position.
2Remove the knob.
3Rotate the turn down screw slowly until a minimum regular flame is achieved. (The flame will diminish when the screw is turned clockwise and increase when turned
4Replace the knob.
5When the setting is right check regulation by quickly rotating the knob from the maximum to the minimum delivery position. The flame must not go out.
figure 6
7