(2,2)
6 OPTIONALLY HARD WIRING THE PRODUCT
A
2
1
1 3⁄16”
(30 mm)
3
B | Remove the |
| access cover |
| 4 |
| 5 |
| 6 |
| 8 |
| 7 |
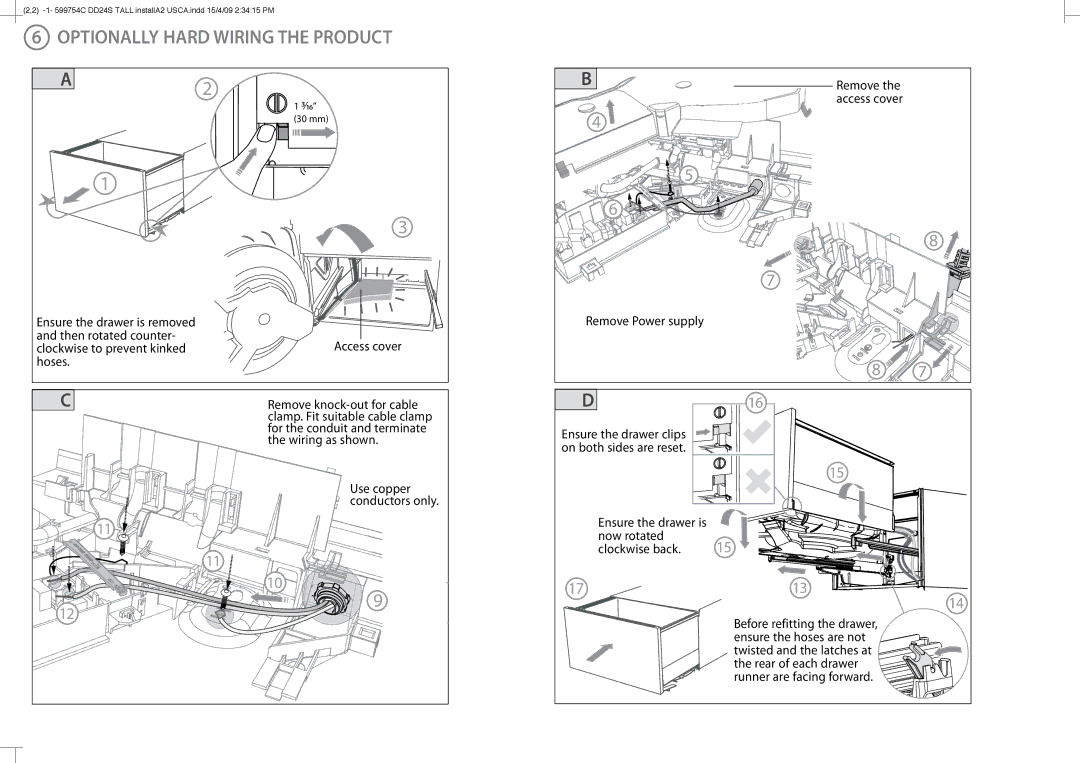
Ensure the drawer is removed |
|
and then rotated counter- | Access cover |
clockwise to prevent kinked | |
hoses. |
|
C | Remove |
| clamp. Fit suitable cable clamp |
| for the conduit and terminate |
| the wiring as shown. |
| Use copper |
| conductors only. |
11 |
|
| 11 |
| 10 |
Remove Power supply |
|
|
| 8 | 7 |
D | 16 |
|
Ensure the drawer clips on both sides are reset.
15
Ensure the drawer is |
|
now rotated | 15 |
clockwise back. |
17 | 13 |
![]() 12
12
9
14 |
Before refitting the drawer, |
ensure the hoses are not |
twisted and the latches at |
the rear of each drawer |
runner are facing forward. |
