(2,1)
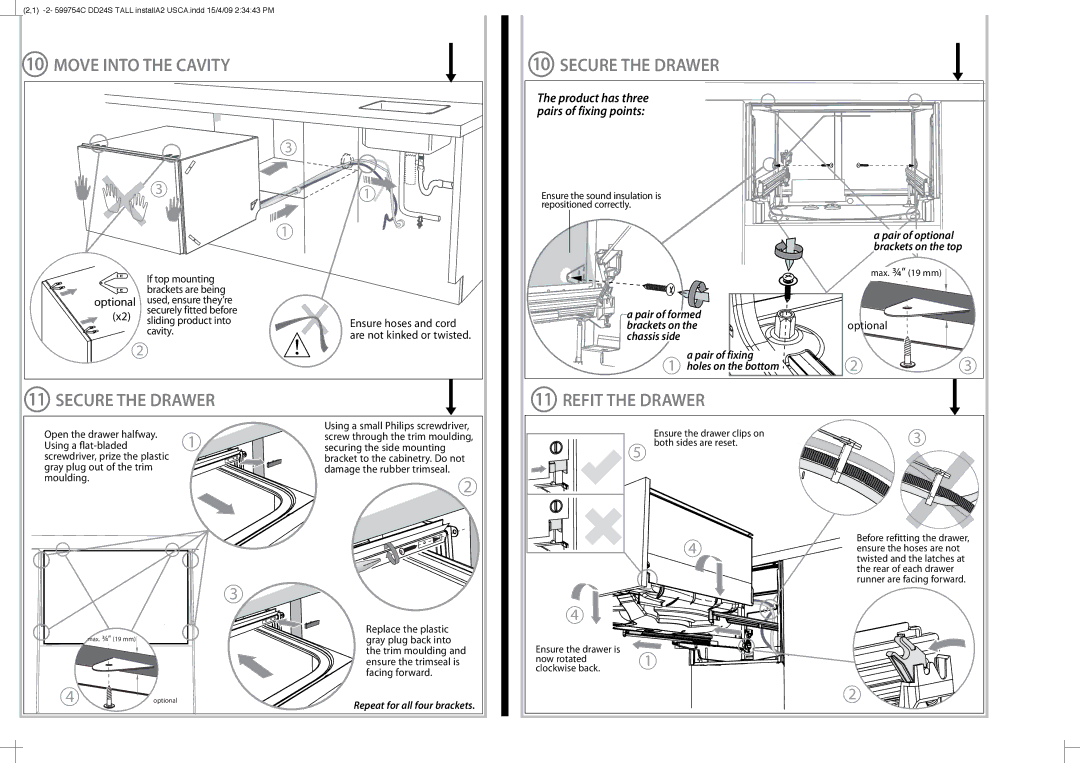
10MOVE INTO THE CAVITY
|
| 3 | |
| 3 | 1 | |
|
| ||
|
| 1 | |
| If top mounting |
| |
| brackets are being |
| |
optional | used, ensure they’re |
| |
(x2) | securely fitted before |
| |
sliding product into | Ensure hoses and cord | ||
| |||
| cavity. | are not kinked or twisted. | |
|
| ||
| 2 |
| |
11 SECURE THE DRAWER |
| ||
10SECURE THE DRAWER
The product has three pairs of fixing points:
Ensure the sound insulation is repositioned correctly.
| a pair of optional |
|
| brackets on the top |
|
| max. ¾” (19 mm) |
|
a pair of formed | optional |
|
brackets on the |
| |
chassis side |
|
|
a pair of fixing | 2 | 3 |
1 holes on the bottom |
11REFIT THE DRAWER
Open the drawer halfway. | 1 |
Using a | |
screwdriver, prize the plastic |
|
gray plug out of the trim |
|
moulding. |
|
Using a small Philips screwdriver, screw through the trim moulding, securing the side mounting bracket to the cabinetry. Do not damage the rubber trimseal.
2
Ensure the drawer clips on both sides are reset.
5
4
3
Before refitting the drawer, ensure the hoses are not twisted and the latches at the rear of each drawer runner are facing forward.
| 4 OPTIONAL |
| max. ¾” (19 mm) |
4 | optional |
3
Replace the plastic gray plug back into the trim moulding and ensure the trimseal is facing forward.
Repeat for all four brackets.
4
Ensure the drawer is
now rotated1 clockwise back.
2