Installation - Four Essential Requirements
4. Ventilation and Installation
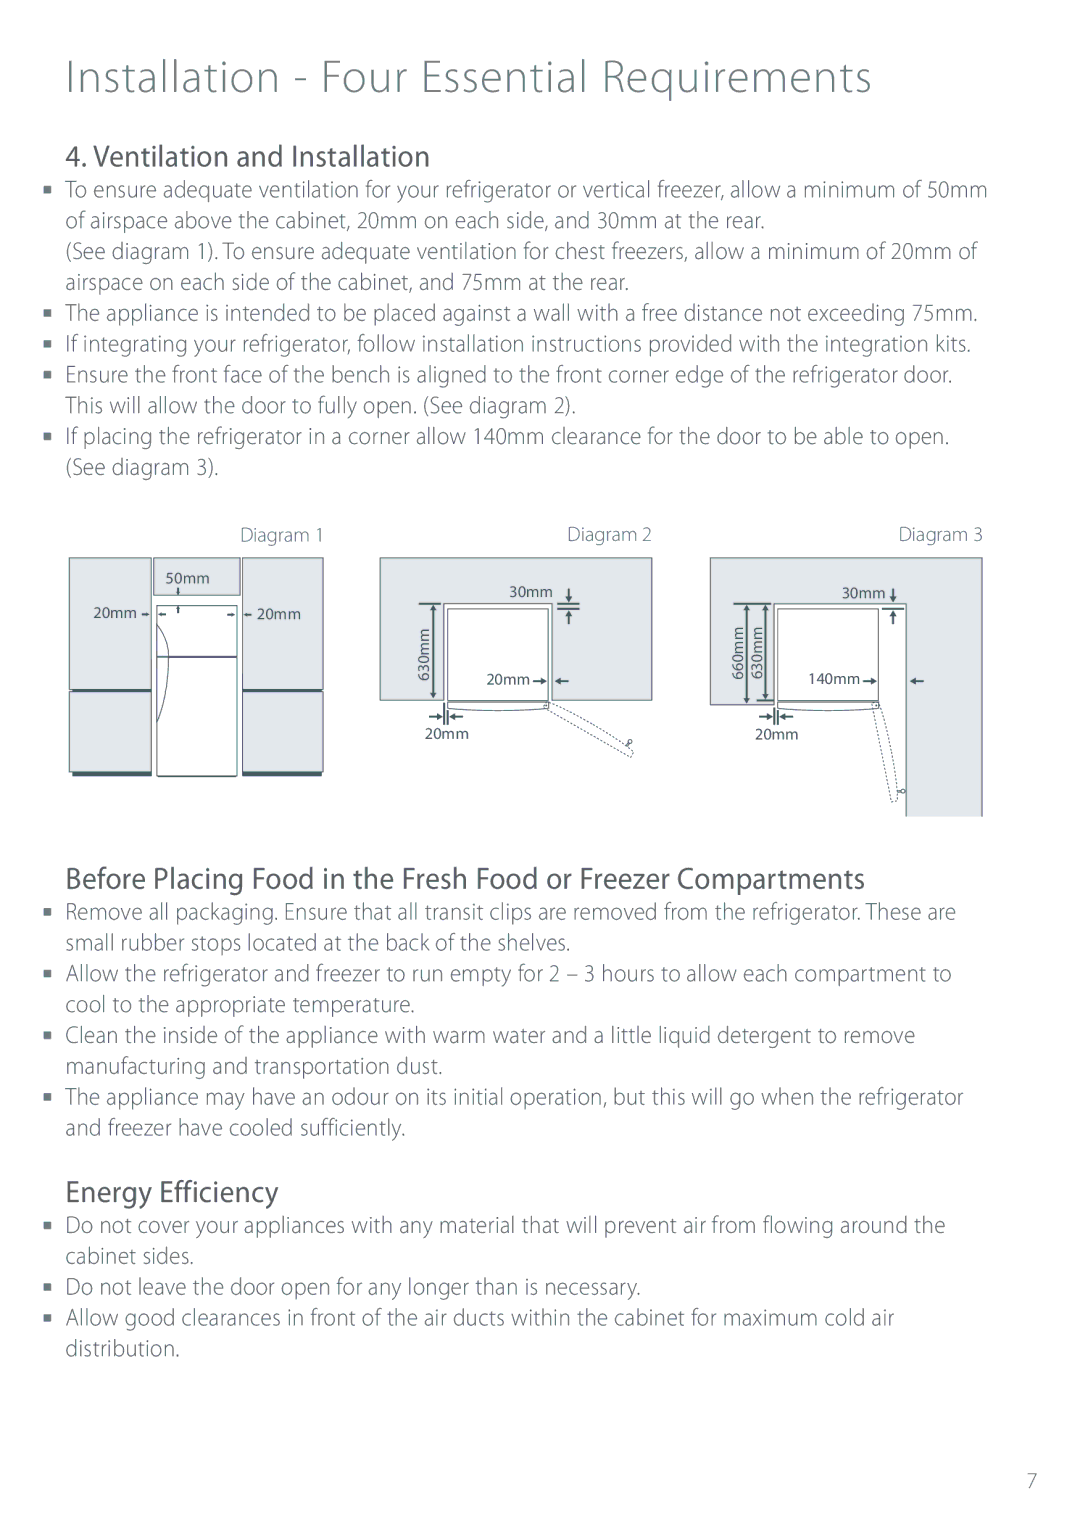
To ensure adequate ventilation for your refrigerator or vertical freezer, allow a minimum of 50mm of airspace above the cabinet, 20mm on each side, and 30mm at the rear.
(See diagram 1). To ensure adequate ventilation for chest freezers, allow a minimum of 20mm of airspace on each side of the cabinet, and 75mm at the rear.
The appliance is intended to be placed against a wall with a free distance not exceeding 75mm. If integrating your refrigerator, follow installation instructions provided with the integration kits. Ensure the front face of the bench is aligned to the front corner edge of the refrigerator door.
This will allow the door to fully open. (See diagram 2).
If placing the refrigerator in a corner allow 140mm clearance for the door to be able to open. (See diagram 3).
Diagram 1
50mm
20mm |
|
|
| 20mm |
|
|
|
|
|
|
|
|
|
|
|
|
|
|
|
|
|
|
|
|
Diagram 2
| 30mm |
630mm | 20mm |
| |
20mm |
|
Diagram 3
|
| 30mm |
660mm | 630mm | 140mm |
|
| |
| 20mm |
|
Before Placing Food in the Fresh Food or Freezer Compartments
Remove all packaging. Ensure that all transit clips are removed from the refrigerator. These are small rubber stops located at the back of the shelves.
Allow the refrigerator and freezer to run empty for 2 – 3 hours to allow each compartment to cool to the appropriate temperature.
Clean the inside of the appliance with warm water and a little liquid detergent to remove manufacturing and transportation dust.
The appliance may have an odour on its initial operation, but this will go when the refrigerator and freezer have cooled sufficiently.
Energy Efficiency
Do not cover your appliances with any material that will prevent air from flowing around the cabinet sides.
Do not leave the door open for any longer than is necessary.
Allow good clearances in front of the air ducts within the cabinet for maximum cold air distribution.
7
