ConnectingMaintenance
Helpful Hint: There are two connecting areas to attach the ramp to the Backyard Treehouse™. You can connect the ramp to either of these areas and switch it whenever you like! You can also attach other
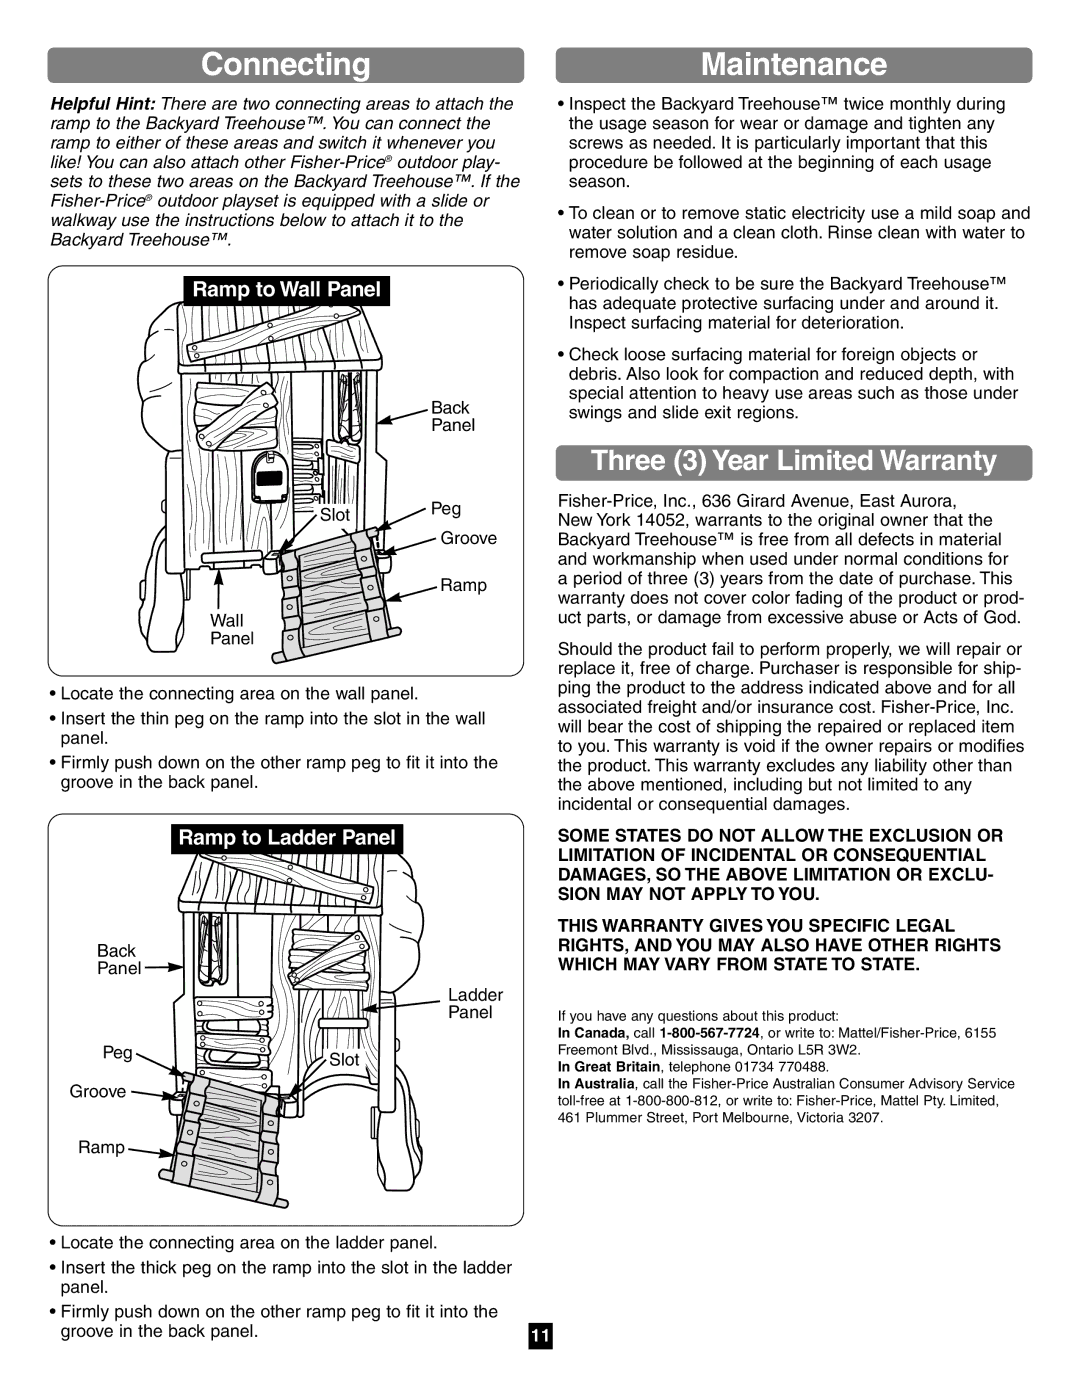
Ramp to Wall Panel
| Back |
| Panel |
Slot | Peg |
| |
| Groove |
| Ramp |
Wall
Panel
•Locate the connecting area on the wall panel.
•Insert the thin peg on the ramp into the slot in the wall panel.
•Firmly push down on the other ramp peg to fit it into the groove in the back panel.
•Inspect the Backyard Treehouse™ twice monthly during the usage season for wear or damage and tighten any screws as needed. It is particularly important that this procedure be followed at the beginning of each usage season.
•To clean or to remove static electricity use a mild soap and water solution and a clean cloth. Rinse clean with water to remove soap residue.
•Periodically check to be sure the Backyard Treehouse™ has adequate protective surfacing under and around it. Inspect surfacing material for deterioration.
•Check loose surfacing material for foreign objects or debris. Also look for compaction and reduced depth, with special attention to heavy use areas such as those under swings and slide exit regions.
Three (3) Year Limited Warranty
Should the product fail to perform properly, we will repair or replace it, free of charge. Purchaser is responsible for ship- ping the product to the address indicated above and for all associated freight and/or insurance cost.
Ramp to Ladder Panel
Back
Panel ![]()
| Ladder |
| Panel |
Peg | Slot |
| |
Groove |
|
Ramp |
|
•Locate the connecting area on the ladder panel.
•Insert the thick peg on the ramp into the slot in the ladder panel.
•Firmly push down on the other ramp peg to fit it into the groove in the back panel.
SOME STATES DO NOT ALLOW THE EXCLUSION OR LIMITATION OF INCIDENTAL OR CONSEQUENTIAL DAMAGES, SO THE ABOVE LIMITATION OR EXCLU- SION MAY NOT APPLY TO YOU.
THIS WARRANTY GIVES YOU SPECIFIC LEGAL RIGHTS, AND YOU MAY ALSO HAVE OTHER RIGHTS WHICH MAY VARY FROM STATE TO STATE.
If you have any questions about this product:
In Canada, call
In Great Britain, telephone 01734 770488.
In Australia, call the
11