Assembly
|
|
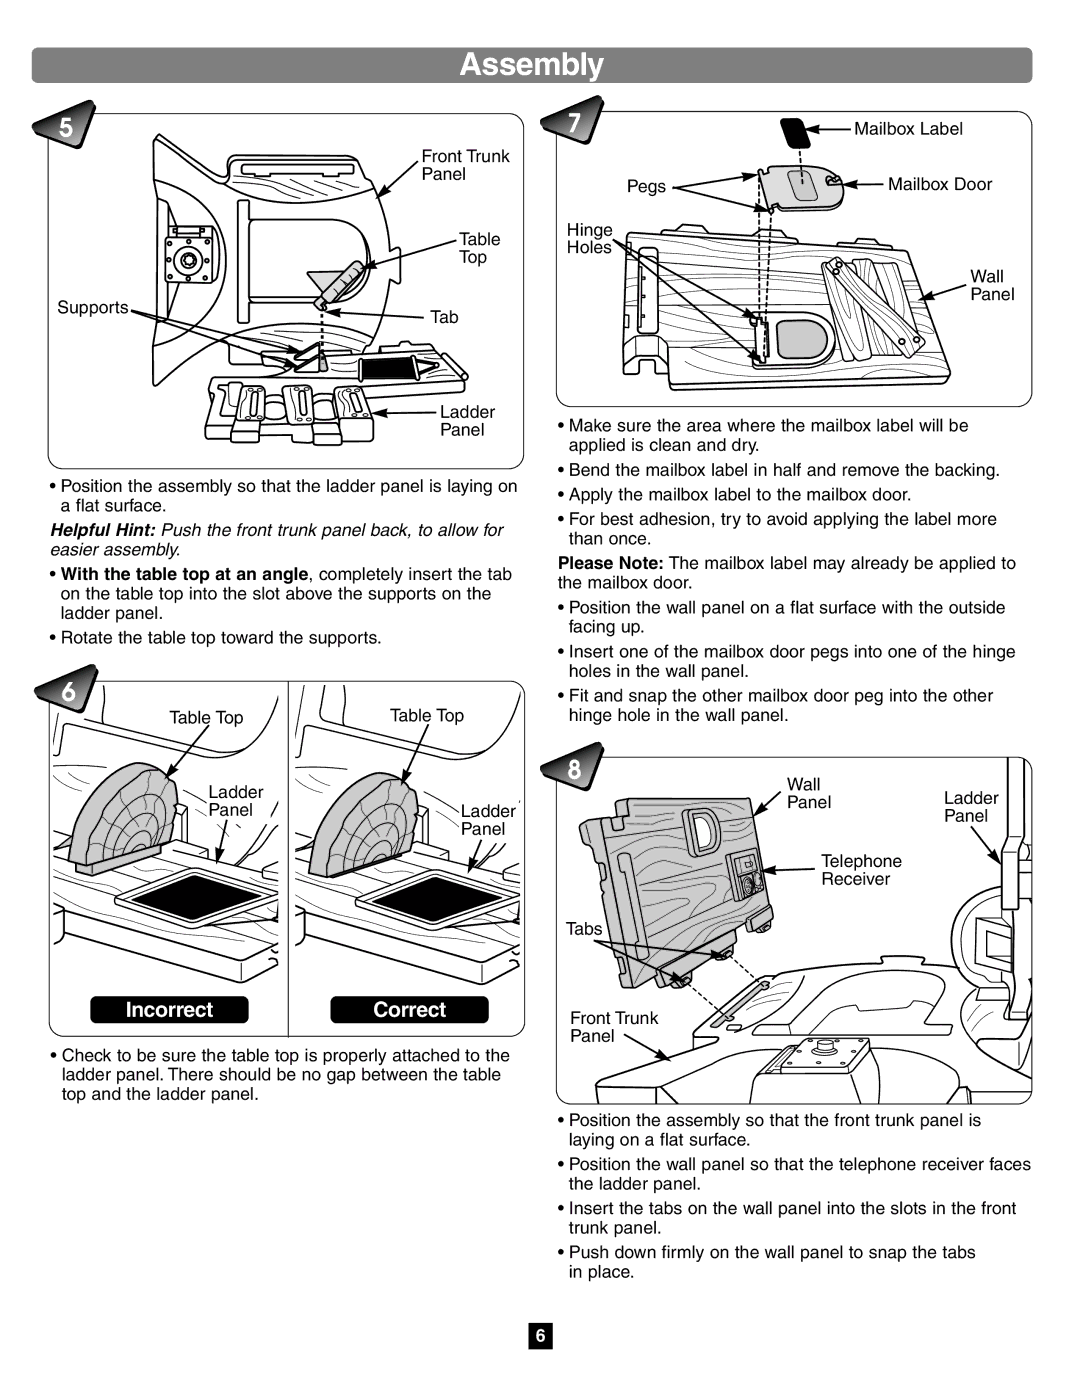
| Mailbox Label |
| Front Trunk |
|
|
| Panel | Pegs | Mailbox Door |
|
| ||
| Table | Hinge |
|
| Holes |
| |
| Top |
| |
|
| Wall | |
|
|
| |
Supports |
|
| Panel |
Tab |
|
| |
|
|
|
![]()
![]()
![]() Ladder
Ladder
Panel
•Position the assembly so that the ladder panel is laying on a flat surface.
Helpful Hint: Push the front trunk panel back, to allow for easier assembly.
•With the table top at an angle, completely insert the tab on the table top into the slot above the supports on the ladder panel.
•Rotate the table top toward the supports.
•Make sure the area where the mailbox label will be applied is clean and dry.
•Bend the mailbox label in half and remove the backing.
•Apply the mailbox label to the mailbox door.
•For best adhesion, try to avoid applying the label more than once.
Please Note: The mailbox label may already be applied to the mailbox door.
• Position the wall panel on a flat surface with the outside |
facing up. |
• Insert one of the mailbox door pegs into one of the hinge |
holes in the wall panel. |
• Fit and snap the other mailbox door peg into the other |
Table Top
Ladder
Panel
Incorrect
Table Top
Ladder
Panel
Correct
hinge hole in the wall panel. |
Wall
![]() PanelLadder
PanelLadder
Panel
Telephone
Receiver
Tabs
Front Trunk
Panel
•Check to be sure the table top is properly attached to the ladder panel. There should be no gap between the table top and the ladder panel.
•Position the assembly so that the front trunk panel is laying on a flat surface.
•Position the wall panel so that the telephone receiver faces the ladder panel.
•Insert the tabs on the wall panel into the slots in the front trunk panel.
•Push down firmly on the wall panel to snap the tabs in place.
6