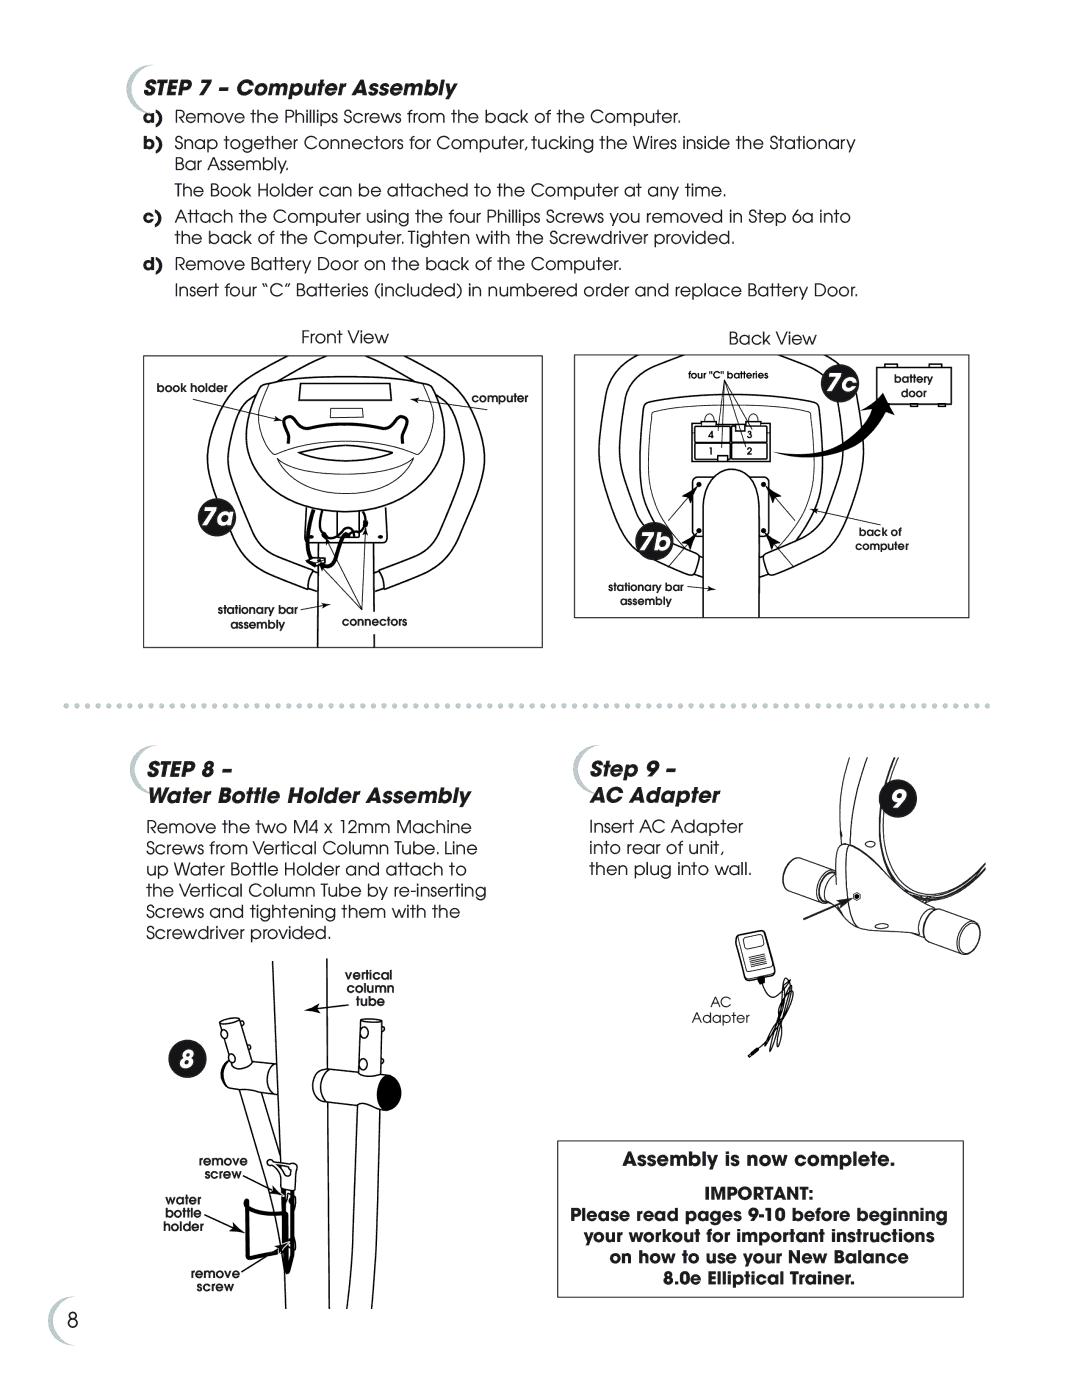
STEP 7 – Computer Assembly
a)Remove the Phillips Screws from the back of the Computer.
b)Snap together Connectors for Computer, tucking the Wires inside the Stationary Bar Assembly.
The Book Holder can be attached to the Computer at any time.
c)Attach the Computer using the four Phillips Screws you removed in Step 6a into the back of the Computer. Tighten with the Screwdriver provided.
d)Remove Battery Door on the back of the Computer.
Insert four “C” Batteries (included) in numbered order and replace Battery Door.
Front View
book holder
computer
7a
stationary bar ![]()
assembly connectors
STEP 8 –
Water Bottle Holder Assembly
Remove the two M4 x 12mm Machine Screws from Vertical Column Tube. Line up Water Bottle Holder and attach to the Vertical Column Tube by
vertical column tube
8
remove
screw
water bottle holder
remove
screw
8
| Back View |
|
|
four "C" batteries | 7c | door | |
|
|
| battery |
4 | 3 |
|
|
1 | 2 |
|
|
7b | back of |
computer | |
stationary bar |
|
assembly |
|
Step 9 –
AC Adapter | 9 |
Insert AC Adapter into rear of unit, then plug into wall.
AC
Adapter
Assembly is now complete.
IMPORTANT:
Please read pages
8.0e Elliptical Trainer.
