
V2240-IUK specifications
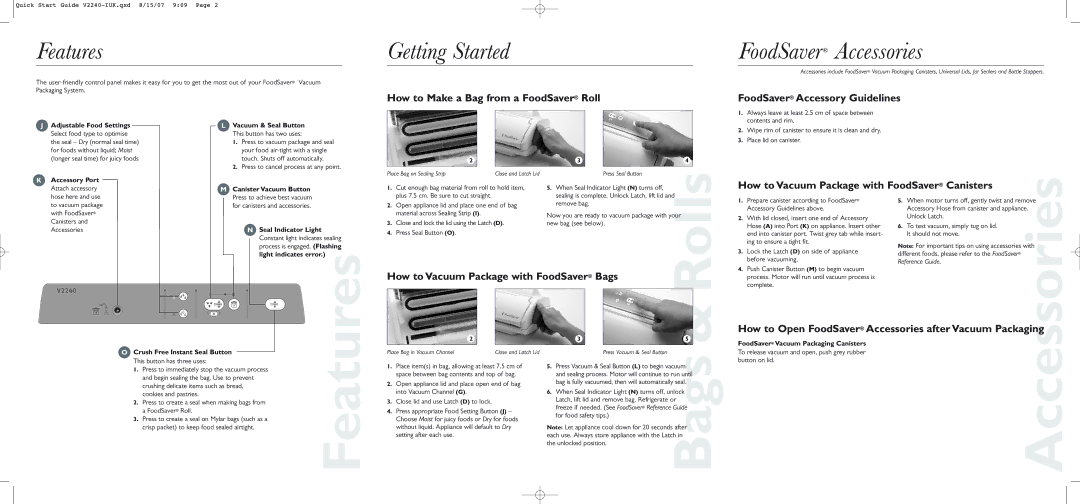
The FoodSaver V2240-IUK is an innovative vacuum sealing system designed to extend the shelf life of food while preserving its freshness and flavor. This versatile device is ideal for anyone looking to minimize waste, save money, and enjoy the benefits of meal prep and bulk buying.One of the standout features of the V2240-IUK is its compact design, which allows it to fit conveniently on kitchen counters without taking up much space. This makes it suitable for both small and large kitchens alike. The user-friendly interface includes a simple control panel that enables effortless operation, making it accessible for everyone from novice cooks to seasoned chefs.
The V2240-IUK employs advanced vacuum sealing technology that effectively removes air from specially designed bags, creating an airtight seal that protects food from freezer burn and spoilage. This feature not only helps in retaining nutrients but also aids in marinating meats and infusing flavors, leading to enhanced culinary experiences. The machine includes a built-in cutter, which allows users to create custom-sized bags, optimizing the use of materials and reducing waste.
Another notable characteristic of the FoodSaver V2240-IUK is its compatibility with a variety of bag sizes, accommodating different storage needs. It can seal both wet and dry food, making it a versatile tool for preserving everything from meats and vegetables to leftovers and snacks. The unit also supports the sealing of canisters and jars, further expanding its functionality.
The V2240-IUK is equipped with a durable motor that ensures efficient and reliable operation. With its strong suction capability, it can handle high-volume sealing tasks, making it perfect for large families or meal prep enthusiasts. Additionally, the vacuum sealer system includes an intuitive lid-locking mechanism, ensuring that the sealing process is both quick and secure.
Overall, the FoodSaver V2240-IUK is a powerful, efficient, and user-friendly vacuum sealing device that makes food preservation a breeze. With its advanced technology, compact design, and versatile capabilities, it is an essential addition to any kitchen, transforming the way you store food and manage leftovers. Whether you're looking to save money, reduce food waste, or simply enjoy fresher meals, the V2240-IUK has the features and performance to meet your needs.