T H E F O O D S AV E R U S E R M A N U A L
How to Make a Custom-Made Bag with FoodSaver Rolls
When using FoodSaver Rolls you first need to make a bag, then vacuum package your food in the bag. (If you are using ready- made FoodSaver Bags, go to page 8.)
1Place the Vac 550 on a flat, dry surface and plug the power cord into a standard electrical outlet.
2Lay the item(s) you want to vacuum package near the FoodSaver Roll so you can see where to cut the bag material. Leave at least 3 extra inches at one end of the bag and more if you want to reseal or reuse the bag. (One inch per reseal.)
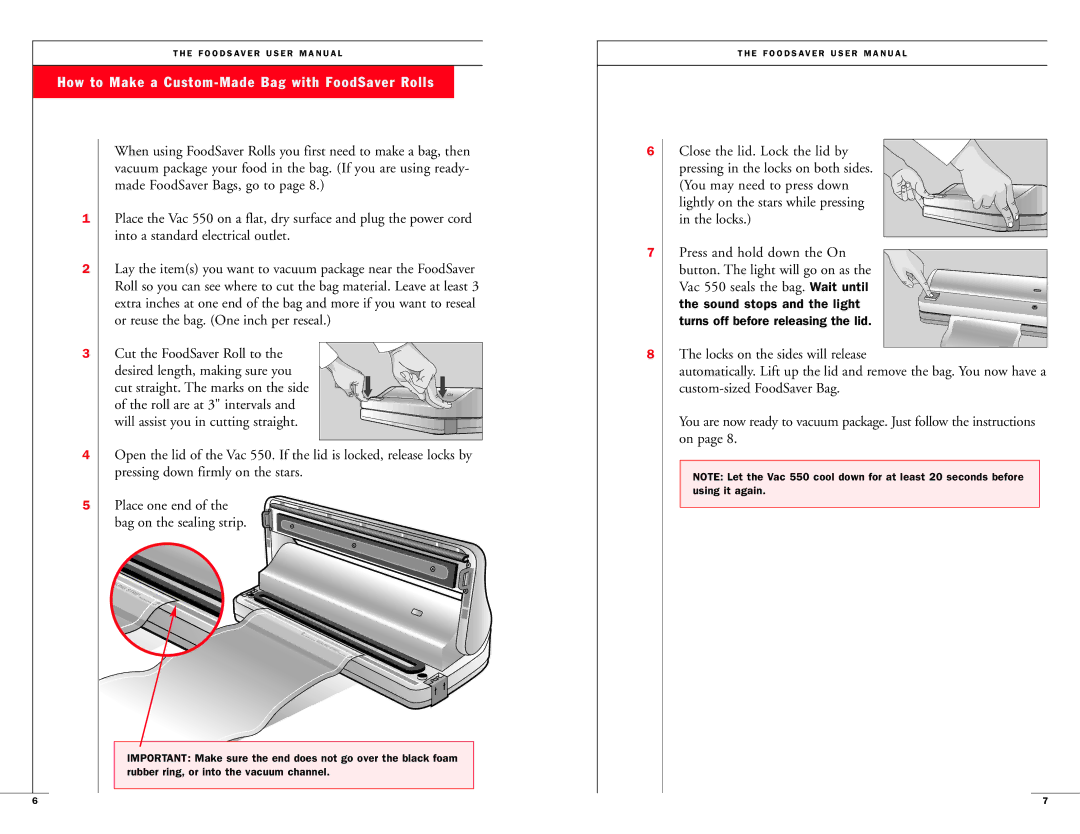
3 | Cut the FoodSaver Roll to the |
| desired length, making sure you |
| cut straight. The marks on the side |
| of the roll are at 3" intervals and |
| will assist you in cutting straight. |
4Open the lid of the Vac 550. If the lid is locked, release locks by pressing down firmly on the stars.
5 | Place one end of the |
| bag on the sealing strip. |
IMPORTANT: Make sure the end does not go over the black foam rubber ring, or into the vacuum channel.
T H E F O O D S AV E R U S E R M A N U A L
6Close the lid. Lock the lid by pressing in the locks on both sides.
(You may need to press down lightly on the stars while pressing in the locks.)
7Press and hold down the On button. The light will go on as the
Vac 550 seals the bag. Wait until
the sound stops and the light turns off before releasing the lid.
8The locks on the sides will release
automatically. Lift up the lid and remove the bag. You now have a
You are now ready to vacuum package. Just follow the instructions on page 8.
NOTE: Let the Vac 550 cool down for at least 20 seconds before using it again.
6 | 7 |