T H E F O O D S AV E R U S E R M A N U A L
How to Vacuum Package Using
1If you have not already done so, place the Vac 550 on a flat, dry surface and plug the power cord into a standard electrical outlet.
2Open the lid of the Vac 550. If the lid is locked, release locks by pressing down firmly on the stars.
3Place the item(s) to be vacuum packaged into the bag.
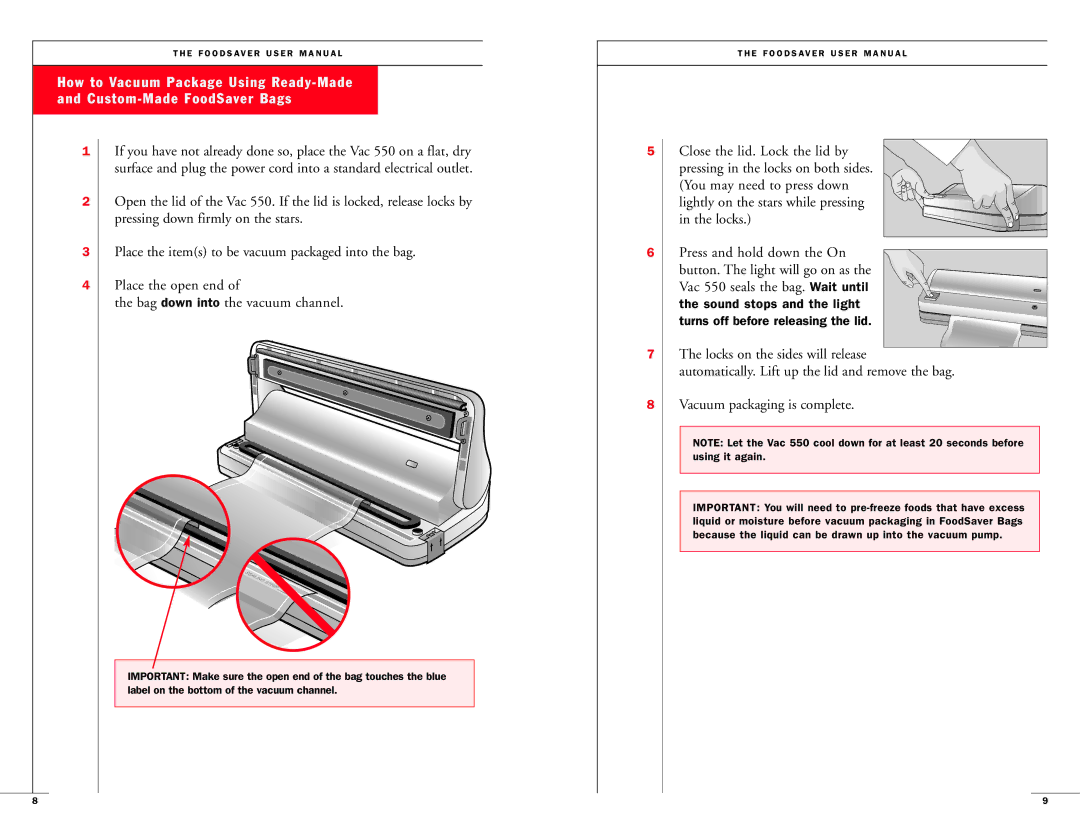
4Place the open end of
the bag down into the vacuum channel.
IMPORTANT: Make sure the open end of the bag touches the blue label on the bottom of the vacuum channel.
T H E F O O D S AV E R U S E R M A N U A L
5Close the lid. Lock the lid by pressing in the locks on both sides.
(You may need to press down lightly on the stars while pressing in the locks.)
6Press and hold down the On button. The light will go on as the
Vac 550 seals the bag. Wait until
the sound stops and the light turns off before releasing the lid.
7The locks on the sides will release
automatically. Lift up the lid and remove the bag.
8Vacuum packaging is complete.
NOTE: Let the Vac 550 cool down for at least 20 seconds before using it again.
IMPORTANT: You will need to
8 | 9 |