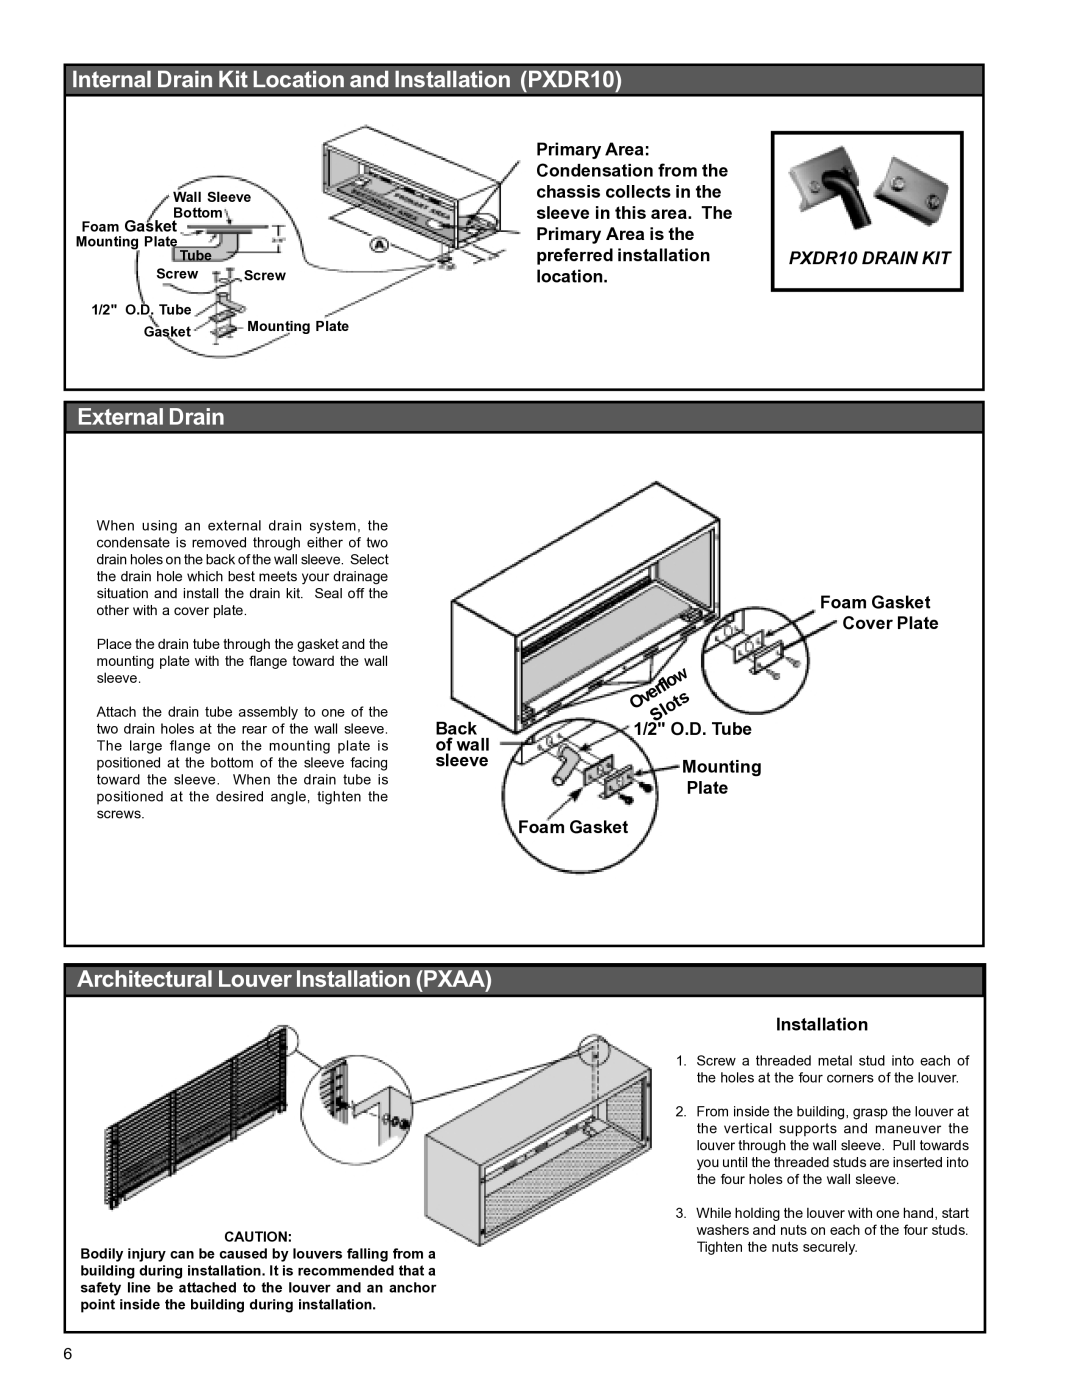
PACKAGED TERMINAL AIR CONDITIONERS AND HEAT PUMPS specifications
Friedrich Packaged Terminal Air Conditioners (PTACs) and Heat Pumps represent a cutting-edge solution for climate control in a variety of settings, especially in hotels, apartments, and commercial spaces. These units are designed to provide individual room temperature management, offering both heating and cooling options to ensure comfort year-round.One of the standout features of Friedrich PTACs is their energy efficiency. These units often meet or exceed ENERGY STAR certification, which signifies superior efficiency compared to traditional models. This efficiency translates to lower energy bills and a reduced environmental footprint, making them a sustainable choice for modern building owners.
Friedrich utilizes advanced technologies in their PTAC units to enhance performance and reliability. This includes features like variable-speed compressors that adjust cooling and heating output based on real-time room demands, leading to more consistent temperatures and improved energy savings. Additionally, some units come equipped with digital controls and remote management capabilities, allowing users to easily monitor and adjust settings from a distance.
Another key characteristic of Friedrich PTACs is their quiet operation. By incorporating sound-reducing technologies and design features, these units minimize operational noise, creating a more pleasant environment for occupants. This is particularly important in settings like hotels and hospitals, where peace and quiet are paramount.
Friedrich's commitment to durability is evident in their robust construction. The units are built with high-quality materials designed to withstand the rigors of constant use, ensuring longevity. The design also includes easily accessible components for convenient maintenance and servicing, which helps to further extend the life of the unit.
Moreover, Friedrich offers a variety of models tailored to diverse installation needs. With options for different capacities, styles, and aesthetic finishes, building owners can find the perfect match for their spaces without sacrificing performance.
In conclusion, Friedrich Packaged Terminal Air Conditioners and Heat Pumps are an excellent choice for anyone looking to enhance indoor climate control. With their energy efficiency, advanced technologies, quiet operation, and durable construction, they set a high standard in the HVAC industry, ensuring comfort for occupants while also addressing the growing demand for environmentally sustainable solutions.