FIRST STEPS (continued)
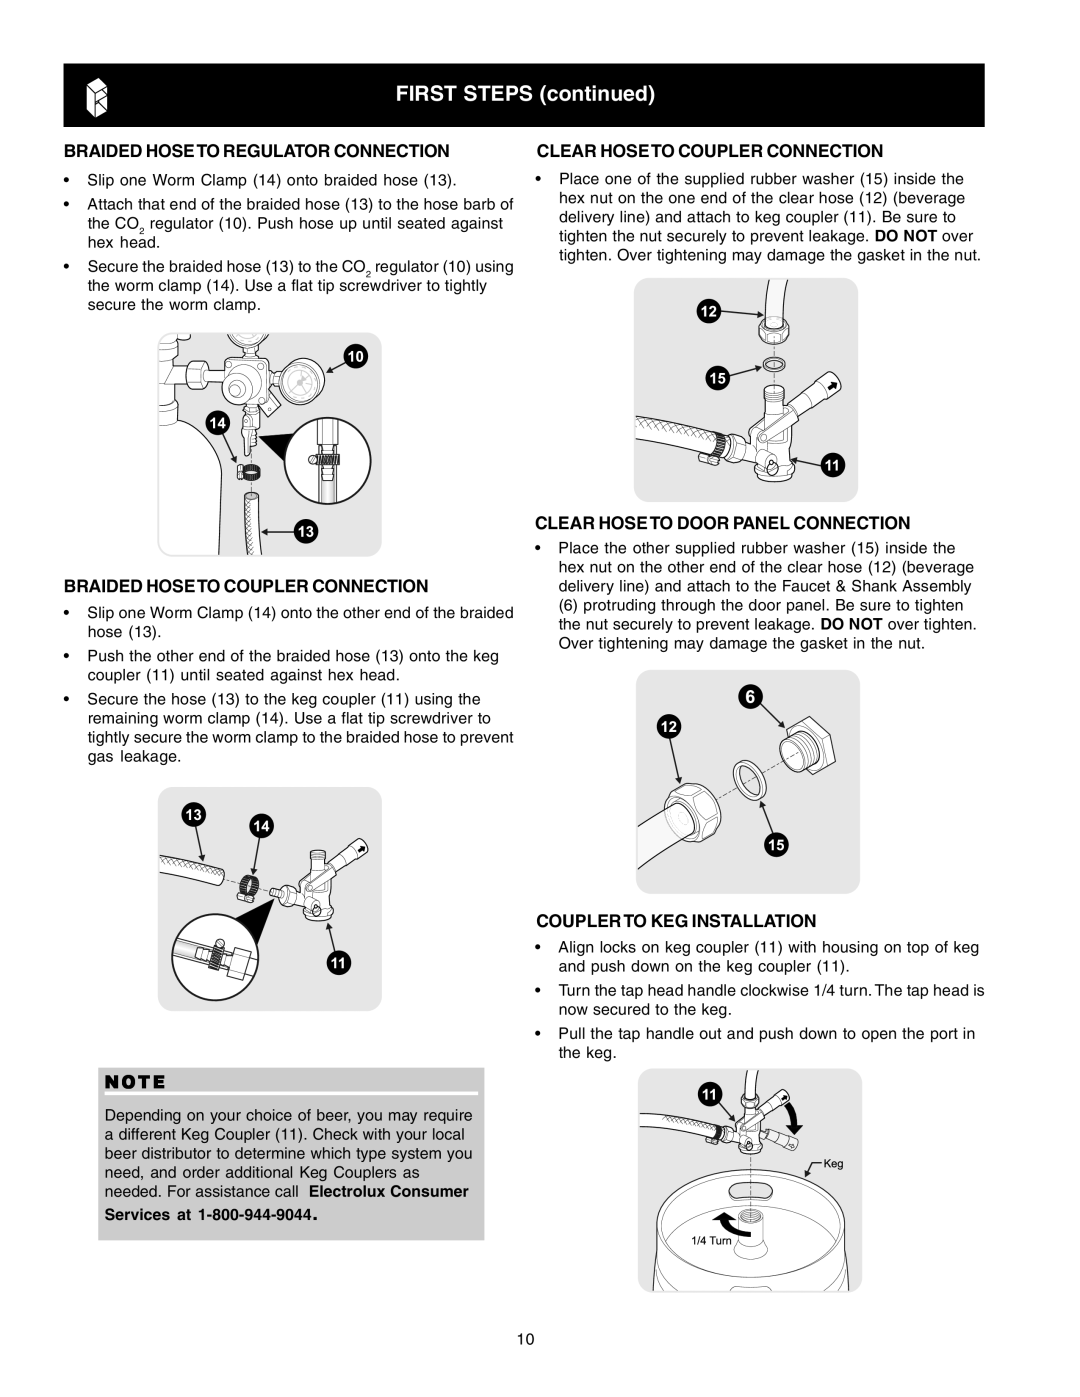
BRAIDED HOSETO REGULATOR CONNECTION
•Slip one Worm Clamp (14) onto braided hose (13).
•Attach that end of the braided hose (13) to the hose barb of
the CO2 regulator (10). Push hose up until seated against hex head.
•Secure the braided hose (13) to the CO2 regulator (10) using the worm clamp (14). Use a flat tip screwdriver to tightly secure the worm clamp.
BRAIDED HOSETO COUPLER CONNECTION
•Slip one Worm Clamp (14) onto the other end of the braided hose (13).
•Push the other end of the braided hose (13) onto the keg coupler (11) until seated against hex head.
•Secure the hose (13) to the keg coupler (11) using the remaining worm clamp (14). Use a flat tip screwdriver to tightly secure the worm clamp to the braided hose to prevent gas leakage.
CLEAR HOSETO COUPLER CONNECTION
•Place one of the supplied rubber washer (15) inside the hex nut on the one end of the clear hose (12) (beverage delivery line) and attach to keg coupler (11). Be sure to tighten the nut securely to prevent leakage. DO NOT over tighten. Over tightening may damage the gasket in the nut.
CLEAR HOSETO DOOR PANEL CONNECTION
•Place the other supplied rubber washer (15) inside the hex nut on the other end of the clear hose (12) (beverage delivery line) and attach to the Faucet & Shank Assembly
(6) protruding through the door panel. Be sure to tighten the nut securely to prevent leakage. DO NOT over tighten. Over tightening may damage the gasket in the nut.
NOTE
Depending on your choice of beer, you may require a different Keg Coupler (11). Check with your local beer distributor to determine which type system you need, and order additional Keg Couplers as needed. For assistance call Electrolux Consumer
Services at
COUPLERTO KEG INSTALLATION
•Align locks on keg coupler (11) with housing on top of keg and push down on the keg coupler (11).
•Turn the tap head handle clockwise 1/4 turn. The tap head is now secured to the keg.
•Pull the tap handle out and push down to open the port in the keg.
10