OPERATING INSTRUCTIONS
Other Features
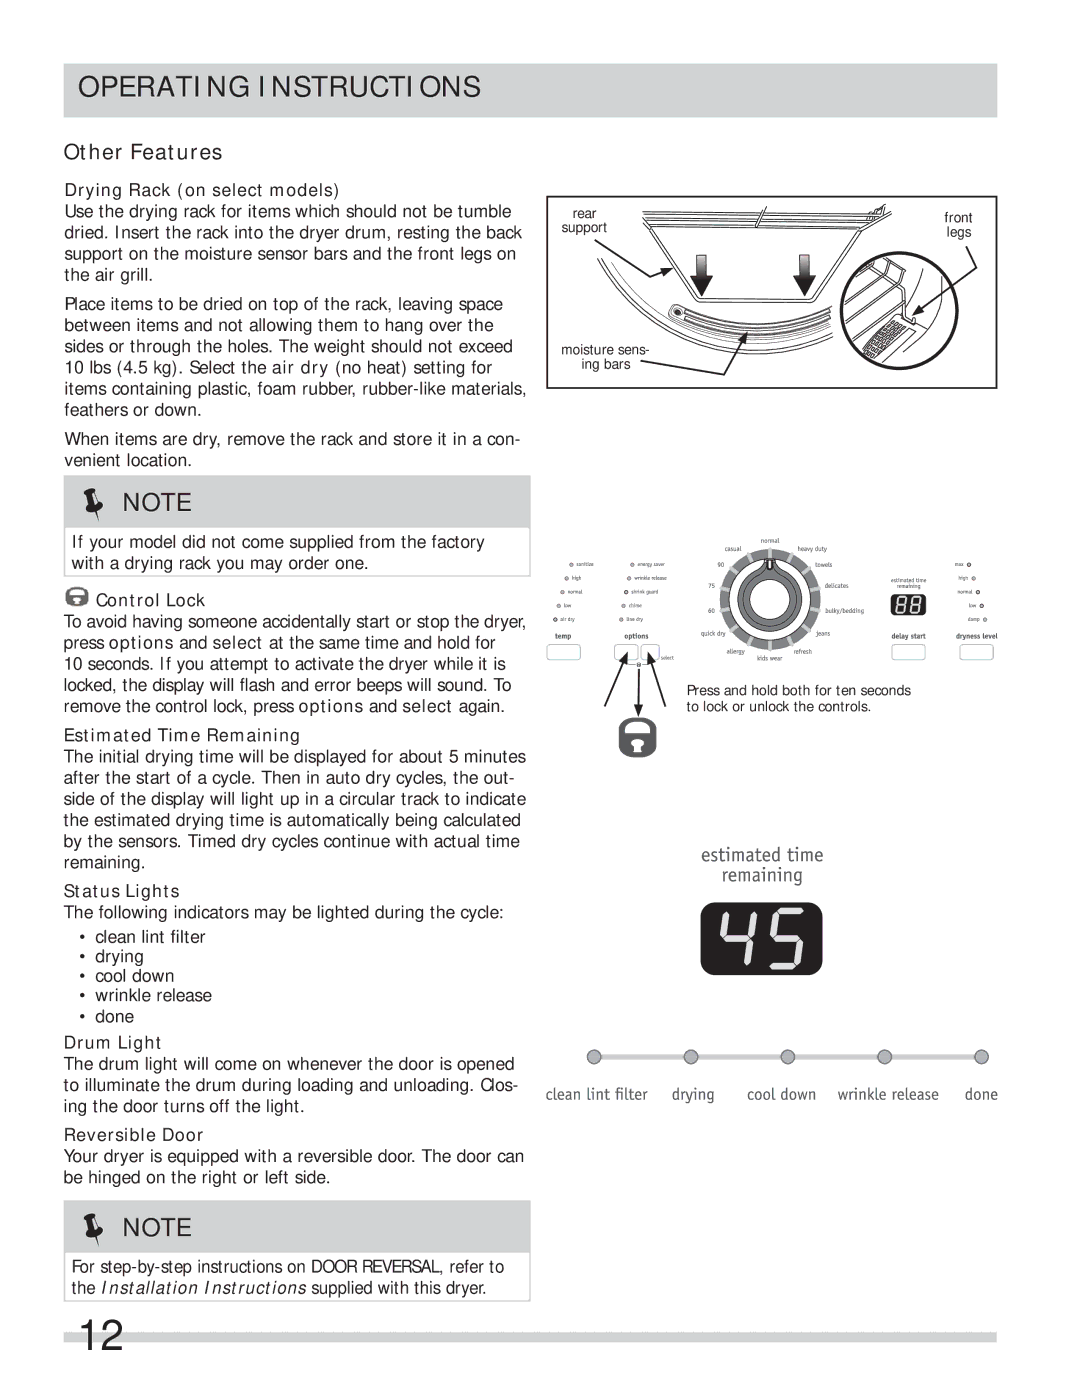
Drying Rack (on select models)
Use the drying rack for items which should not be tumble dried. Insert the rack into the dryer drum, resting the back support on the moisture sensor bars and the front legs on the air grill.
Place items to be dried on top of the rack, leaving space between items and not allowing them to hang over the sides or through the holes. The weight should not exceed 10 lbs (4.5 kg). Select the air dry (no heat) setting for items containing plastic, foam rubber,
When items are dry, remove the rack and store it in a con- venient location.
NOTE
If your model did not come supplied from the factory with a drying rack you may order one.
 Control Lock
To avoid having someone accidentally start or stop the dryer, press options and select at the same time and hold for
10 seconds. If you attempt to activate the dryer while it is locked, the display will flash and error beeps will sound. To remove the control lock, press options and select again.
Estimated Time Remaining
The initial drying time will be displayed for about 5 minutes after the start of a cycle. Then in auto dry cycles, the out- side of the display will light up in a circular track to indicate the estimated drying time is automatically being calculated by the sensors. Timed dry cycles continue with actual time remaining.
Status Lights
The following indicators may be lighted during the cycle:
•clean lint filter
•drying
•cool down
•wrinkle release
•done
Drum Light
The drum light will come on whenever the door is opened to illuminate the drum during loading and unloading. Clos- ing the door turns off the light.
Reversible Door
Your dryer is equipped with a reversible door. The door can be hinged on the right or left side.
NOTE
For
rear | front | |
support | ||
legs | ||
|
moisture sens-
ing bars
Press and hold both for ten seconds to lock or unlock the controls.
12