
FR-8251, FR-8111 specifications
Furuno has long been a leader in marine electronics, and its FR-8251 and FR-8111 radar systems continue that tradition. Both are advanced systems designed specifically for professional mariners who demand high performance, reliability, and technological sophistication in their navigational tools.The Furuno FR-8251 is a powerful radar system that boasts a range of features tailored for commercial vessels. With a 25 kW transmitter, the FR-8251 delivers exceptional performance, providing a clearer and more detailed image of the maritime environment. It is equipped with advanced signal processing technology, including the Doppler processing feature, which allows for the detection of moving targets. This is highly beneficial for collision avoidance, as it provides accurate information regarding the speed and direction of other vessels.
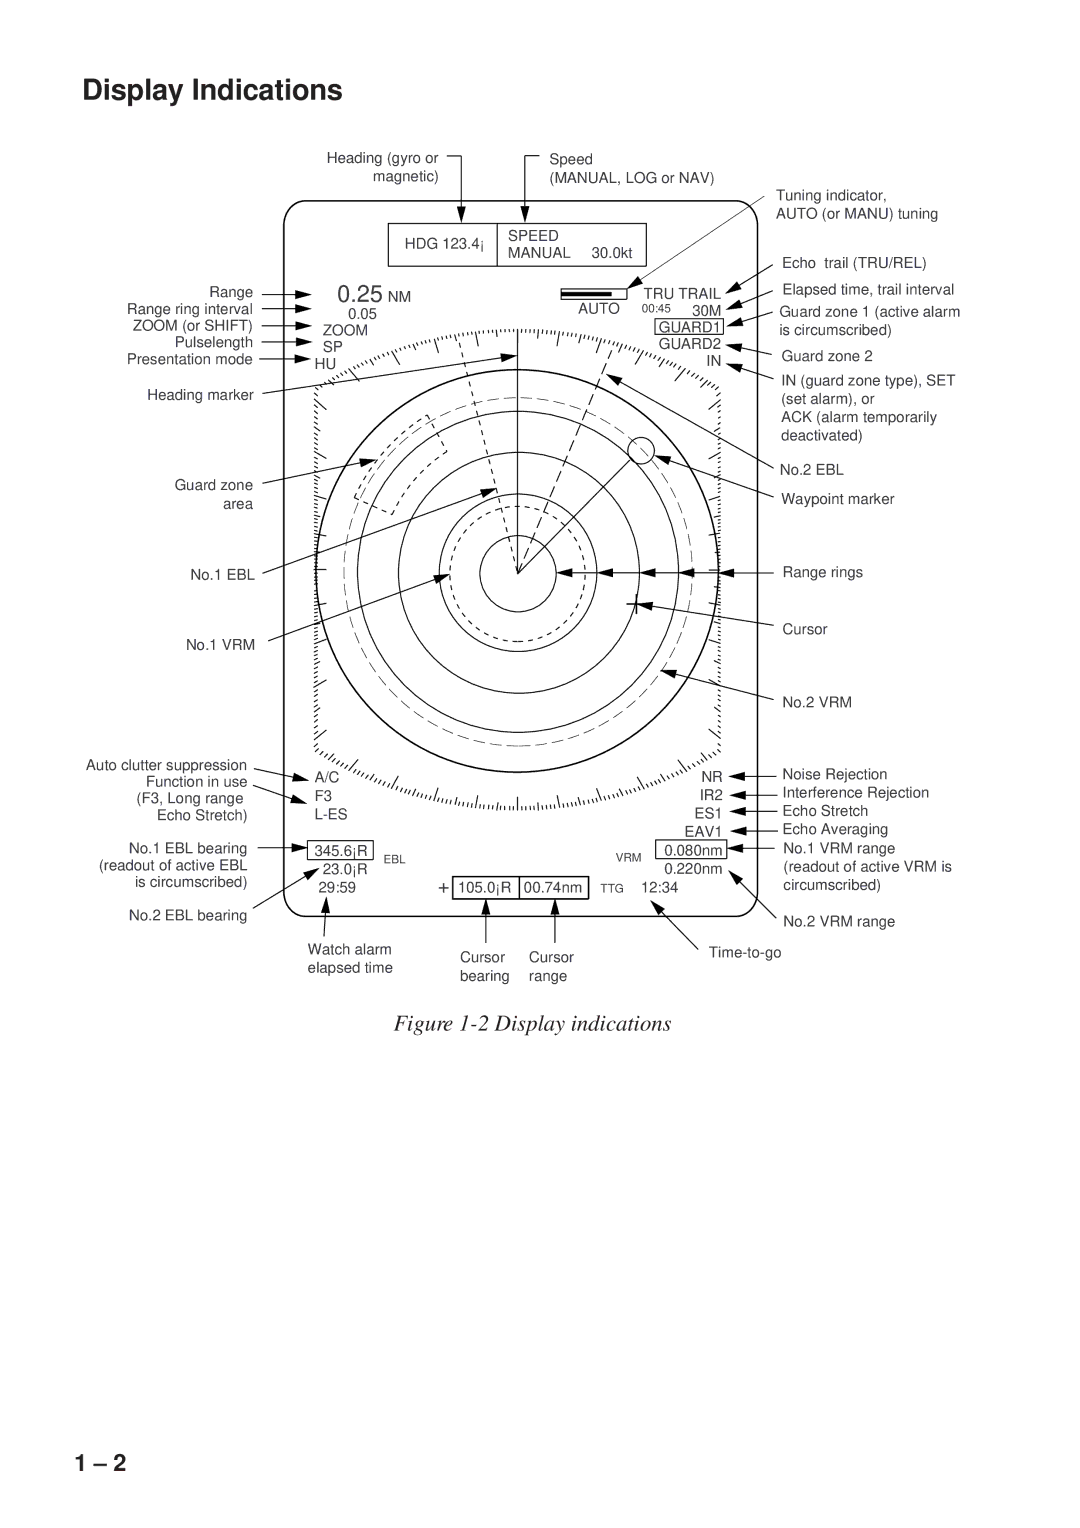
Another noteworthy feature of the FR-8251 is its large, high-resolution display that enhances visibility and ease of use, even in challenging weather conditions. The user interface is straightforward, allowing for quick adjustments and easy navigation through the various settings. It supports a variety of display formats and allows for customization, enabling operators to tailor the information presented according to their specific needs.
On the other hand, the Furuno FR-8111 is equally impressive and designed as a more compact solution without sacrificing performance. This model comes with a 12 kW output and is specifically crafted for smaller vessels, yet it still delivers high-quality radar coverage. Utilizing Furuno’s renowned Automatic Target Tracker (ATT) technology, the FR-8111 enables mariners to efficiently track multiple targets, significantly enhancing situational awareness.
Additionally, both the FR-8251 and FR-8111 come with integrated ARPA (Automatic Radar Plotting Aid), providing users with sophisticated tools for navigation and collision avoidance. The presence of multiple target tracking empowers operators to make informed decisions, optimizing safety at sea.
Furuno’s commitment to reliability and durability is evident in both models, which are designed to withstand the harsh marine environment. Their robust build quality ensures longevity, while their advanced technologies offer peace of mind.
Both the Furuno FR-8251 and FR-8111 are excellent choices for professional mariners seeking cutting-edge radar systems. With their impressive performance, user-friendly interfaces, and advanced technologies, these radar systems set the standard in marine navigation, providing essential support for safe and efficient voyages.