INSTALLATION
For your safety and the safety of others, carefully follow the instruc- tions provided in the “Safety Regu- lations” section.
Machine Packaging
The original packaging has been designed and constructed to protect the machine during transport. We recommend keeping the packaging material for possible future transport.
Preliminary Operations
• Remove the coffee bean hopper cover and the drip tray with grill from the packaging.
• Remove the coffee machine from the packaging and position it in a place that meets the requirements described in the safety regulations.
•Place the drip tray with grill into its appropriate seat on the machine. Make sure it is fully inserted to its limit stop.
• Insert the coffee bean hopper cover.
![]() Note: Insert the plug in the machine and in the wall so- cket only when indicated and check
Note: Insert the plug in the machine and in the wall so- cket only when indicated and check
that the power button is switched to “0”.
![]() Important note: Carefully read the explanatory descrip- tions of all the warnings the machine
Important note: Carefully read the explanatory descrip- tions of all the warnings the machine
displays to the user via the lights on the control panel display (see section “Display Warnings”).
NEVER remove the drip tray ![]() when the machine is turned on. Wait a couple of minutes after turning on/off, as the machine will be carrying out a
when the machine is turned on. Wait a couple of minutes after turning on/off, as the machine will be carrying out a
ning Cycle”).
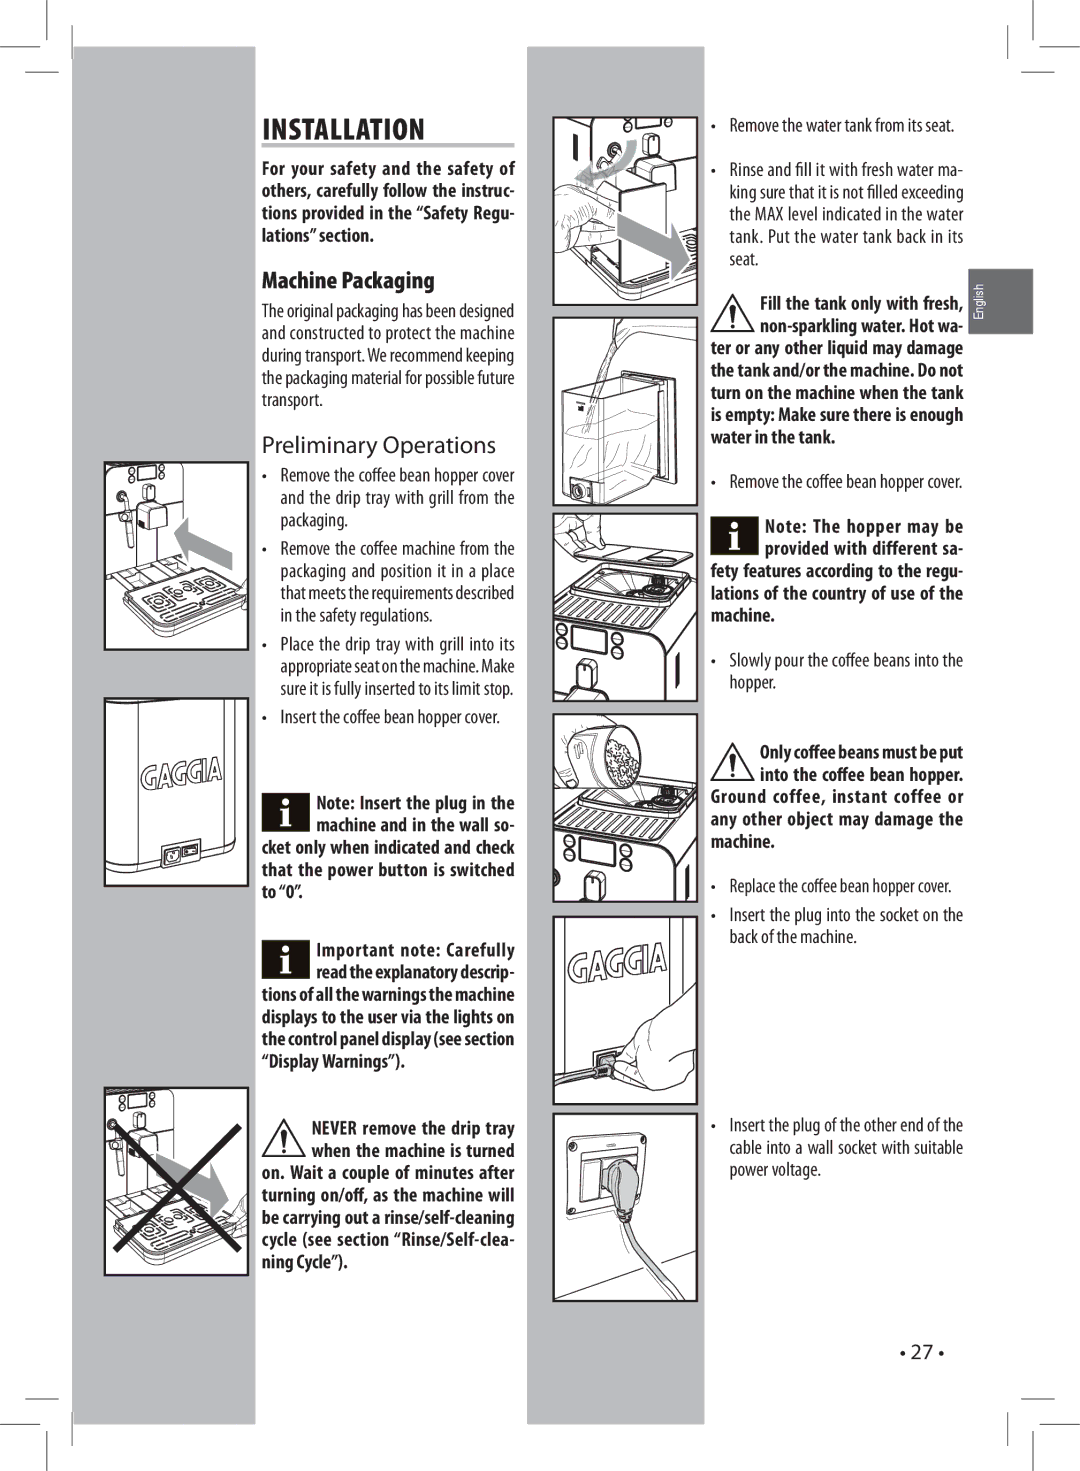
•Remove the water tank from its seat.
•Rinse and fi ll it with fresh water ma- king sure that it is not fi lled exceeding the MAX level indicated in the water tank. Put the water tank back in its seat.
Fill the tank only with fresh, | English |
| |
|
|
ter or any other liquid may damage |
|
the tank and/or the machine. Do not |
|
turn on the machine when the tank |
|
is empty: Make sure there is enough |
|
water in the tank. |
|
• Remove the coffee bean hopper cover.
![]() Note: The hopper may be provided with different sa- fety features according to the regu-
Note: The hopper may be provided with different sa- fety features according to the regu-
lations of the country of use of the machine.
•Slowly pour the coff ee beans into the hopper.
Only coffee beans must be put into the coffee bean hopper.
Ground coffee, instant coffee or any other object may damage the machine.
•Replace the coffee bean hopper cover.
•Insert the plug into the socket on the back of the machine.
•Insert the plug of the other end of the cable into a wall socket with suitable power voltage.
• 27 •