
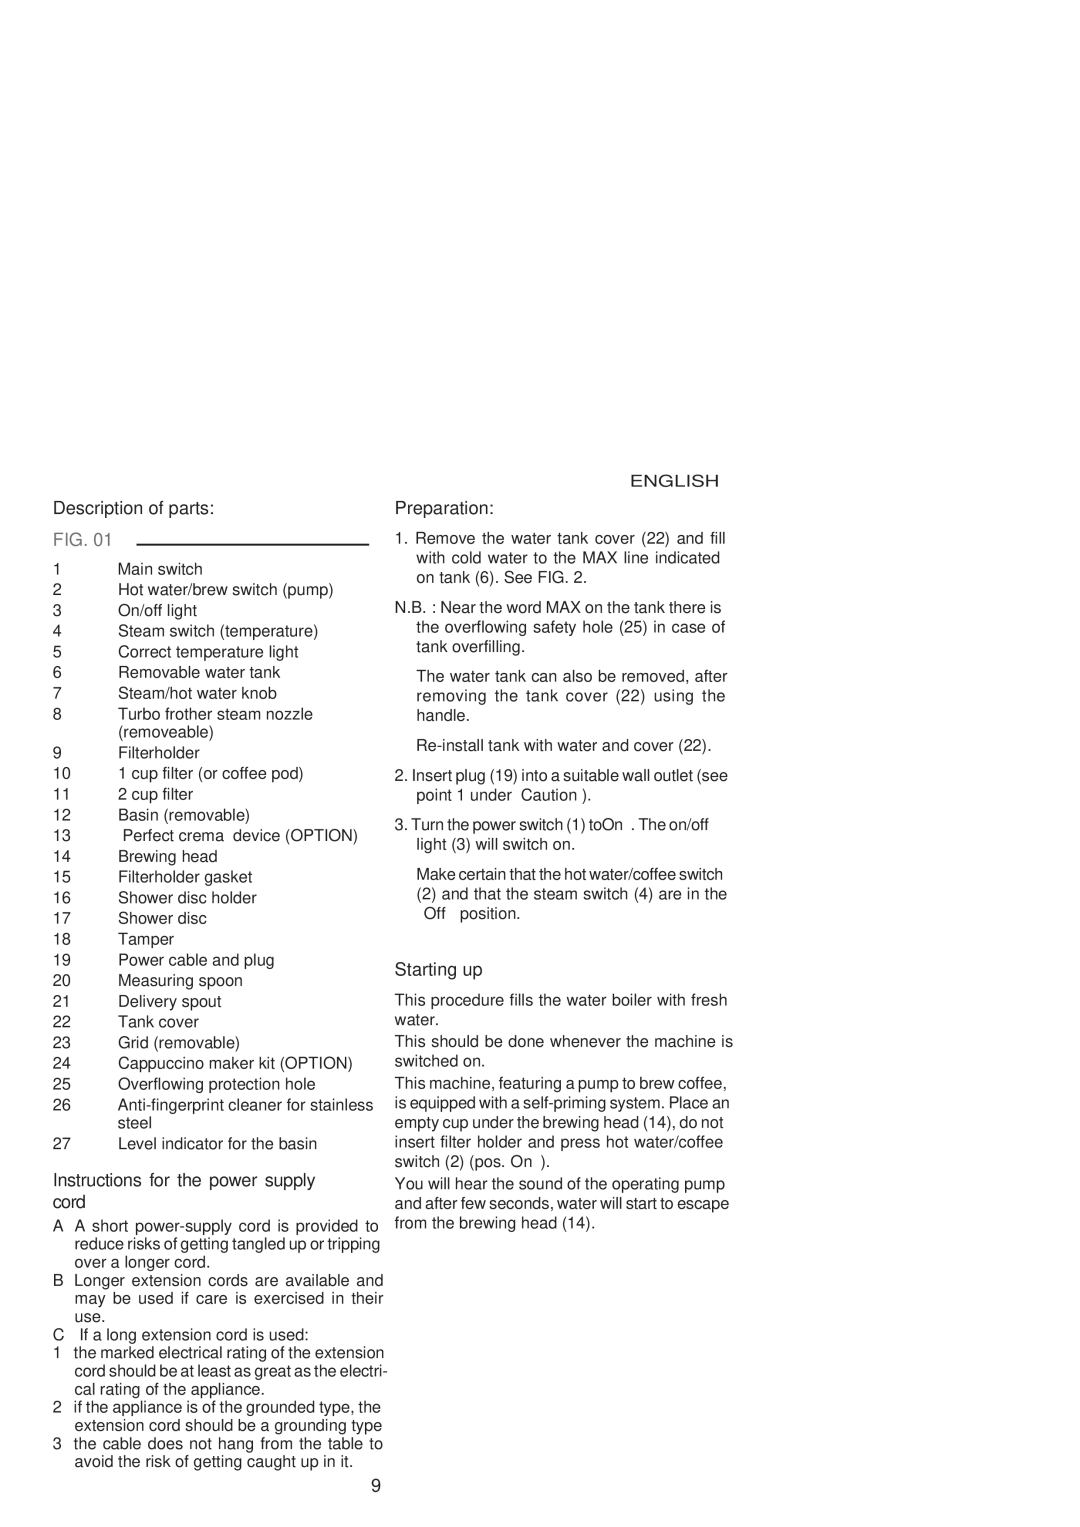
12300 specifications
The Gaggia 12300 is a compact, user-friendly espresso machine designed for coffee enthusiasts who appreciate quality and convenience. Known for its classic Italian design and innovative features, the Gaggia 12300 promises an exceptional brewing experience right in the comfort of your home.At the heart of the Gaggia 12300 is its reliable 15-bar pressure pump, which is essential for producing rich, flavorful espresso. This pressure is crucial for extracting the oils and flavor compounds from coffee grounds, resulting in a rich crema and a satisfying cup of espresso. The machine is equipped with a stainless steel boiler that ensures quick heating, allowing users to brew their favorite coffee in minutes without sacrificing quality.
One of the standout features of the Gaggia 12300 is its patented Pannarello steam wand. This innovative tool allows users to froth milk easily, making it ideal for creating lattes, cappuccinos, and other milk-based beverages. With a simple twist, the Pannarello produces steam for frothing, and it also allows for hot water dispensing, adding versatility to the machine. Users can enjoy cafe-style drinks at home without the need for extensive barista skills.
The Gaggia 12300 also boasts a straightforward interface, making it accessible even for those new to espresso machines. Its simple dial controls allow users to adjust settings easily, while its removable water reservoir makes refilling a breeze. The machine's compact design fits well in kitchens of all sizes, making it an ideal choice for those with limited countertop space.
In terms of durability, the Gaggia 12300 is built with robust materials that ensure longevity. The body is designed to withstand daily use while maintaining its sleek appearance. Furthermore, regular maintenance and easy-to-clean components enhance the machine's lifespan, allowing users to enjoy their espresso creations for years to come.
Overall, the Gaggia 12300 is a perfect blend of traditional espresso-making techniques and modern convenience. With its powerful brewing capabilities, easy-to-use features, and stylish design, this espresso machine is an excellent investment for anyone looking to elevate their coffee experience. Whether you're a casual drinker or a serious espresso aficionado, the Gaggia 12300 invites you to explore the richness of Italian coffee culture from your own kitchen.