G
The functional safety of the water timer depends on the capability of the battery.
If you change the battery the program is not saved. You must reprogram the Water Timer (see 5. Operation).
4. Putting Your Water Timer into Operation
G
Even if the battery is almost empty, the Water Timer ensures that an open valve is always closed since less energy is re- quired to close the valve than to open it.
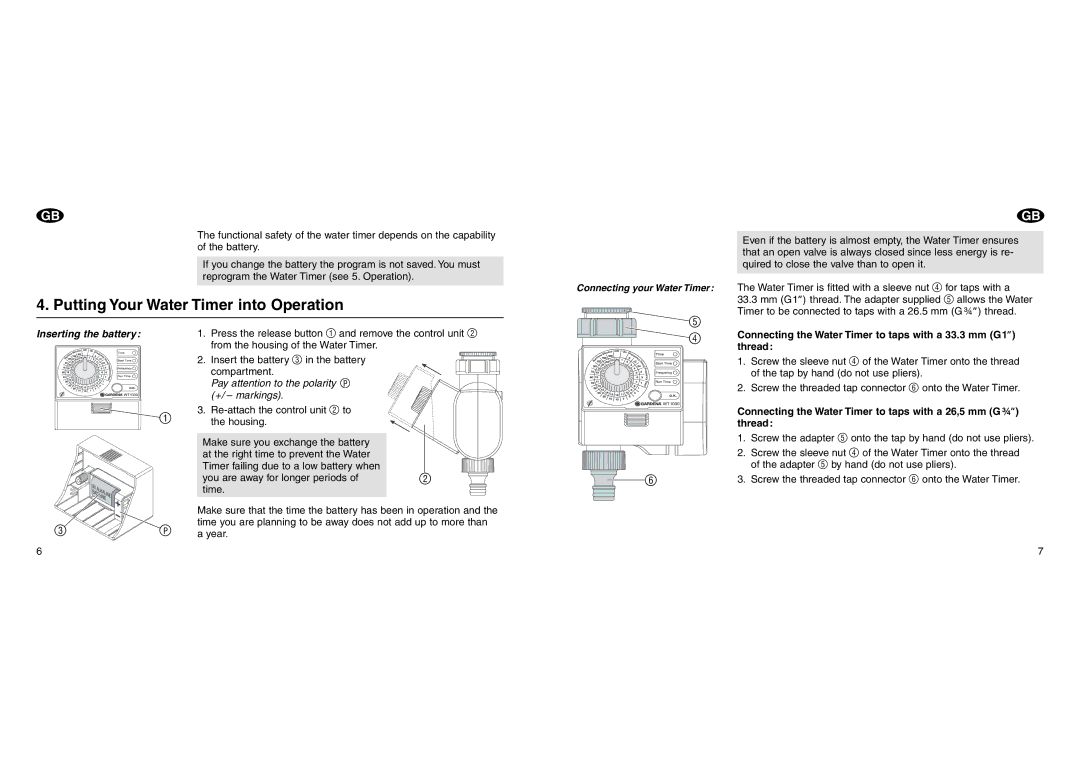
Connecting your Water Timer: The Water Timer is fitted with a sleeve nut 4 for taps with a 33.3 mm (G1”) thread. The adapter supplied 5 allows the Water
Timer to be connected to taps with a 26.5 mm (G¾ ”) thread.
5
Inserting the battery:
1 |
3 | zP |
6
1.Press the release button 1 and remove the control unit 2 from the housing of the Water Timer.
2.Insert the battery 3 in the battery
compartment.
Pay attention to the polarity P (+/ – markings).
3.
Make sure you exchange the battery at the right time to prevent the Water Timer failing due to a low battery when
you are away for longer periods of2 time.
Make sure that the time the battery has been in operation and the time you are planning to be away does not add up to more than a year.
4 Connecting the Water Timer to taps with a 33.3 mm (G1”) thread:
1. Screw the sleeve nut 4 of the Water Timer onto the thread of the tap by hand (do not use pliers).
2. Screw the threaded tap connector 6 onto the Water Timer.
Connecting the Water Timer to taps with a 26,5 mm (G ¾”) thread:
1. Screw the adapter 5 onto the tap by hand (do not use pliers).
2. Screw the sleeve nut 4 of the Water Timer onto the thread of the adapter 5 by hand (do not use pliers).
6 | 3. Screw the threaded tap connector 6 onto the Water Timer. |
7
