INSTALLATION continued
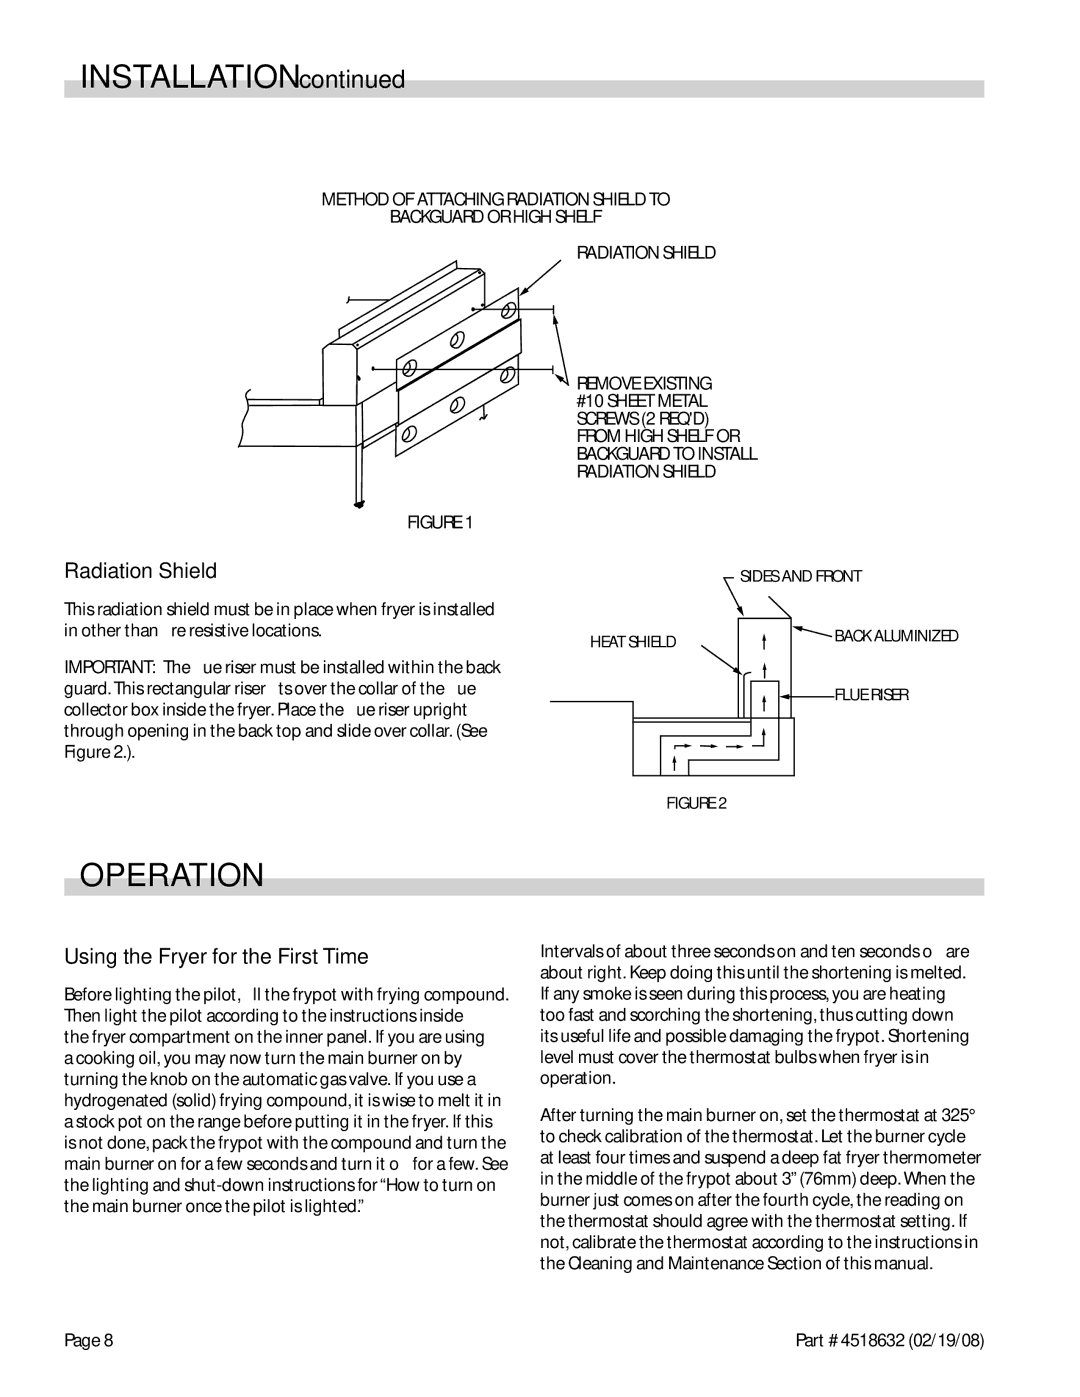
METHOD OF ATTACHING RADIATION SHIELD TO
BACKGUARD OR HIGH SHELF
RADIATION SHIELD
REMOVE EXISTING
#10 SHEET METAL
SCREWS (2 REQ'D)
FROM HIGH SHELF OR BACKGUARD TO INSTALL RADIATION SHIELD
|
| FIGURE 1 |
|
|
|
|
|
|
|
Radiation Shield |
|
|
|
|
|
| SIDES AND FRONT | ||
This radiation shield must be in place when fryer is installed |
|
|
|
|
|
|
| ||
in other than fire resistive locations. |
| HEAT SHIELD |
|
| BACK ALUMINIZED | ||||
|
|
| |||||||
IMPORTANT: The flue riser must | be installed | within the back |
|
|
|
|
|
|
|
|
|
|
|
|
|
| |||
guard. This rectangular riser fits | over the collar of the flue |
|
|
|
|
|
| FLUE RISER | |
collector box inside the fryer. Place the flue riser upright |
|
|
|
|
|
| |||
|
|
|
|
|
|
| |||
|
|
|
|
|
|
| |||
through opening in the back top and slide over collar. (See |
|
|
|
|
|
|
| ||
|
|
|
|
|
|
| |||
Figure 2.). |
|
|
|
|
|
|
|
|
|
|
|
|
|
|
|
|
|
| |
|
|
|
|
|
|
|
|
|
|
|
|
| FIGURE 2 |
|
|
| |||
OPERATION
Using the Fryer for the First Time
Before lighting the pilot, fill the frypot with frying compound. Then light the pilot according to the instructions inside
the fryer compartment on the inner panel. If you are using a cooking oil, you may now turn the main burner on by turning the knob on the automatic gas valve. If you use a hydrogenated (solid) frying compound, it is wise to melt it in a stock pot on the range before putting it in the fryer. If this is not done, pack the frypot with the compound and turn the main burner on for a few seconds and turn it off for a few. See the lighting and
Intervals of about three seconds on and ten seconds off are about right. Keep doing this until the shortening is melted. If any smoke is seen during this process, you are heating too fast and scorching the shortening, thus cutting down its useful life and possible damaging the frypot. Shortening level must cover the thermostat bulbs when fryer is in operation.
After turning the main burner on, set the thermostat at 325° to check calibration of the thermostat. Let the burner cycle at least four times and suspend a deep fat fryer thermometer in the middle of the frypot about 3” (76mm) deep. When the burner just comes on after the fourth cycle, the reading on the thermostat should agree with the thermostat setting. If not, calibrate the thermostat according to the instructions in the Cleaning and Maintenance Section of this manual.
Page 8 | Part # 4518632 (02/19/08) |