Gateway GTW-WMM103 Sanus Systems, Left Side view of a 42” plasma mounted to the wall with a VMPL

Models: GTW-WMM103

1 2
Download 2 pages 44.24 Kb
Page 2
Image 2
Left: Side view of a 42” plasma mounted to the wall with a VMPL.

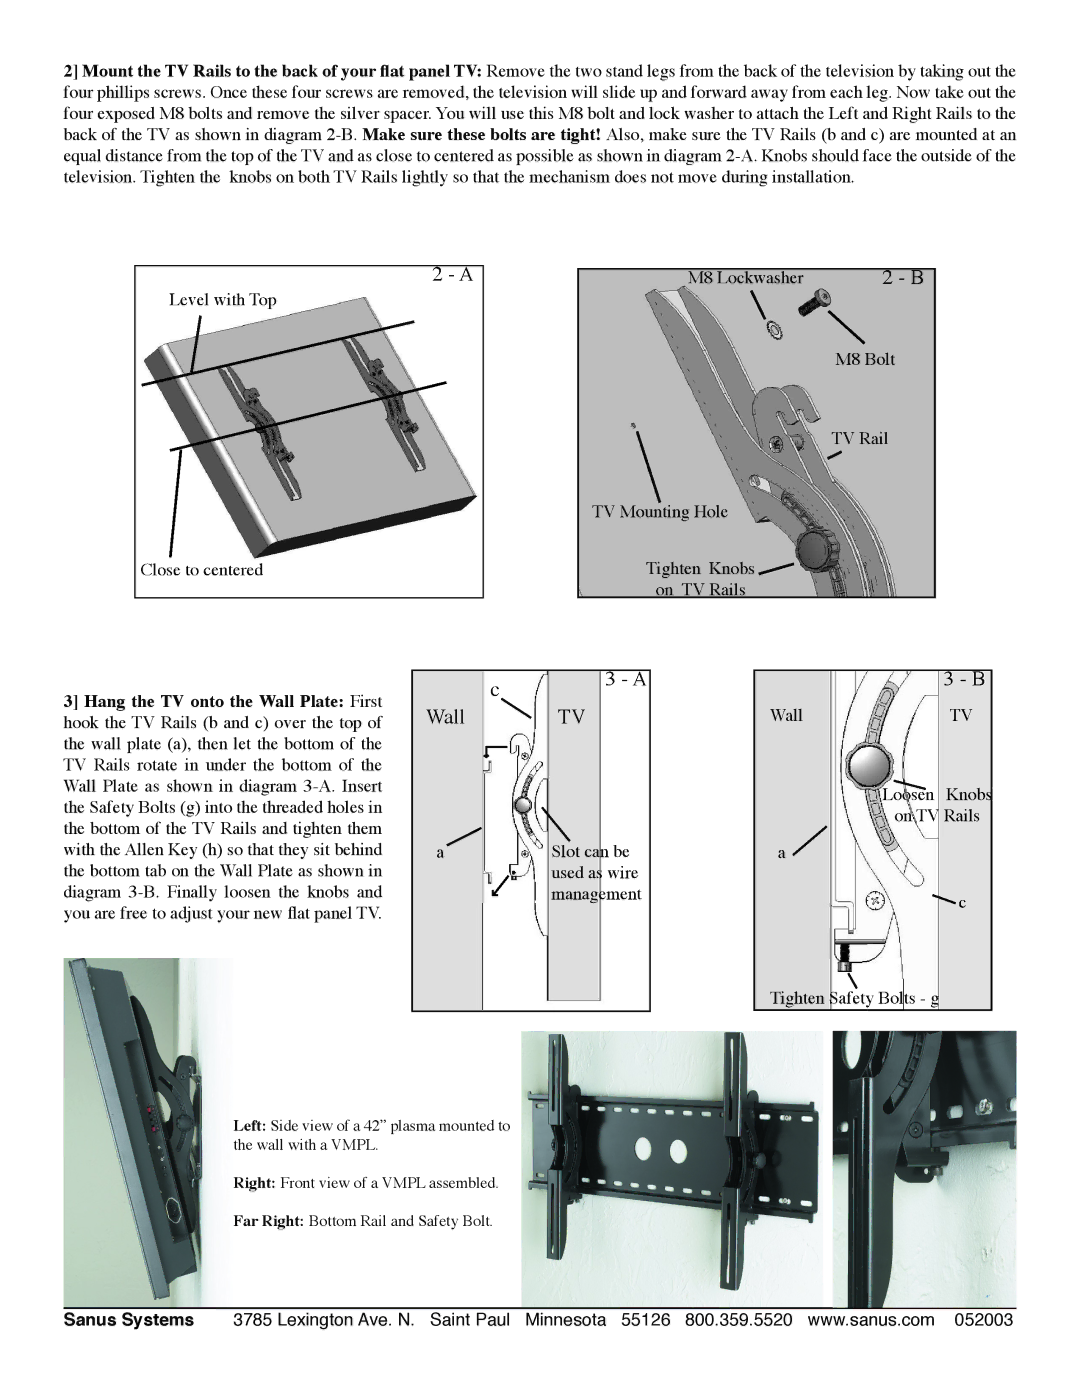
2] Mount the TV Rails to the back of your flat panel TV: Remove the two stand legs from the back of the television by taking out the four phillips screws. Once these four screws are removed, the television will slide up and forward away from each leg. Now take out the four exposed M8 bolts and remove the silver spacer. You will use this M8 bolt and lock washer to attach the Left and Right Rails to the back of the TV as shown in diagram 2-B. Make sure these bolts are tight! Also, make sure the TV Rails (b and c) are mounted at an equal distance from the top of the TV and as close to centered as possible as shown in diagram 2-A. Knobs should face the outside of the television. Tighten the knobs on both TV Rails lightly so that the mechanism does not move during installation.

3] Hang the TV onto the Wall Plate: First hook the TV Rails (b and c) over the top of the wall plate (a), then let the bottom of the TV Rails rotate in under the bottom of the Wall Plate as shown in diagram 3-A. Insert the Safety Bolts (g) into the threaded holes in the bottom of the TV Rails and tighten them with the Allen Key (h) so that they sit behind the bottom tab on the Wall Plate as shown in diagram 3-B. Finally loosen the knobs and you are free to adjust your new flat panel TV.

Left: Side view of a 42” plasma mounted to the wall with a VMPL.

Right: Front view of a VMPL assembled.

Far Right: Bottom Rail and Safety Bolt.

Sanus Systems

3785 Lexington Ave. N. Saint Paul Minnesota 55126 800.359.5520 www.sanus.com 052003

Page 2
Image 2
Gateway GTW-WMM103 manual Sanus Systems, Left Side view of a 42” plasma mounted to the wall with a VMPL