Care and Cleaning Operating Instructions Safety Instructions
Installation of the range.
Read these instructions completely and carefully.
![]() WARNING!
WARNING!
Anti-Tip Bracket
• ALL RANGES CAN TIP
• INJURY COULD RESULT
• INSTALL
• SEE INSTRUCTIONS
Tools You Will Need
■Phillips head screwdriver
■13⁄8″ or adjustable wrench
■Flat blade screwdriver
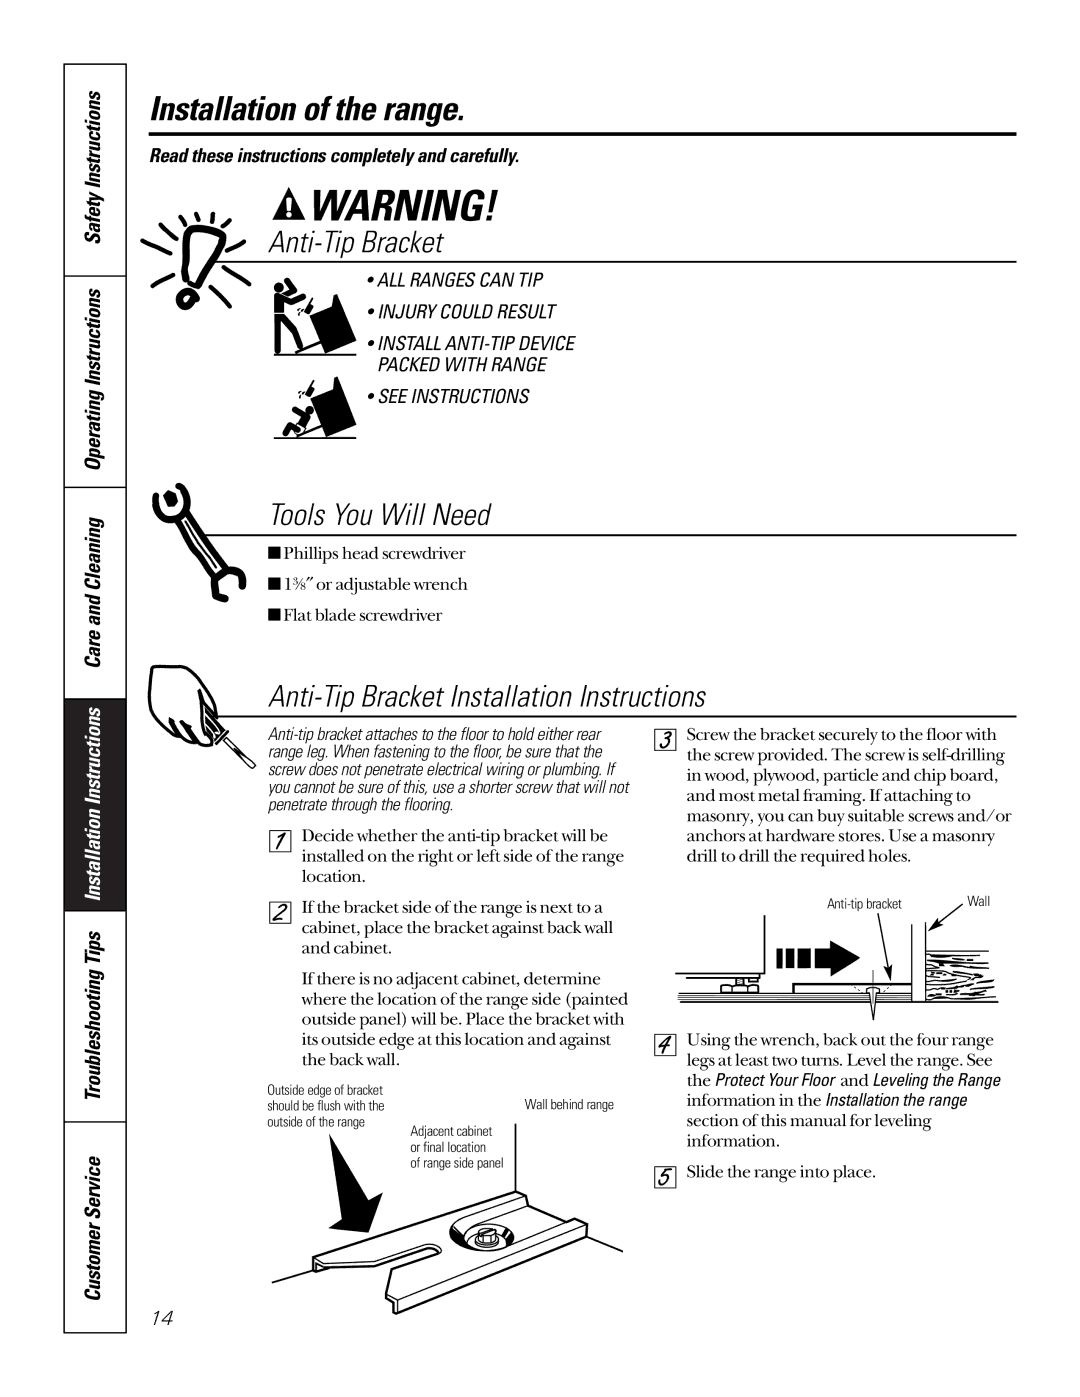
Anti-Tip Bracket Installation Instructions
Customer Service Troubleshooting Tips Installation Instructions
Decide whether the
If the bracket side of the range is next to a cabinet, place the bracket against back wall and cabinet.
If there is no adjacent cabinet, determine where the location of the range side (painted outside panel) will be. Place the bracket with its outside edge at this location and against the back wall.
Outside edge of bracket
should be flush with theWall behind range
outside of the range
Adjacent cabinet or final location of range side panel
Screw the bracket securely to the floor with the screw provided. The screw is
|
|
|
|
|
|
|
| Wall | ||||
|
|
|
|
|
|
|
|
|
|
|
|
|
|
|
|
|
|
|
|
|
|
|
|
|
|
|
|
|
|
|
|
|
|
|
|
|
|
|
|
|
|
|
|
|
|
|
|
|
|
|
|
|
|
|
|
|
|
|
|
|
|
|
|
|
Using the wrench, back out the four range legs at least two turns. Level the range. See the Protect Your Floor and Leveling the Range information in the Installation the range section of this manual for leveling information.
Slide the range into place.
14