CARE AND CLEANING
Proper care and cleaning are important so your cooktop will give you efficient and satisfactory service. Follow these directions carefully in caring for it to help assure safe and proper maintenance.
BE SURE ELECTRIC POWER IS OFF BEFORE CLEANING ANY PART OF THE COOKTOP.
Control Knobs
The control knobs may be removed for cleaning.
Before removing the knobs for cleaning, please note that the knobs on the left side and the knobs on the right side are in the proper OFF position. When replacing the knobs, check the OFF position to insure proper alignment.
To remove a knob, pull it straight off the stem.
Wash the knobs in soap and water but do not soak. Avoid getting water down in to the knob stem holes.
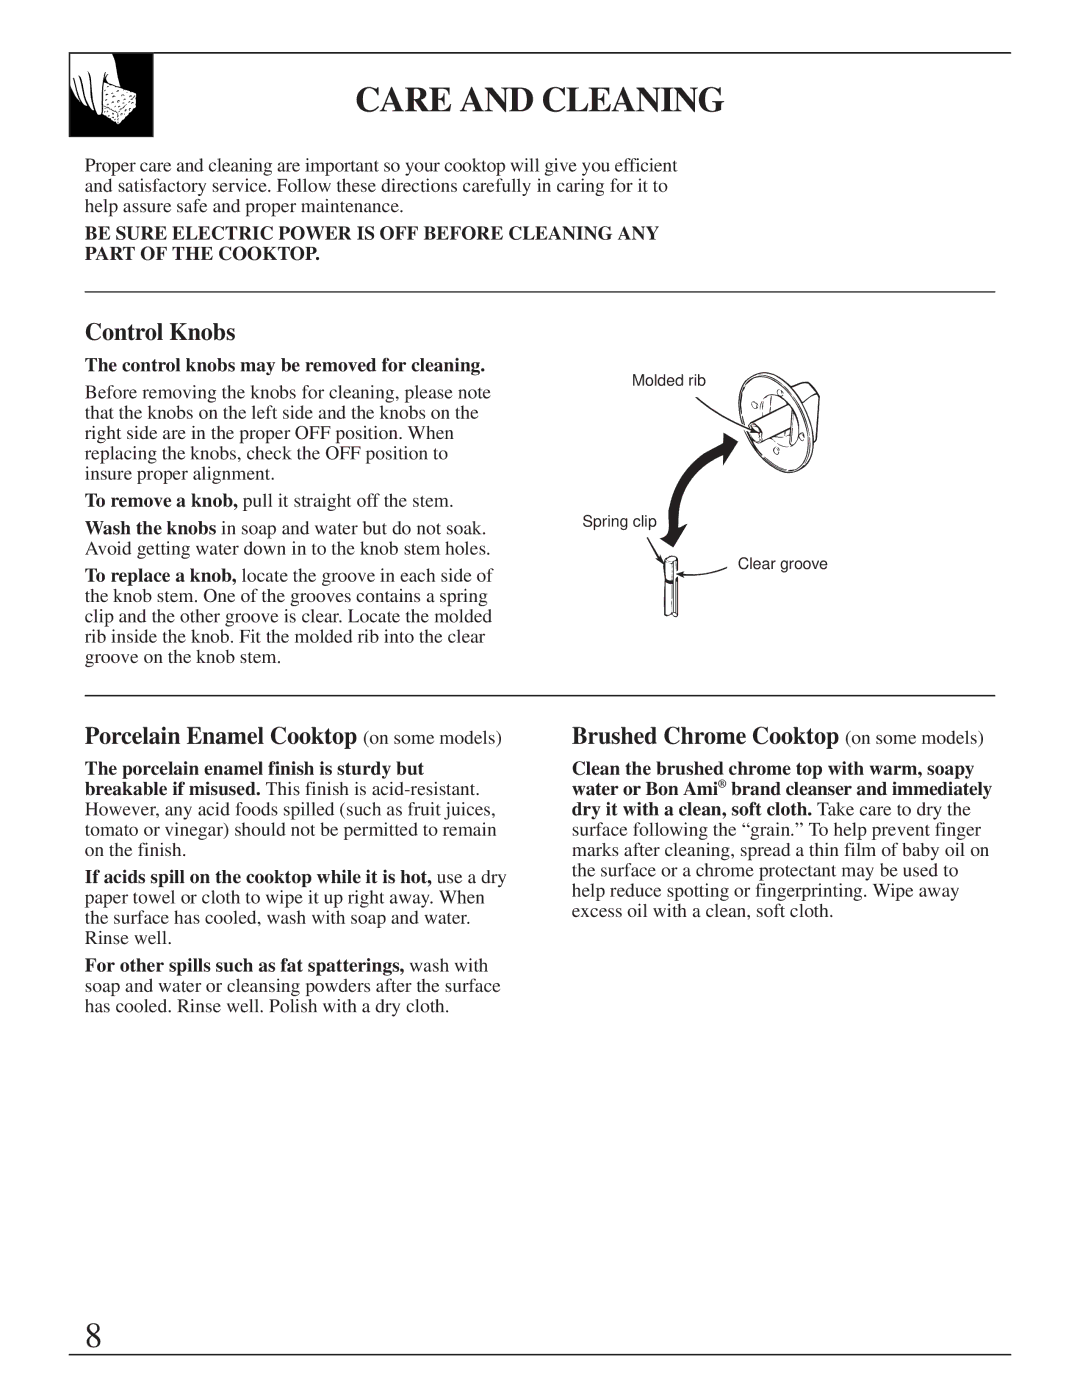
To replace a knob, locate the groove in each side of the knob stem. One of the grooves contains a spring clip and the other groove is clear. Locate the molded rib inside the knob. Fit the molded rib into the clear groove on the knob stem.
Molded rib
Spring clip
Clear groove
Porcelain Enamel Cooktop (on some models) | Brushed Chrome Cooktop (on some models) |
The porcelain enamel finish is sturdy but breakable if misused. This finish is
If acids spill on the cooktop while it is hot, use a dry paper towel or cloth to wipe it up right away. When the surface has cooled, wash with soap and water. Rinse well.
For other spills such as fat spatterings, wash with soap and water or cleansing powders after the surface has cooled. Rinse well. Polish with a dry cloth.
Clean the brushed chrome top with warm, soapy water or Bon Ami® brand cleanser and immediately dry it with a clean, soft cloth. Take care to dry the surface following the “grain.” To help prevent finger marks after cleaning, spread a thin film of baby oil on the surface or a chrome protectant may be used to help reduce spotting or fingerprinting. Wipe away excess oil with a clean, soft cloth.
8
