CONTROLS
Your surface units and controls are designed to give you an infinite choice of heat settings for surface unit cooking.
At both OFF and HI the control “clicks” into position.
When cooking in a quiet kitchen, you may hear slight “clicking”
Switching heats to higher settings always results in a quicker change than switching to lower settings.
How to Set the Controls
1. Grasp the control knob and push down.
2. Turn the knob to the desired heat setting.
The control must be pushed in to set only from the OFF position. When the control is in any position other than OFF, it may be rotated without pushing in.
Be sure you turn the control knob to OFF when you finish cooking.
An indicator light will glow when a surface unit is on.
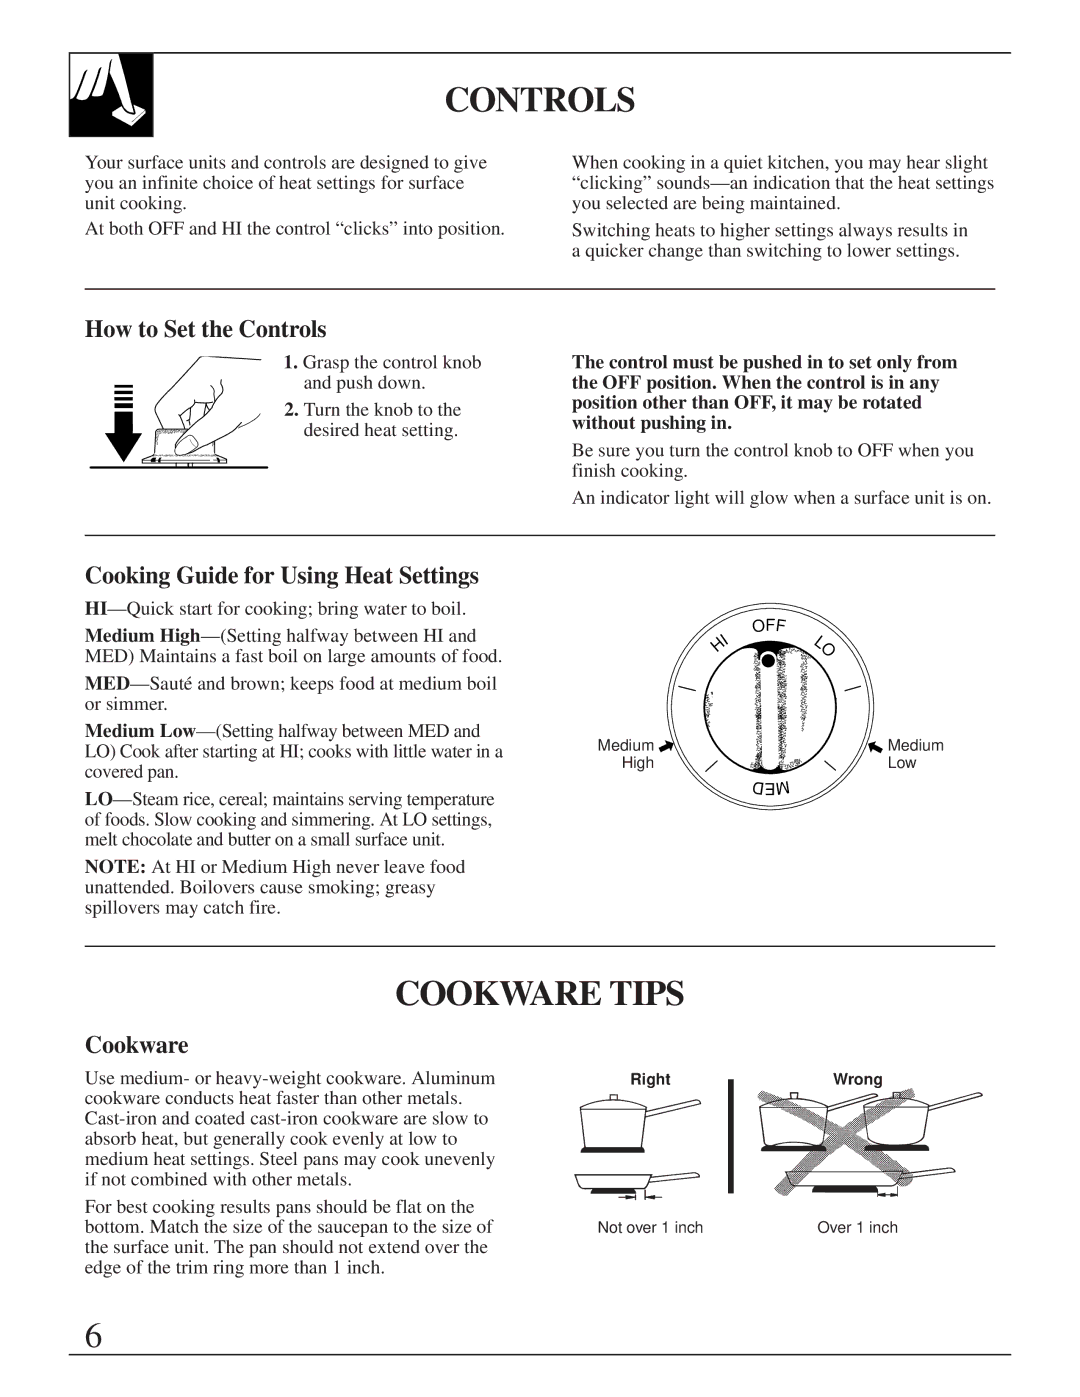
Cooking Guide for Using Heat Settings
Medium
Medium
NOTE: At HI or Medium High never leave food unattended. Boilovers cause smoking; greasy spillovers may catch fire.
| OFF |
I | L |
H | O |
|
Medium | Medium |
High | Low |
| M |
| DE |
COOKWARE TIPS
Cookware
Use medium- or
For best cooking results pans should be flat on the bottom. Match the size of the saucepan to the size of the surface unit. The pan should not extend over the edge of the trim ring more than 1 inch.
Right
Not over 1 inch
Wrong
Over 1 inch
6
