Installation Instructions


Pre-Installation Checklist
ALL INSTALLATION INFORMATION ON THE FOLLOWING PAGES IS TO BE USED FOR SINGLE AND DOUBLE OVEN INSTALLATION!
Remove packaging materials. Check behind hinges and under false bottom. Remove labels on the outside of the door, plastic on trims and panel, all tape around the oven, and any shipping screws securing the oven to the base pad.
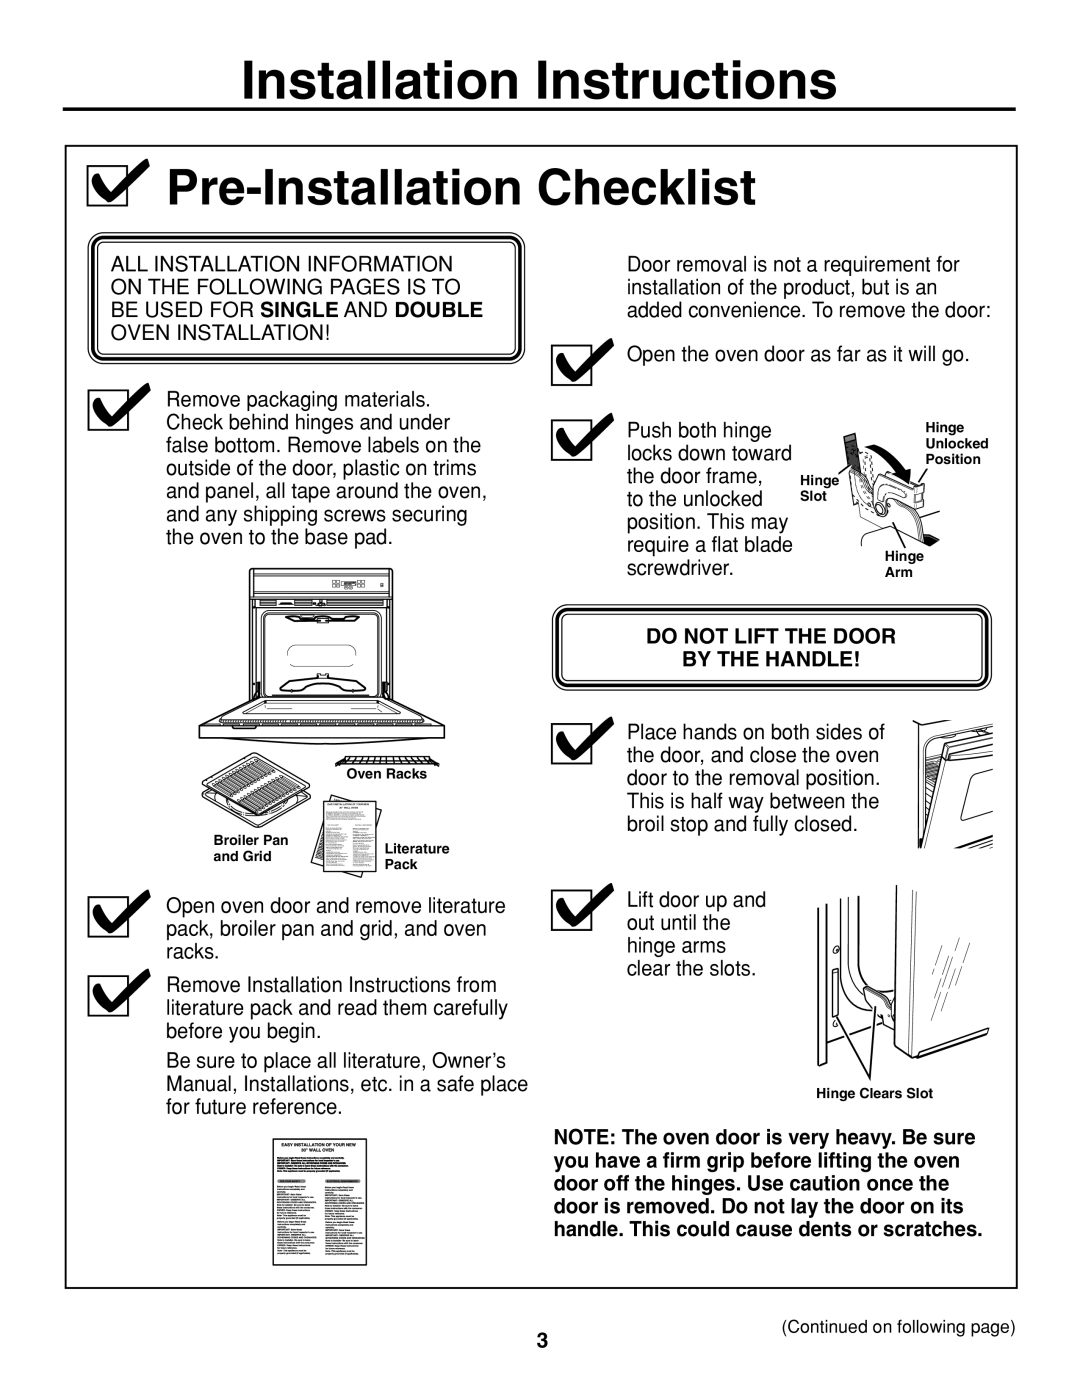
Door removal is not a requirement for installation of the product, but is an added convenience. To remove the door:
Open the oven door as far as it will go.
Push both hinge | Hinge | |
locks down toward | Unlocked | |
Position | ||
the door frame, | Hinge | |
to the unlocked | Slot | |
position. This may |
| |
require a flat blade | Hinge | |
screwdriver. | ||
Arm |
DO NOT LIFT THE DOOR
BY THE HANDLE!
Oven Racks
| E |
|
| ASY INST |
|
EASY | INSTALLATIONALL | TIONOF YOUR NEW |
30 | ||
| 30" WALL" WALLOVENOF | |
|
| OVENYOUR NEW |
Broiler Pan | Literature | |
and Grid | ||
Pack | ||
|
Open oven door and remove literature pack, broiler pan and grid, and oven racks.
Remove Installation Instructions from literature pack and read them carefully before you begin.
Be sure to place all literature, Owner’s Manual, Installations, etc. in a safe place for future reference.
Place hands on both sides of the door, and close the oven door to the removal position. This is half way between the broil stop and fully closed.
Lift door up and out until the hinge arms clear the slots.
Hinge Clears Slot
NOTE: The oven door is very heavy. Be sure you have a firm grip before lifting the oven door off the hinges. Use caution once the door is removed. Do not lay the door on its handle. This could cause dents or scratches.
3
(Continued on following page)