Reversing the Door. | www.GEAppliances.com |
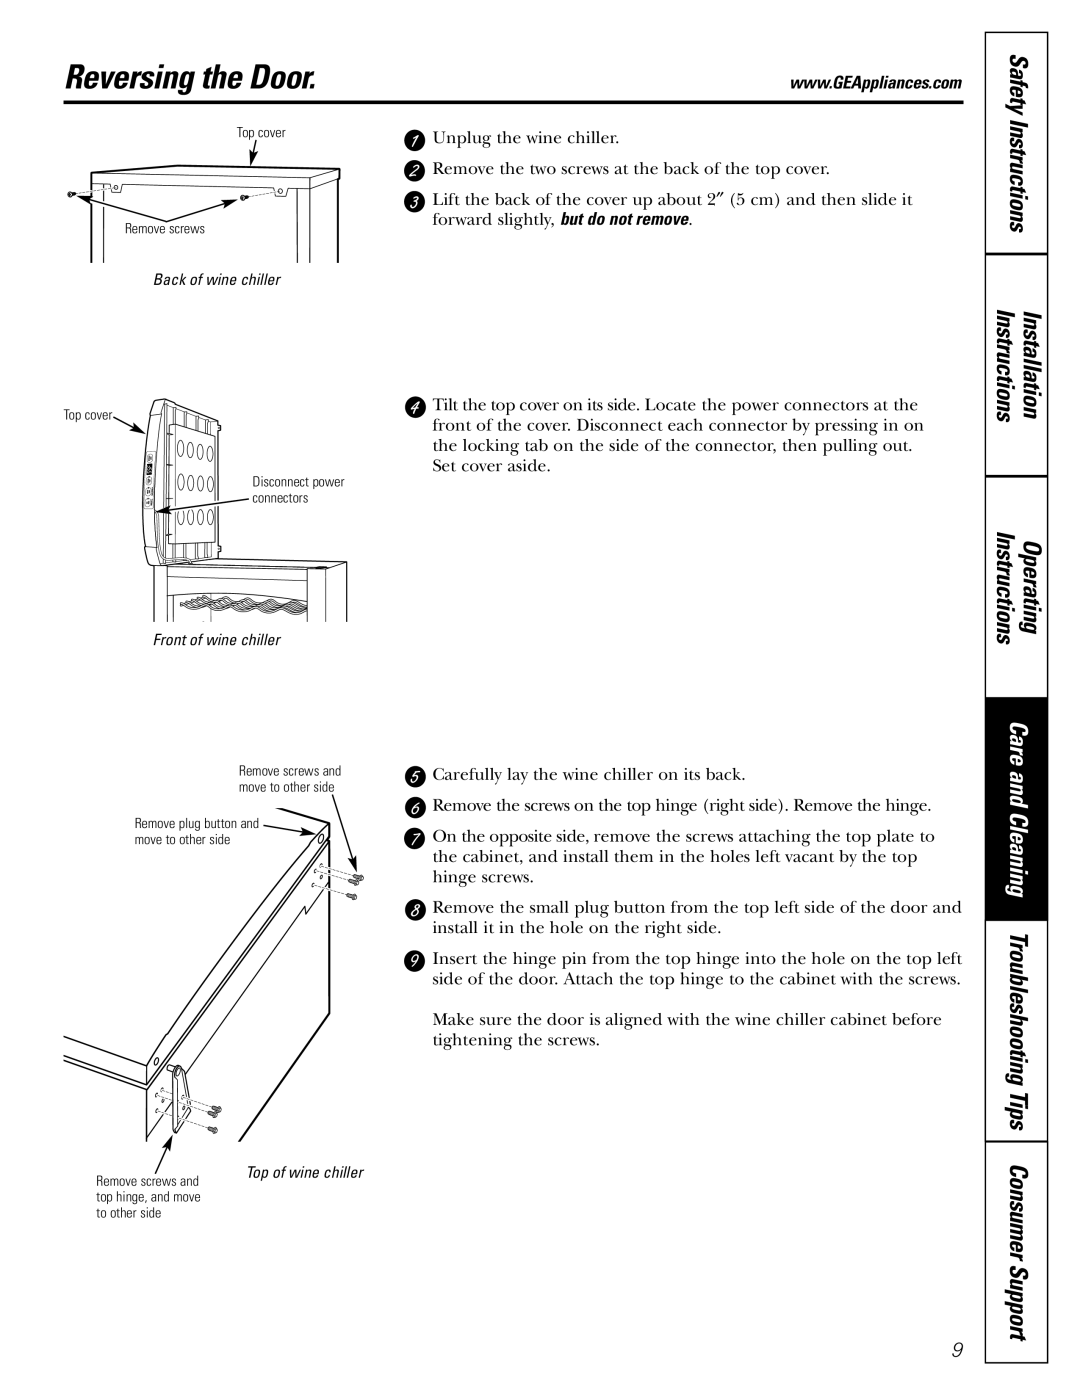
Top cover | Unplug the wine chiller. |
Safety
Remove screws
Back of wine chiller
Top cover
Disconnect power ![]() connectors
connectors
![]() Remove the two screws at the back of the top cover.
Remove the two screws at the back of the top cover.
![]() Lift the back of the cover up about 2″ (5 cm) and then slide it forward slightly, but do not remove.
Lift the back of the cover up about 2″ (5 cm) and then slide it forward slightly, but do not remove.
![]() Tilt the top cover on its side. Locate the power connectors at the front of the cover. Disconnect each connector by pressing in on the locking tab on the side of the connector, then pulling out.
Tilt the top cover on its side. Locate the power connectors at the front of the cover. Disconnect each connector by pressing in on the locking tab on the side of the connector, then pulling out.
Set cover aside.
Instructions
Instructions | Installation |
Front of wine chiller
Instructions | Operating |
Remove screws and move to other side
Remove plug button and move to other side
![]() Carefully lay the wine chiller on its back.
Carefully lay the wine chiller on its back.
![]() Remove the screws on the top hinge (right side). Remove the hinge.
Remove the screws on the top hinge (right side). Remove the hinge.
![]() On the opposite side, remove the screws attaching the top plate to the cabinet, and install them in the holes left vacant by the top hinge screws.
On the opposite side, remove the screws attaching the top plate to the cabinet, and install them in the holes left vacant by the top hinge screws.
![]() Remove the small plug button from the top left side of the door and install it in the hole on the right side.
Remove the small plug button from the top left side of the door and install it in the hole on the right side.
![]() Insert the hinge pin from the top hinge into the hole on the top left side of the door. Attach the top hinge to the cabinet with the screws.
Insert the hinge pin from the top hinge into the hole on the top left side of the door. Attach the top hinge to the cabinet with the screws.
Make sure the door is aligned with the wine chiller cabinet before tightening the screws.
Care and Cleaning
Troubleshooting Tips |
Remove screws and top hinge, and move to other side
Top of wine chiller
9
Consumer Support