Burner removal
(on some models)
(continued)
To remove the
The smoker burner (on some models) can be removed and cleaned by unplugging the igniter wire and lifting out the burner.
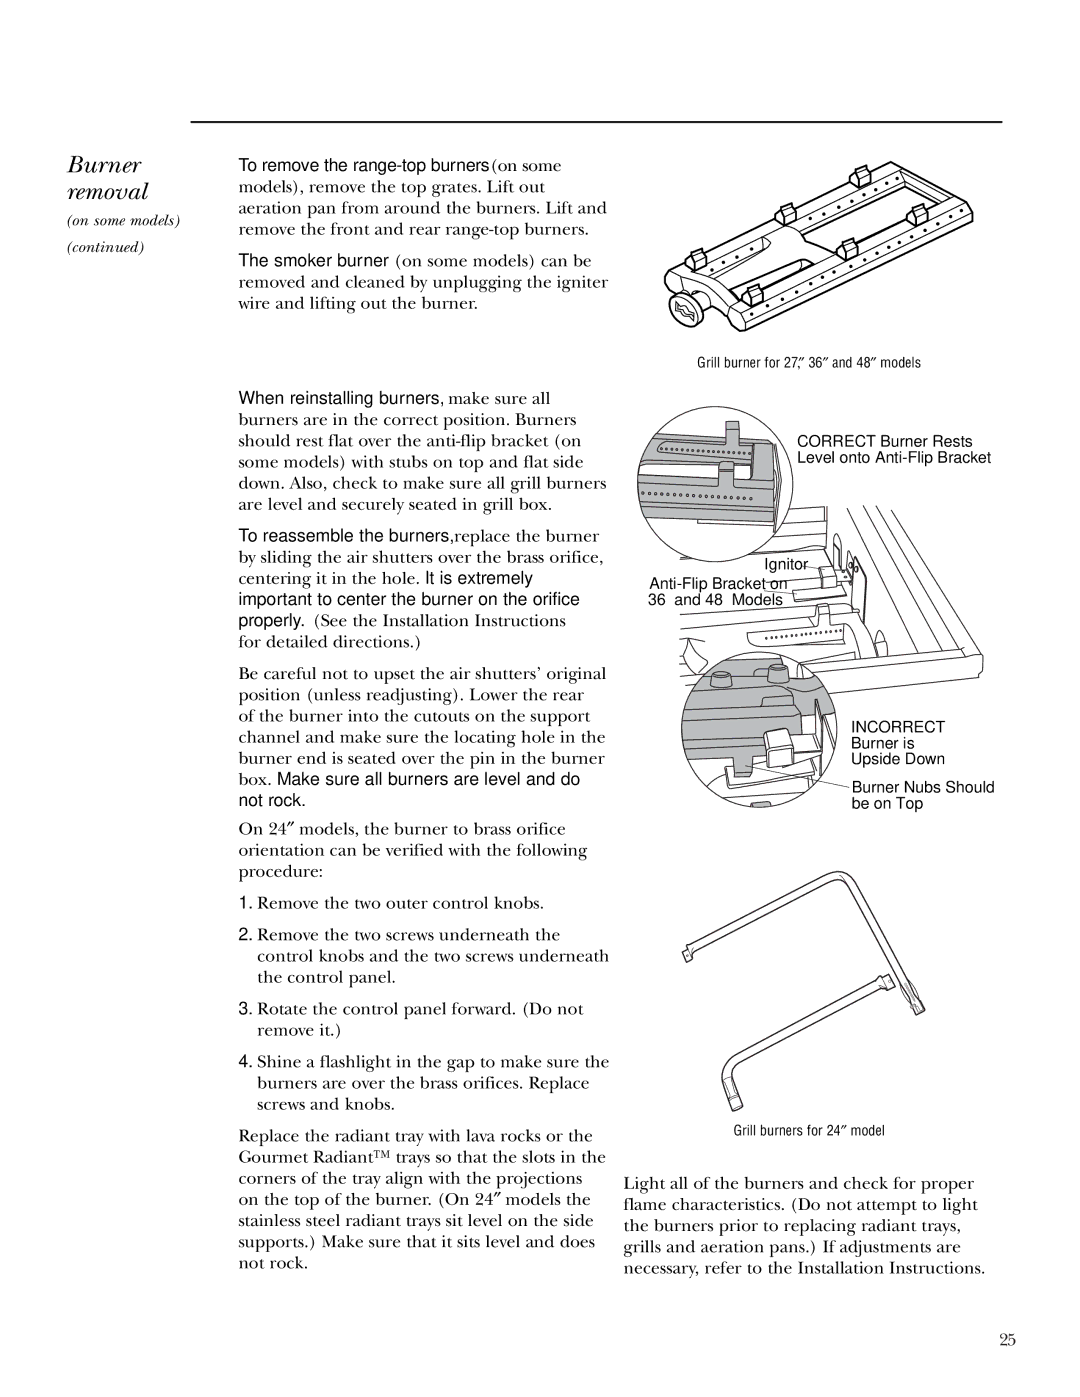
Grill burner for 27,″ 36″ and 48″ models
When reinstalling burners, make sure all burners are in the correct position. Burners should rest flat over the
To reassemble the burners, replace the burner by sliding the air shutters over the brass orifice, centering it in the hole. It is extremely
important to center the burner on the orifice
properly. (See the Installation Instructions for detailed directions.)
Be careful not to upset the air shutters’ original position (unless readjusting). Lower the rear of the burner into the cutouts on the support channel and make sure the locating hole in the burner end is seated over the pin in the burner box. Make sure all burners are level and do
not rock.
On 24″ models, the burner to brass orifice orientation can be verified with the following procedure:
1.Remove the two outer control knobs.
2.Remove the two screws underneath the control knobs and the two screws underneath the control panel.
3.Rotate the control panel forward. (Do not remove it.)
4.Shine a flashlight in the gap to make sure the burners are over the brass orifices. Replace screws and knobs.
Replace the radiant tray with lava rocks or the Gourmet Radiant™ trays so that the slots in the corners of the tray align with the projections on the top of the burner. (On 24″ models the stainless steel radiant trays sit level on the side supports.) Make sure that it sits level and does not rock.
CORRECT Burner Rests
Level onto
Ignitor
INCORRECT Burner is Upside Down
![]() Burner Nubs Should
Burner Nubs Should ![]() be on Top
be on Top
Grill burners for 24″ model
Light all of the burners and check for proper flame characteristics. (Do not attempt to light the burners prior to replacing radiant trays, grills and aeration pans.) If adjustments are necessary, refer to the Installation Instructions.
25