CONNECTING THE 8X1 DPKVM SWITCHER
How to Connect the 8x1 DPKVM Switcher
1Connect up to eight (8) DisplayPort source devices to the DisplayPort inputs on the back panel of the Switcher using DisplayPort cables.
2Connect a
a OPTIONAL: To use the
b OPTIONAL: To communicate with the Switcher using Telnet, connect an Ethernet cable from the Ethernet jack on the back of the Switcher to the network. See page 24 for more information on using the Telnet feature.
c OPTIONAL: To extend the range of the IR control, connect an IR Extender (Gefen part no.
3Connect the included 5V locking power supply to the power receptacle on the 8x1 DPKVM Switcher
4Connect the opposite end of the power supply to an open wall socket power source.
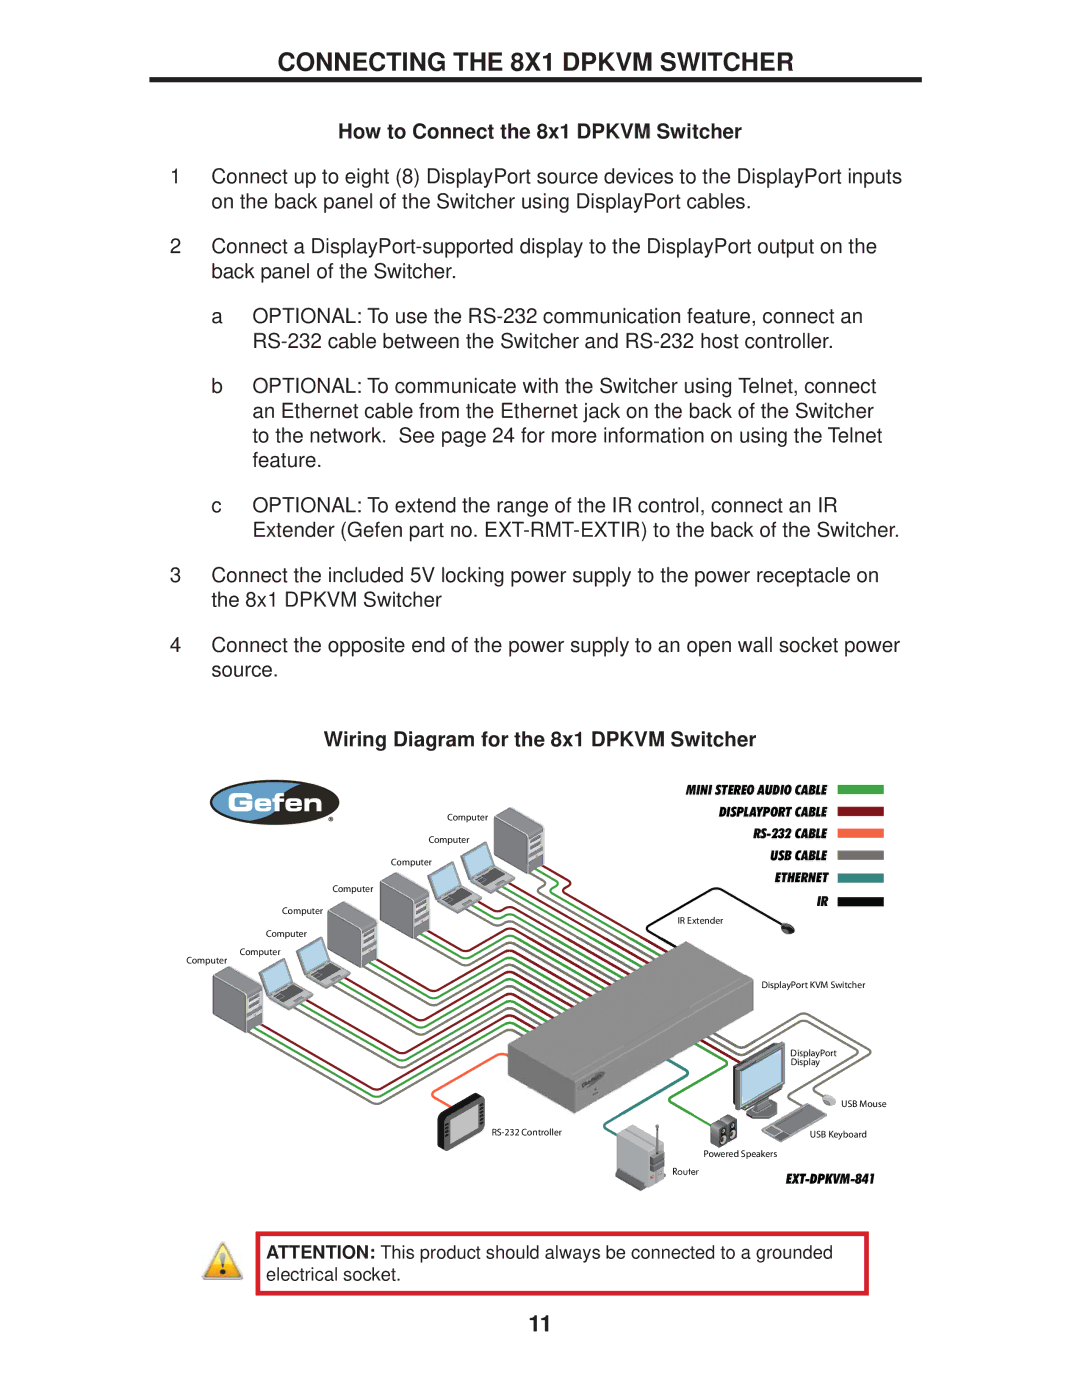
Wiring Diagram for the 8x1 DPKVM Switcher
| MINI STEREO AUDIO CABLE |
| |
|
| ||
Computer | DISPLAYPORT CABLE |
| |
| |||
| |||
|
| ||
Computer |
| ||
| |||
| |||
|
| ||
Computer | USB CABLE |
| |
| |||
| |||
|
| ||
Computer | ETHERNET |
| |
| |||
IR |
| ||
Computer |
| ||
| |||
IR Extender | |||
| |||
Computer |
|
| |
Computer |
|
| |
Computer |
|
| |
| DisplayPort KVM Switcher | ||
DisplayPort
Display
USB Mouse
USB Keyboard |
Powered Speakers
Router
ATTENTION: This product should always be connected to a grounded electrical socket.
11