
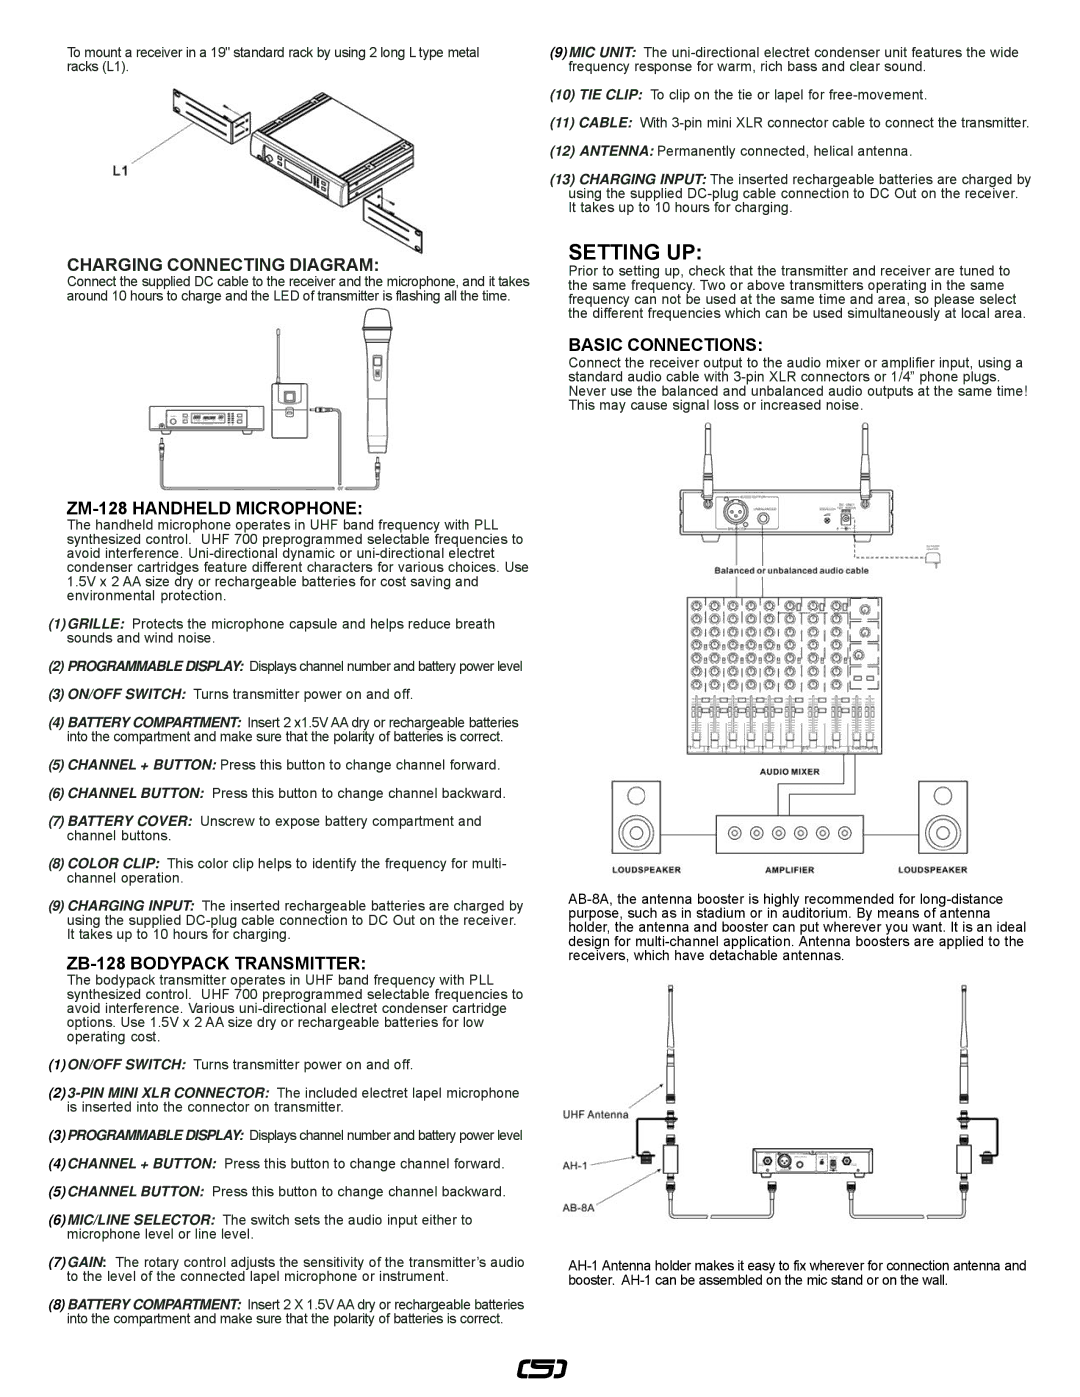
UZ-1128, UZ-9128 specifications
The Gemini UZ-1128 and UZ-9128 represent significant advancements in unmanned aerial vehicle (UAV) technology, designed for a range of applications including surveillance, reconnaissance, and agricultural monitoring. These drones are characterized by cutting-edge features and capabilities that cater to both commercial and governmental needs.One of the standout features of the Gemini UZ series is its robust flight performance. The UZ-1128 boasts an impressive endurance of up to 12 hours, making it suitable for long-duration missions without the need for frequent recharging. The UZ-9128, enhanced for even more demanding tasks, can fly at altitudes of up to 15,000 feet, providing a valuable vantage point for aerial assessments.
Both models are equipped with high-definition cameras and advanced image processing technologies, allowing operators to capture detailed imagery and real-time video feeds. The UZ-9128 offers enhanced optical zoom capabilities, making it ideal for situations that require close monitoring of distant targets. The dual payload capacity of these drones allows users to customize their configurations, integrating thermal imaging and multispectral sensors to gather essential data for various applications.
The Gemini UZ series incorporates sophisticated navigation systems, including GPS and inertial navigation, ensuring precise positioning and stability during flight. The drones feature a user-friendly interface that supports automated flight planning and mission execution, reducing the workload for operators and enhancing mission efficiency.
In terms of construction, the UZ-1128 and UZ-9128 are built with lightweight, durable materials that ensure longevity and resilience in diverse environmental conditions. Their aerodynamic design contributes to enhanced flight stability and reduced energy consumption, making them economically viable for extended use.
Another critical characteristic of the Gemini UZ series is their interoperability with various ground control systems, enabling seamless integration into existing operational frameworks. This flexibility is essential for users who require adaptability and scalability in their UAV operations.
Overall, the Gemini UZ-1128 and UZ-9128 stand out as formidable tools in the realm of UAV technology, offering a combination of extended flight capabilities, advanced sensors, and robust navigational features. These drones are poised to support a wide array of missions, driving efficiency and effectiveness in the fields they serve.