English
ASSEMBLY AND ADJUSTMENTS
![]() Warning: Always be sure that the tool is switched off and unplugged before adjusting, adding accessories, or checking a function on the tool
Warning: Always be sure that the tool is switched off and unplugged before adjusting, adding accessories, or checking a function on the tool
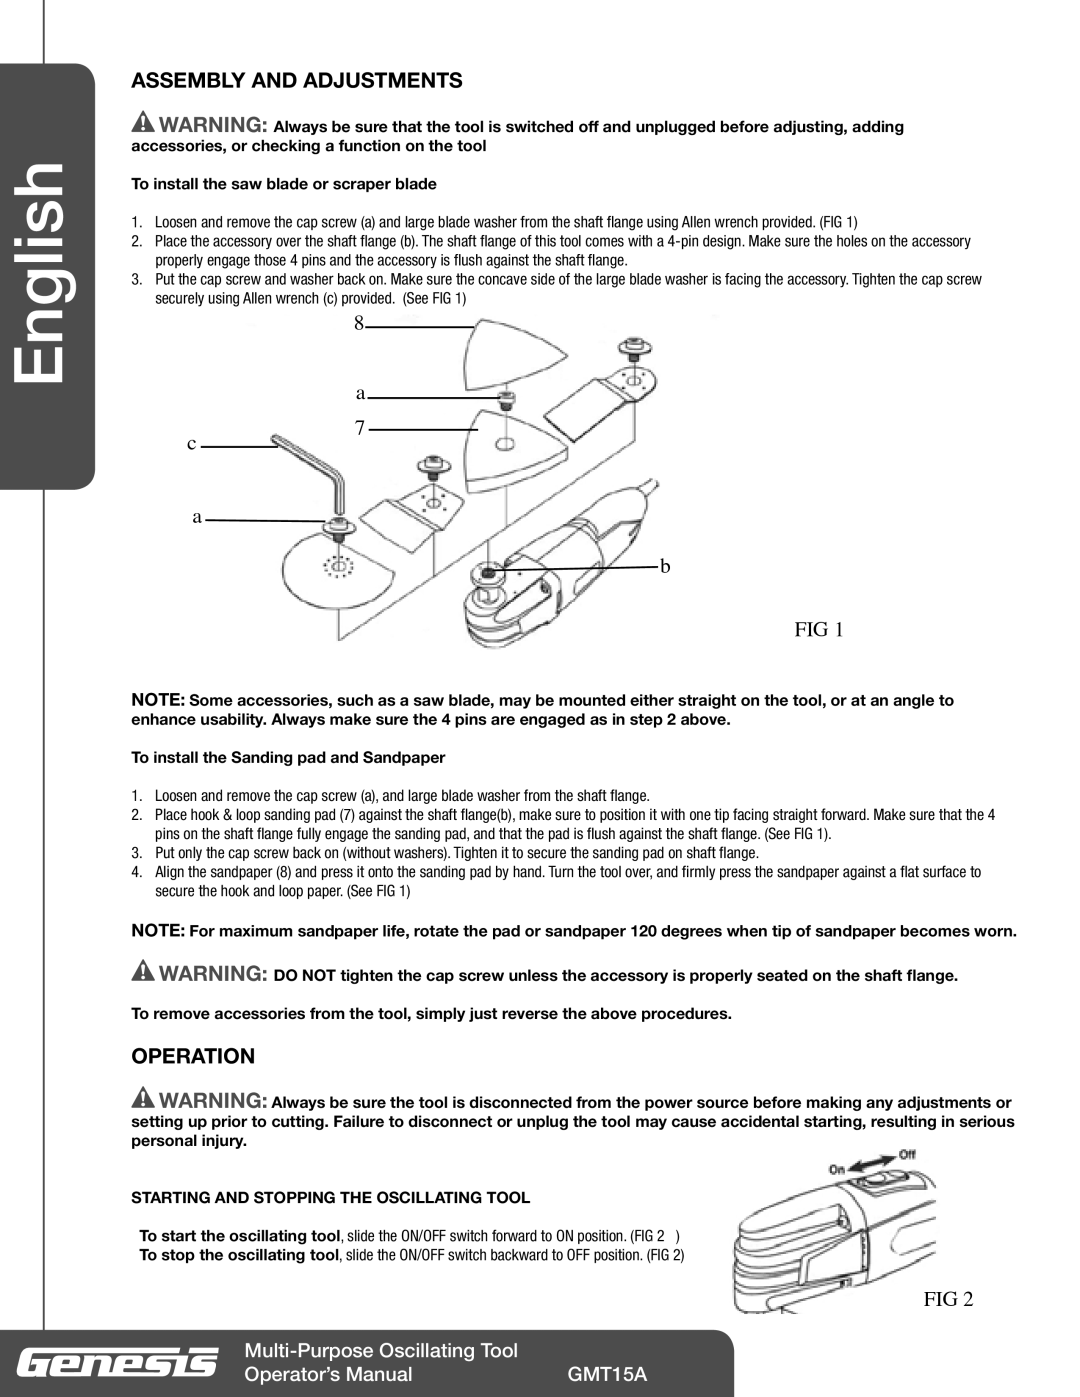
To install the saw blade or scraper blade
1. Loosen and remove the cap screw (a) and large blade washer from the shaft flange using Allen wrench provided. (FIG 1)
2. Place the accessory over the shaft flange (b). The shaft flange of this tool comes with a
3. Put the cap screw and washer back on. Make sure the concave side of the large blade washer is facing the accessory. Tighten the cap screw
securely using Allen wrench (c) provided. (See FIG 1)
8
a
c7
a
b
FIG 1
NOTE: Some accessories, such as a saw blade, may be mounted either straight on the tool, or at an angle to enhance usability. Always make sure the 4 pins are engaged as in step 2 above.
To install the Sanding pad and Sandpaper
1.Loosen and remove the cap screw (a), and large blade washer from the shaft flange.
2.Place hook & loop sanding pad (7) against the shaft flange(b), make sure to position it with one tip facing straight forward. Make sure that the 4 pins on the shaft flange fully engage the sanding pad, and that the pad is flush against the shaft flange. (See FIG 1).
3.Put only the cap screw back on (without washers). Tighten it to secure the sanding pad on shaft flange.
4.Align the sandpaper (8) and press it onto the sanding pad by hand. Turn the tool over, and firmly press the sandpaper against a flat surface to secure the hook and loop paper. (See FIG 1)
NOTE: For maximum sandpaper life, rotate the pad or sandpaper 120 degrees when tip of sandpaper becomes worn.
![]() Warning: DO NOT tighten the cap screw unless the accessory is properly seated on the shaft flange.
Warning: DO NOT tighten the cap screw unless the accessory is properly seated on the shaft flange.
To remove accessories from the tool, simply just reverse the above procedures.
OPERATION
![]() Warning: Always be sure the tool is disconnected from the power source before making any adjustments or setting up prior to cutting. Failure to disconnect or unplug the tool may cause accidental starting, resulting in serious personal injury.
Warning: Always be sure the tool is disconnected from the power source before making any adjustments or setting up prior to cutting. Failure to disconnect or unplug the tool may cause accidental starting, resulting in serious personal injury.
STARTING AND STOPPING THE OSCILLATING TOOL
To start the oscillating tool, slide the ON/OFF switch forward to ON position. (FIG 2 )
To stop the oscillating tool, slide the ON/OFF switch backward to OFF position. (FIG 2)
FIG 2
| |
Operator’s Manual | GMT15A |