Installation
Installation Instruction
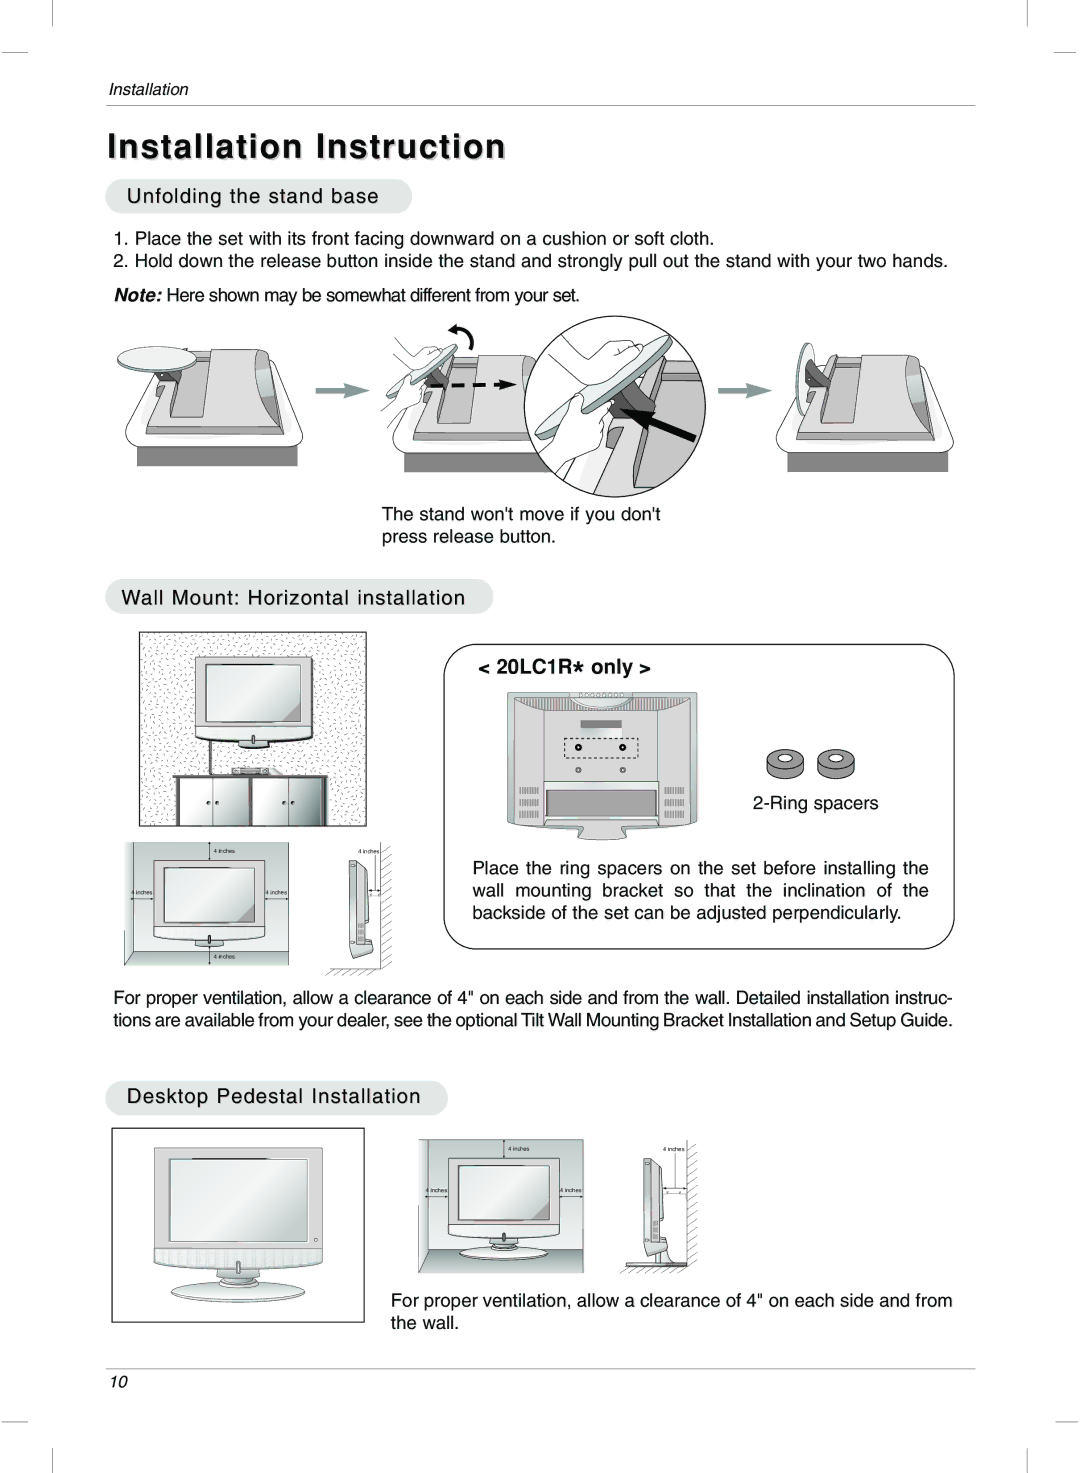
Unfolding the stand base
1.Place the set with its front facing downward on a cushion or soft cloth.
2.Hold down the release button inside the stand and strongly pull out the stand with your two hands.
Note: Here shown may be somewhat different from your set.
The stand won't move if you don't press release button.
Wall Mount: Horizontal installation
4 inches | 4 inches |
4 inches |
|
|
|
|
|
|
|
|
| 4 inches |
|
|
|
|
|
|
|
|
|
|
|
|
|
|
|
|
|
|
|
|
|
|
|
|
|
|
|
|
|
|
|
|
|
|
|
|
|
|
|
|
|
|
|
|
< 20LC1R* only >
Place the ring spacers on the set before installing the wall mounting bracket so that the inclination of the backside of the set can be adjusted perpendicularly.
4 inches
For proper ventilation, allow a clearance of 4" on each side and from the wall. Detailed installation instruc- tions are available from your dealer, see the optional Tilt Wall Mounting Bracket Installation and Setup Guide.
Desktop Pedestal Installation
4 inches
4 inches |
|
|
|
|
| 4 inches |
|
|
|
|
|
|
|
|
|
|
|
|
|
|
|
|
|
|
|
|
|
|
|
|
|
|
|
|
4 inches |
For proper ventilation, allow a clearance of 4" on each side and from the wall.
10