NOTE
•For all types and styles of doors:
-If the ceiling in your garage is so low that there is not at least a 3" space above the Header Bracket
mountingpoint, contact a Genie Factory AuthorizedDealer.
•If a door spring is in the way, place the Header Bracket above the spring. Do Not move the door spring.
WARNING:
Door springs are under extremely high tension and
shou d be hand ed ONLYby a trained professiona.
CCheck wall for a stud or a solid header at your mark: (If checking a finished wall, a stud finder may be helpful).
•If location is above Header,a 2"x 6" board must be screwed to studs beside your mark with at least two Lag Screwsand Flat Washers(not provided).
•Transfer your markto new mounting board.
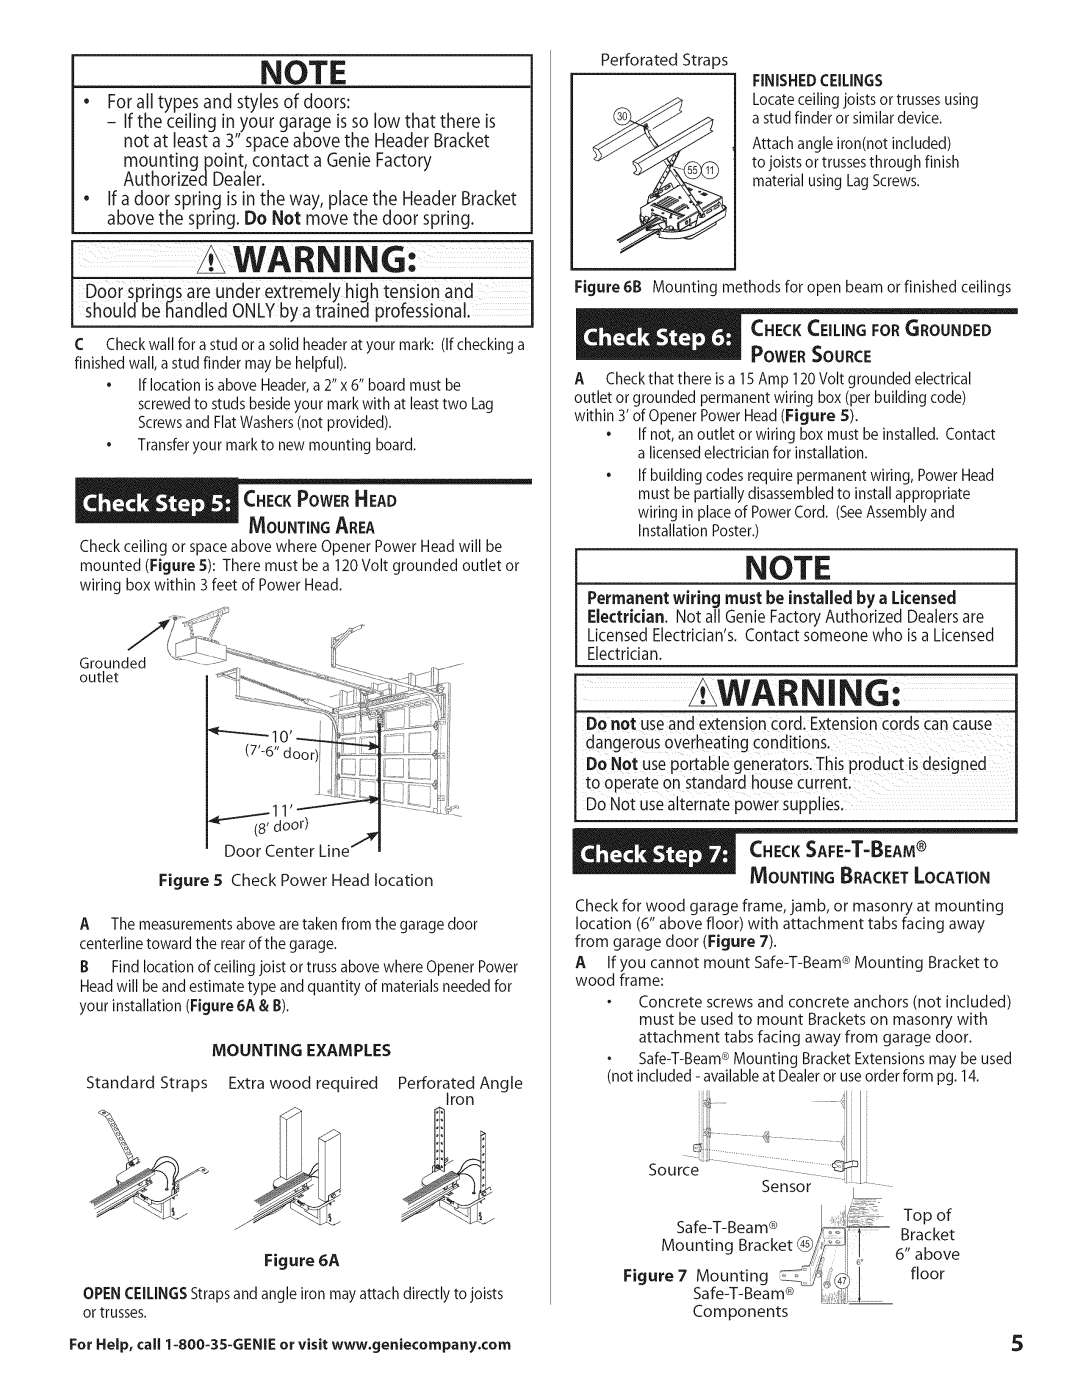
Check ceiling or space above where Opener Power Head will be mounted (Figure 5): There must be a 120Volt grounded outlet or wiring box within 3 feet of Power Head.
Grounded outlet
1
(8'door)
Door Center Line
Figure S Check Power Head location
AThe measurements above are taken from the garage door centerline toward the rear of the garage.
BFind location of ceiling joist or truss above where Opener Power Head will be and estimate type and quantity of materials needed for your installation (Figure 6A & B).
MOUNTING EXAMPLES
Standard Straps Extra wood required Perforated Angle Iron
Figure 6A
OPENCEILINGSStrapsand angle iron may attach directly to joists or trusses.
For Help, call 1=800=35=GENIEor visit www.geniecompany.com
Perforated Straps
FINISHEDCEILINGS
Locateceilingjoistsor trussesusing astudfinderor similardevice.
Attach angle iron(not included) to joists or trusses through finish material using LagScrews.
Figure 6B Mounting methods for open beam or finished ceilings
POWERSOURCE
ACheck that there is a 15 Amp 120 Volt grounded electrical outlet or grounded permanent wiring box (per building code) within 3'of Opener Power Head(Figure S).
•If not, an outlet or wiring box must be installed. Contact a licensed electrician for installation.
If building codes require permanent wiring, Power Head must be partially disassembled to install appropriate wiring in place of Power Cord. (SeeAssembly and Installation Poster.)
NOTE
Permanent wiring must be installed by a Licensed
Electrician. Not all Genie Factory Authorized Dealers are Licensed Electrician's. Contact someone who is a Licensed
Electrician.
WARNING:
Do not use and extension cordi Extension cords Can cause dangerous overheating COnditions:
Do NOt Use p0rtable generat0rs: This pr0duct is designed to operate on standard house current;
DoNot use alternate power supplies.
_ | MOUlJ | BRACKETn | LOCATIO, ......NNTING |
Check for wood garage frame, jamb, or masonry at mounting location (6" above floor) with attachment tabs facing away from garage door (Figure 7).
AIf you cannot mount
. Concrete screws and concrete anchors (not included) must be used to mount Brackets on masonry with attachment tabs facing away from garage door.
(not included - available at Dealer or use order form pg. 14.
| I |
|
|
_i_ / ...........: Topof | |||
/ | Bracket | ||
| |||
Mounting Bracket@/_ | 6" | above | |
_i | _rr |
| |
Figure 7 Mounting | I |
| floor |
_ |
|
| |
Components |
|
|
|
5