How to Use:
This product is for household use only.
GETTING STARTED
•Remove all packing material and any stickers.
•Remove and save literature.
•Please go to www.prodprotect.com/applica to register your warranty.
•Wash all removable parts in hot soapy water, rinse and dry thoroughly as directed in the Care and Cleaning section of this Use & Care manual.
Note: Although the grill plates are dishwasher safe we recommend hand washing to preserve their appearance. In dishwashing the metal will get a cloudy film that will not affect the performance but does not look attractive.
•Select a location where this unit is to be used allowing enough space for back of the unit, cabinets and the wall to allow heat to flow without damage to cabinets and walls.
ATTACH GRILL PLATES
The removable plates of your 360 Grill™ are designed to fit on the grill one way only. If you are having trouble attaching a plate, do not try to force the plate onto the grill!
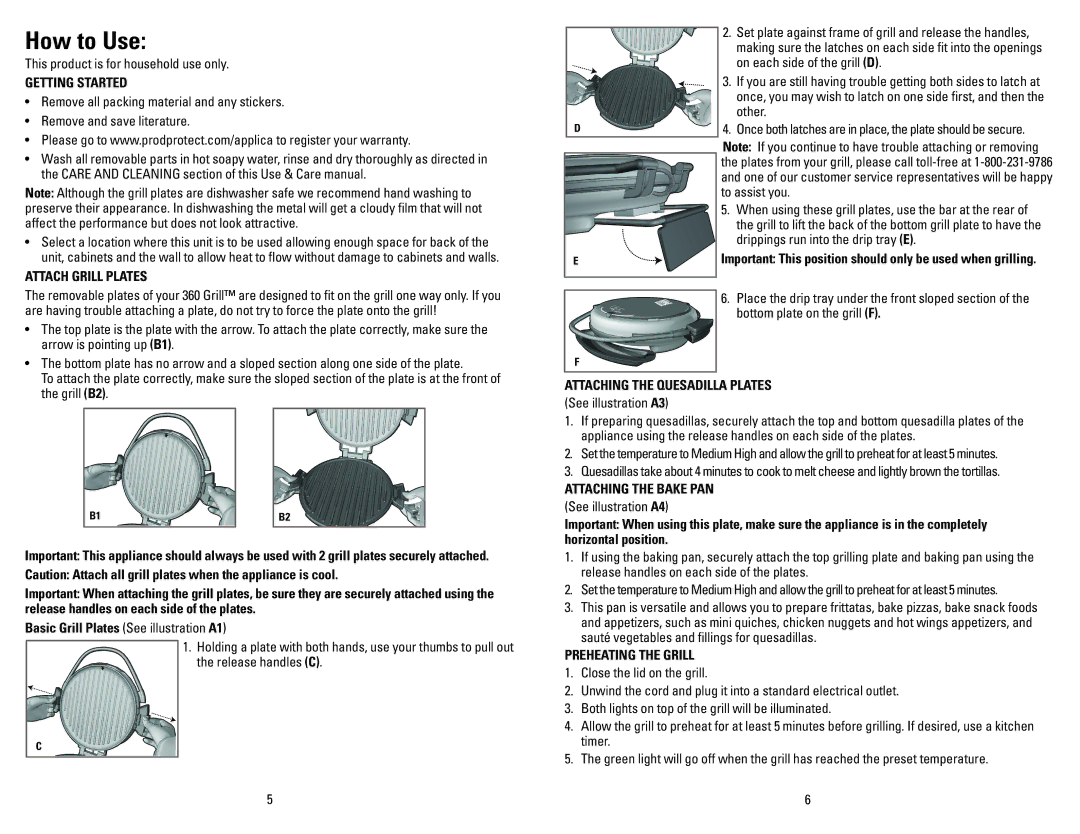
•The top plate is the plate with the arrow. To attach the plate correctly, make sure the arrow is pointing up (B1).
•The bottom plate has no arrow and a sloped section along one side of the plate.
To attach the plate correctly, make sure the sloped section of the plate is at the front of the grill (B2).
B1 |
| B2 |
|
|
|
Important: This appliance should always be used with 2 grill plates securely attached.
Caution: Attach all grill plates when the appliance is cool.
Important: When attaching the grill plates, be sure they are securely attached using the release handles on each side of the plates.
Basic Grill Plates (See illustration A1)
1.Holding a plate with both hands, use your thumbs to pull out the release handles (C).
C
5
|
| 2. | Set plate against frame of grill and release the handles, |
|
| ||
|
|
| making sure the latches on each side fit into the openings |
|
|
| on each side of the grill (D). |
|
| 3. | If you are still having trouble getting both sides to latch at |
|
|
| once, you may wish to latch on one side first, and then the |
|
|
| other. |
| D | 4. | Once both latches are in place, the plate should be secure. |
|
| Note: If you continue to have trouble attaching or removing | |
|
| the plates from your grill, please call | |
|
| and one of our customer service representatives will be happy | |
|
| to assist you. | |
|
| 5. | When using these grill plates, use the bar at the rear of |
|
|
| the grill to lift the back of the bottom grill plate to have the |
|
|
| drippings run into the drip tray (E). |
| E | Important: This position should only be used when grilling. | |
|
| 6. | Place the drip tray under the front sloped section of the |
|
| ||
|
| ||
|
|
| bottom plate on the grill (F). |
F
ATTACHING THE QUESADILLA PLATES
(See illustration A3)
1.If preparing quesadillas, securely attach the top and bottom quesadilla plates of the appliance using the release handles on each side of the plates.
2.Set the temperature to Medium High and allow the grill to preheat for at least 5 minutes.
3.Quesadillas take about 4 minutes to cook to melt cheese and lightly brown the tortillas.
ATTACHING THE BAKE PAN (See illustration A4)
Important: When using this plate, make sure the appliance is in the completely horizontal position.
1.If using the baking pan, securely attach the top grilling plate and baking pan using the release handles on each side of the plates.
2.Set the temperature to Medium High and allow the grill to preheat for at least 5 minutes.
3.This pan is versatile and allows you to prepare frittatas, bake pizzas, bake snack foods and appetizers, such as mini quiches, chicken nuggets and hot wings appetizers, and sauté vegetables and fillings for quesadillas.
PREHEATING THE GRILL
1.Close the lid on the grill.
2.Unwind the cord and plug it into a standard electrical outlet.
3.Both lights on top of the grill will be illuminated.
4.Allow the grill to preheat for at least 5 minutes before grilling. If desired, use a kitchen timer.
5.The green light will go off when the grill has reached the preset temperature.
6