A. Create Array:
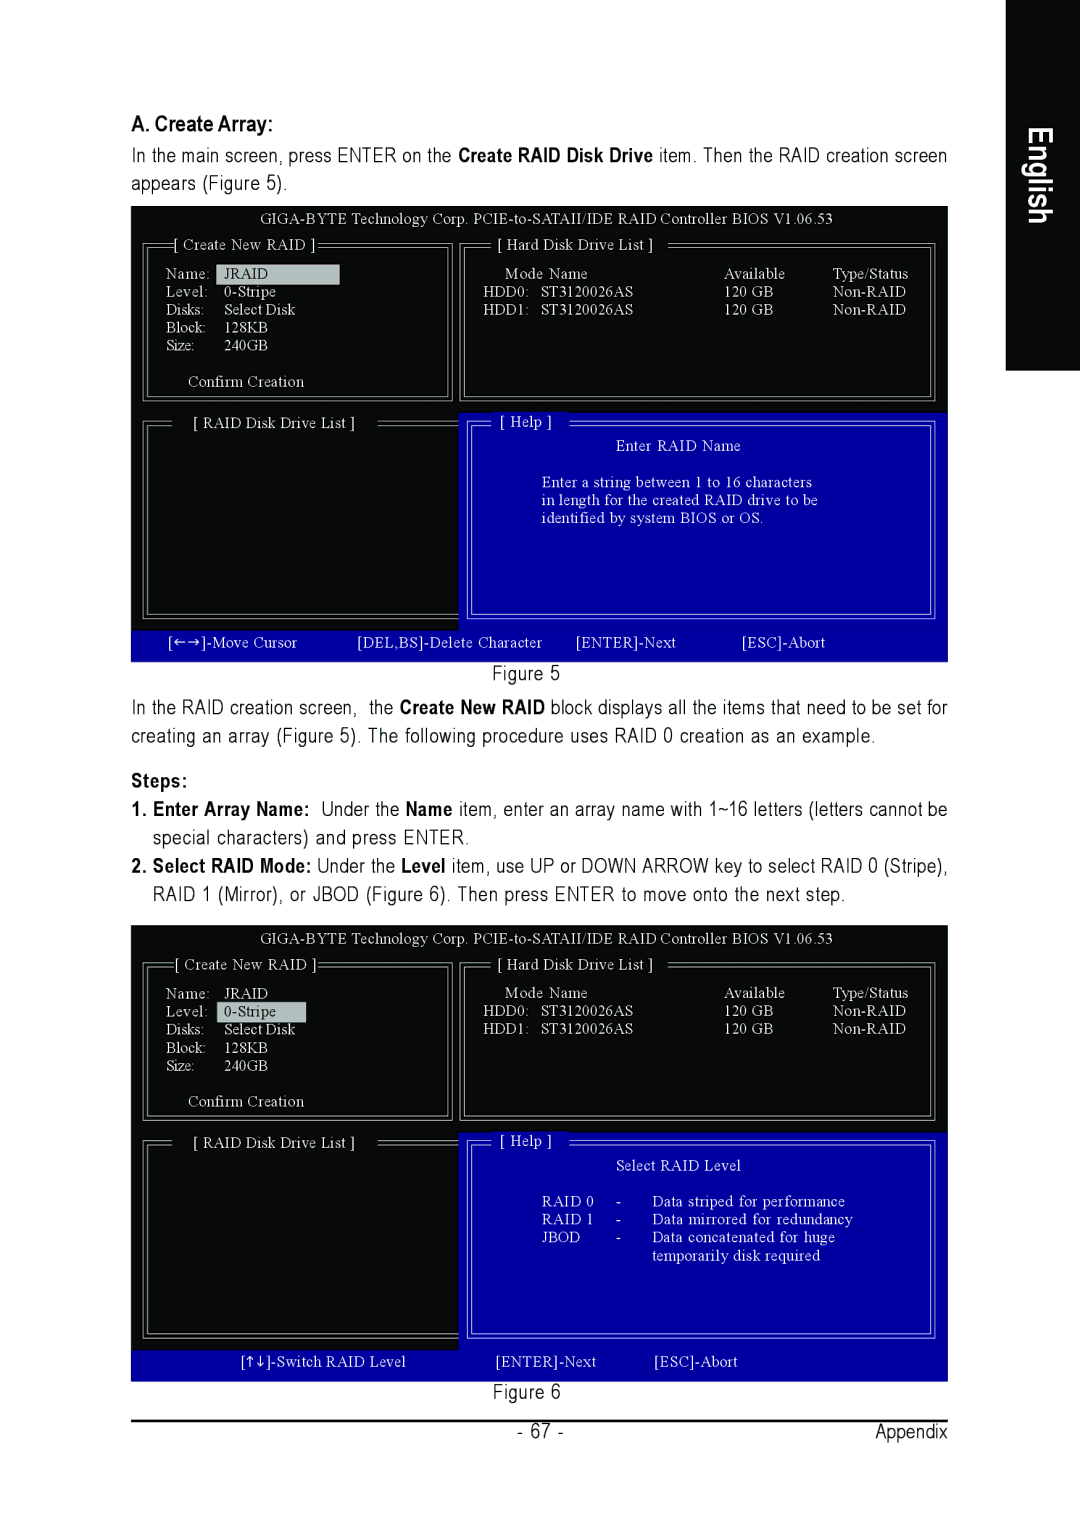
In the main screen, press ENTER on the Create RAID Disk Drive item. Then the RAID creation screen appears (Figure 5).
English
![]() [ Create New RAID ]
[ Create New RAID ] ![]()
Name: JRAID
Level:
Disks: Select Disk
Block: 128KB
Size: 240GB
Confirm Creation
[ RAID Disk Drive List ]
[ Hard Disk Drive List ] |
|
|
Mode Name | Available | Type/Status |
HDD0: ST3120026AS | 120 GB | |
HDD1: ST3120026AS | 120 GB |
[ Help ]
Enter RAID Name
Enter a string between 1 to 16 characters in length for the created RAID drive to be identified by system BIOS or OS.
[ |
Figure 5
In the RAID creation screen, the Create New RAID block displays all the items that need to be set for creating an array (Figure 5). The following procedure uses RAID 0 creation as an example.
Steps:
1.Enter Array Name: Under the Name item, enter an array name with 1~16 letters (letters cannot be special characters) and press ENTER.
2.Select RAID Mode: Under the Level item, use UP or DOWN ARROW key to select RAID 0 (Stripe), RAID 1 (Mirror), or JBOD (Figure 6). Then press ENTER to move onto the next step.
![]() [ Create New RAID ]
[ Create New RAID ]![]()
Name: JRAID
Level:
Disks: Select Disk
Block: 128KB
Size: 240GB
Confirm Creation
[ RAID Disk Drive List ]
[ Hard Disk Drive List ] |
|
|
Mode Name | Available | Type/Status |
HDD0: ST3120026AS | 120 GB | |
HDD1: ST3120026AS | 120 GB |
[ Help ]
| Select RAID Level | |
RAID 0 | - | Data striped for performance |
RAID 1 | - | Data mirrored for redundancy |
JBOD | - | Data concatenated for huge |
|
| temporarily disk required |
[ | ||
| Figure 6 |
|
|
|
|
| - 67 - | Appendix |