Gigabyte GA-M55S-S3 user manual Making a SATA Driver Disk, English, cd bootdrv menu

Models: GA-M55S-S3

1 88
Download 88 pages 37.01 Kb
Page 73
Image 73
(4) Making a SATA Driver Disk

(4) Making a SATA Driver Disk

To install operating system onto a serial ATA hard disk successfully, you need to install the SATA controller driver during OS installation. Without the driver, the hard disk may not be recognized during the Windows setup process. First of all, copy the driver for the SATA controller from the motherboard driver CD-ROM to a floppy disk. See the instructions below about how to copy the driver in MS-DOS mode(Note). Prepare a startup disk that has CD-ROM support and a blank formatted floppy disk.

Step 1: Insert the prepared startup disk and motherboard driver CD-ROM in your system. Boot from the

startup disk. Once at the A:\> prompt, change to the CD-ROM drive (example: D:\>). At the D:\> prompt, type the following two commands. Press ENTER after each command (Figure 10):

cd bootdrv

menu

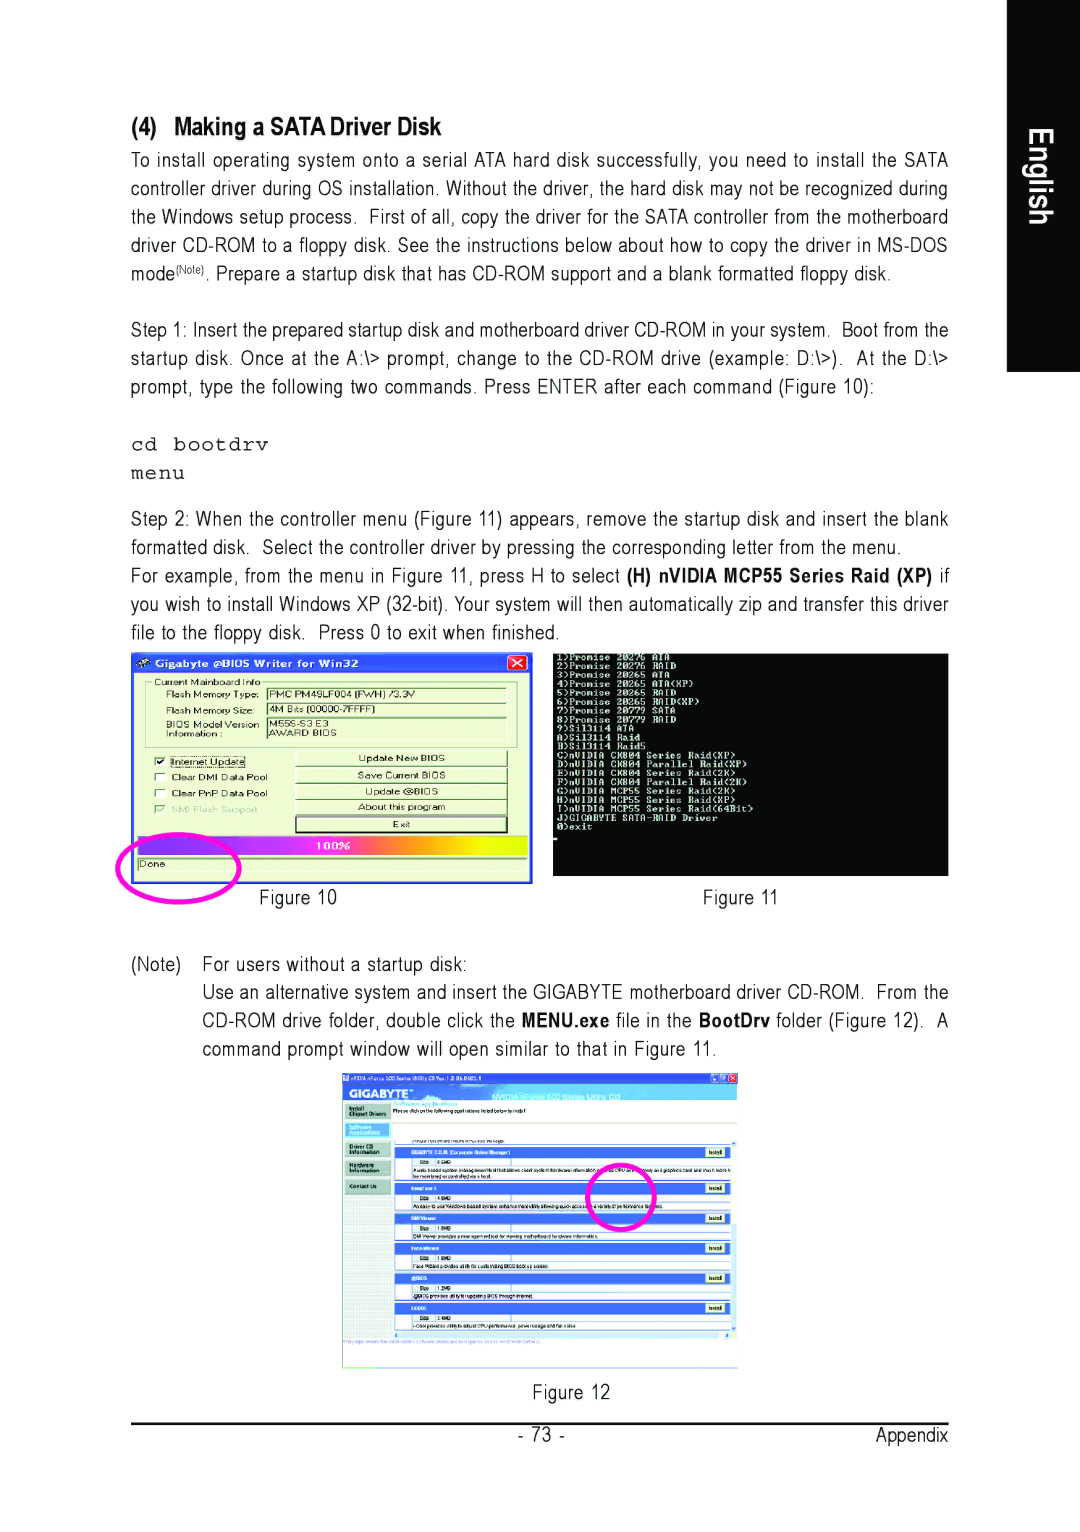
Step 2: When the controller menu (Figure 11) appears, remove the startup disk and insert the blank formatted disk. Select the controller driver by pressing the corresponding letter from the menu.

For example, from the menu in Figure 11, press H to select (H) nVIDIA MCP55 Series Raid (XP) if you wish to install Windows XP (32-bit). Your system will then automatically zip and transfer this driver file to the floppy disk. Press 0 to exit when finished.

English

Figure 10Figure 11

(Note) For users without a startup disk:

Use an alternative system and insert the GIGABYTE motherboard driver CD-ROM. From the CD-ROM drive folder, double click the MENU.exe file in the BootDrv folder (Figure 12). A command prompt window will open similar to that in Figure 11.

Figure 12

- 73 -

Appendix

Page 73
Image 73
Gigabyte GA-M55S-S3 Making a SATA Driver Disk, English, cd bootdrv menu, Figure Note For users without a startup disk