6. Installation Directions
Each time before setting up the
Please read the following installation directions before using
English
Hardware Installation
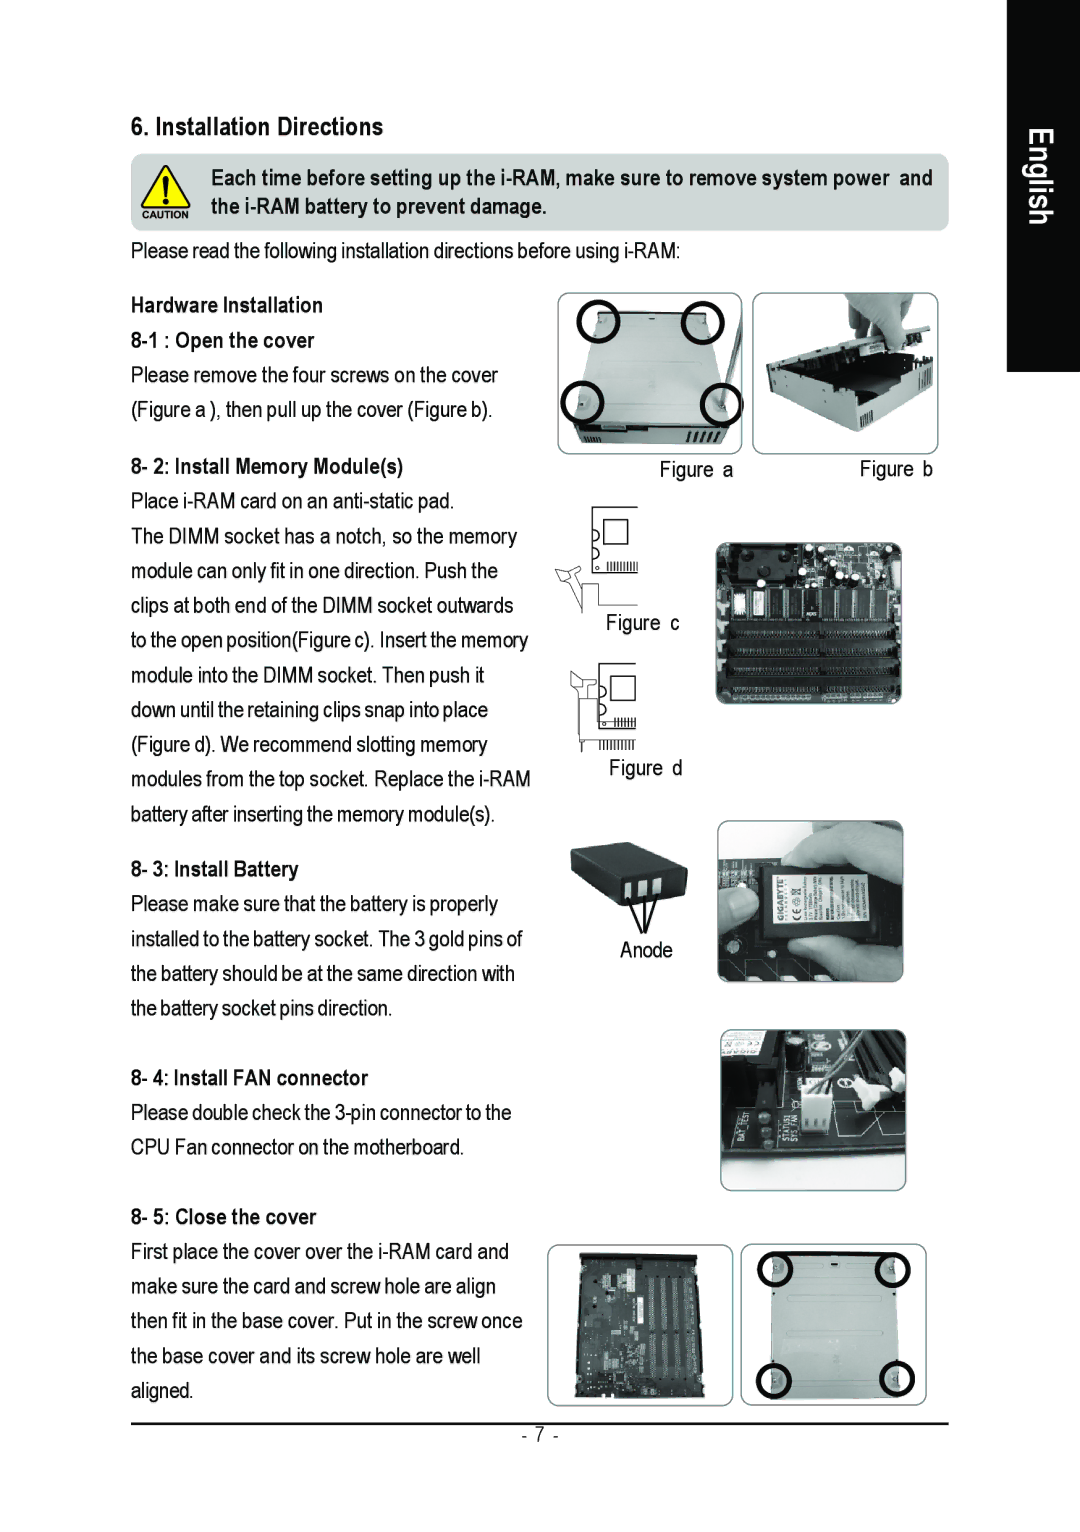
Please remove the four screws on the cover (Figure a ), then pull up the cover (Figure b).
8- 2: Install Memory Module(s)
Place
The DIMM socket has a notch, so the memory module can only fit in one direction. Push the clips at both end of the DIMM socket outwards to the open position(Figure c). Insert the memory module into the DIMM socket. Then push it down until the retaining clips snap into place (Figure d). We recommend slotting memory modules from the top socket. Replace the
8- 3: Install Battery
Please make sure that the battery is properly installed to the battery socket. The 3 gold pins of the battery should be at the same direction with the battery socket pins direction.
Figure a | Figure b |
Figure c
Figure d
Anode
8- 4: Install FAN connector
Please double check the
8- 5: Close the cover
First place the cover over the
- 7 -