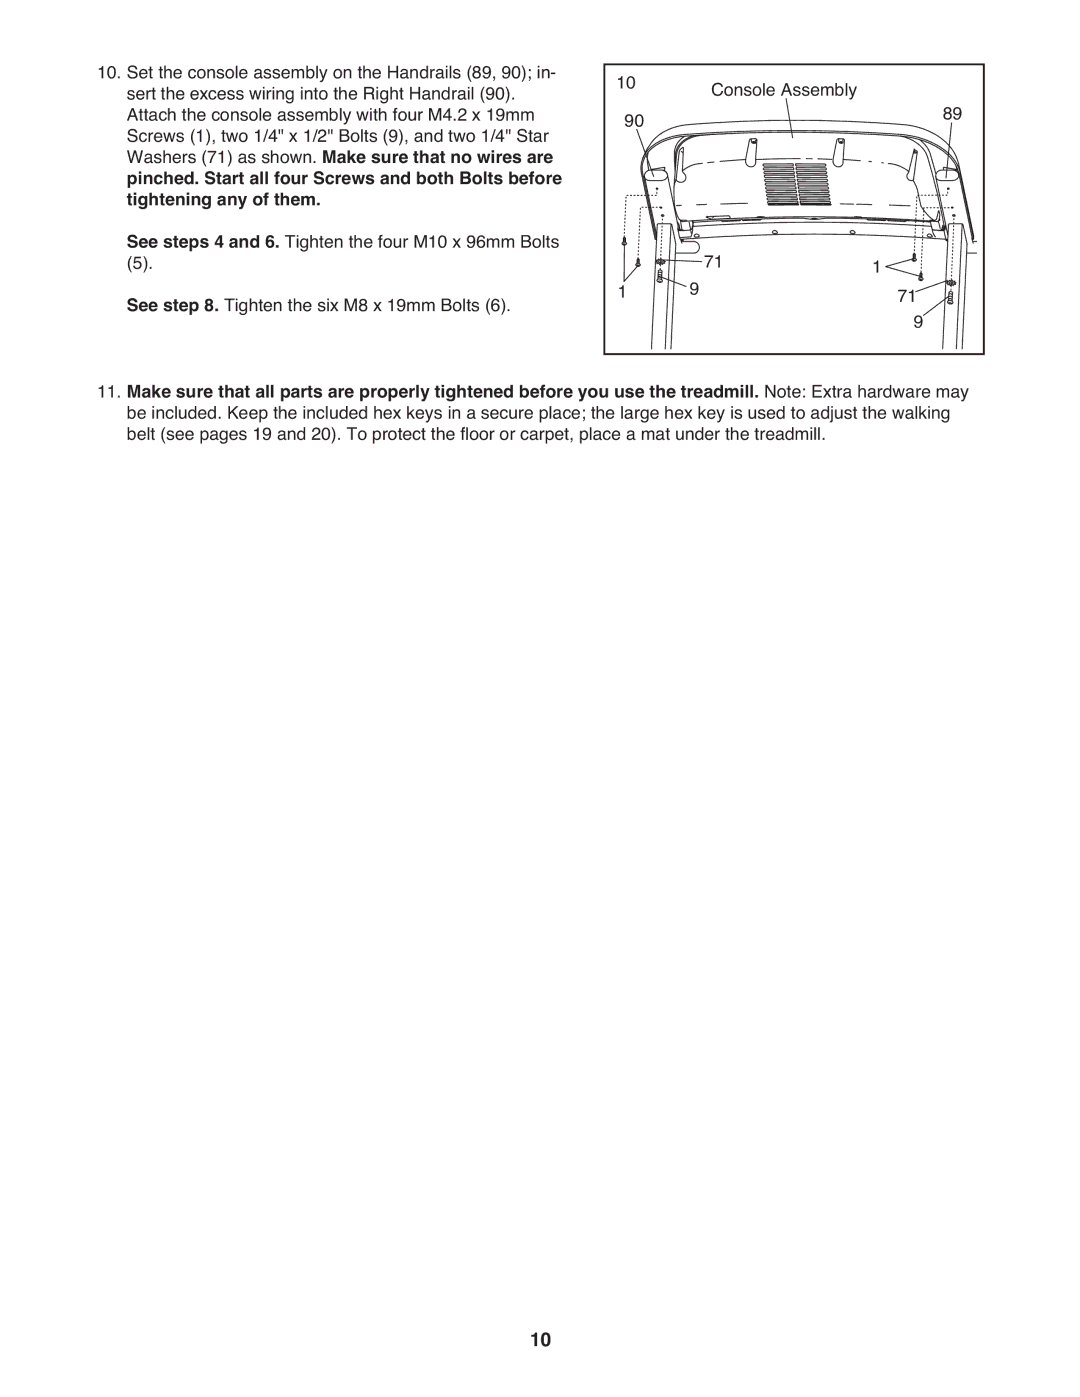
10.Set the console assembly on the Handrails (89, 90); in- sert the excess wiring into the Right Handrail (90). Attach the console assembly with four M4.2 x 19mm Screws (1), two 1/4" x 1/2" Bolts (9), and two 1/4" Star Washers (71) as shown. Make sure that no wires are pinched. Start all four Screws and both Bolts before tightening any of them.
See steps 4 and 6. Tighten the four M10 x 96mm Bolts
(5).
See step 8. Tighten the six M8 x 19mm Bolts (6).
10 |
| Console Assembly |
| 89 |
90 |
|
|
| |
1 | 9 | 71 | 1 | 719 |
|
| |||
|
|
|
|
11.Make sure that all parts are properly tightened before you use the treadmill. Note: Extra hardware may be included. Keep the included hex keys in a secure place; the large hex key is used to adjust the walking belt (see pages 19 and 20). To protect the floor or carpet, place a mat under the treadmill.
10