Installing the Toy Bar
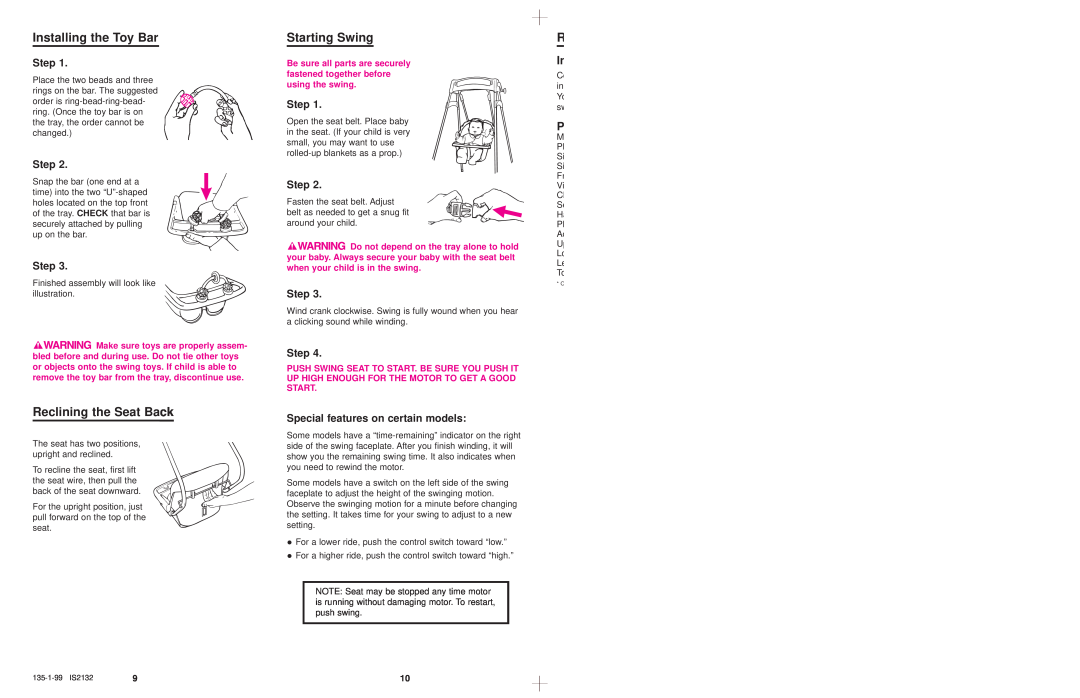
Step 1.
Place the two beads and three rings on the bar. The suggested order is
Step 2.
Snap the bar (one end at a time) into the two
Step 3.
Finished assembly will look like illustration.
![]()
![]()
![]()
![]() Make sure toys are properly assem- bled before and during use. Do not tie other toys or objects onto the swing toys. If child is able to remove the toy bar from the tray, discontinue use.
Make sure toys are properly assem- bled before and during use. Do not tie other toys or objects onto the swing toys. If child is able to remove the toy bar from the tray, discontinue use.
Reclining the Seat Back
The seat has two positions, upright and reclined.
To recline the seat, first lift the seat wire, then pull the back of the seat downward.
For the upright position, just pull forward on the top of the seat.
Starting Swing
Be sure all parts are securely fastened together before using the swing.
Step 1.
Open the seat belt. Place baby in the seat. (If your child is very small, you may want to use
Step 2.
Fasten the seat belt. Adjust belt as needed to get a snug fit around your child.
![]()
![]()
![]()
![]() Do not depend on the tray alone to hold your baby. Always secure your baby with the seat belt when your child is in the swing.
Do not depend on the tray alone to hold your baby. Always secure your baby with the seat belt when your child is in the swing.
Step 3.
Wind crank clockwise. Swing is fully wound when you hear a clicking sound while winding.
Step 4.
PUSH SWING SEAT TO START. BE SURE YOU PUSH IT UP HIGH ENOUGH FOR THE MOTOR TO GET A GOOD START.
Special features on certain models:
Some models have a
Some models have a switch on the left side of the swing faceplate to adjust the height of the swinging motion. Observe the swinging motion for a minute before changing the setting. It takes time for your swing to adjust to a new setting.
•For a lower ride, push the control switch toward “low.”
•For a higher ride, push the control switch toward “high.”
NOTE: Seat may be stopped any time motor is running without damaging motor. To restart, push swing.
R
In
C in Yo sw
P
M
Pl
Si
Si
Fr
Vi
Cl
Se
H
Pl
Ad
U
Lo
Le
To
* O
9 | 10 |