Warnings

Pressure Relief Procedure

Follow this Pressure Relief Procedure whenever instructed to relieve pressure, stop spraying, check or service equipment, or install or clean spray tip.

1.Lock trigger. Turn OFF power and turn pressure control to lowest pressure setting.

2.Unlock trigger. Hold gun against side of flushing pail. Trigger gun into pail to relieve pressure.

If you suspect spray tip or hose is clogged or that pressure has not been fully relieved after following the steps above, VERY SLOWLY loosen tip guard retaining nut or hose end coupling to relieve pressure gradually, then loosen completely. Clear hose or tip obstruction.

Gun Trigger Lock

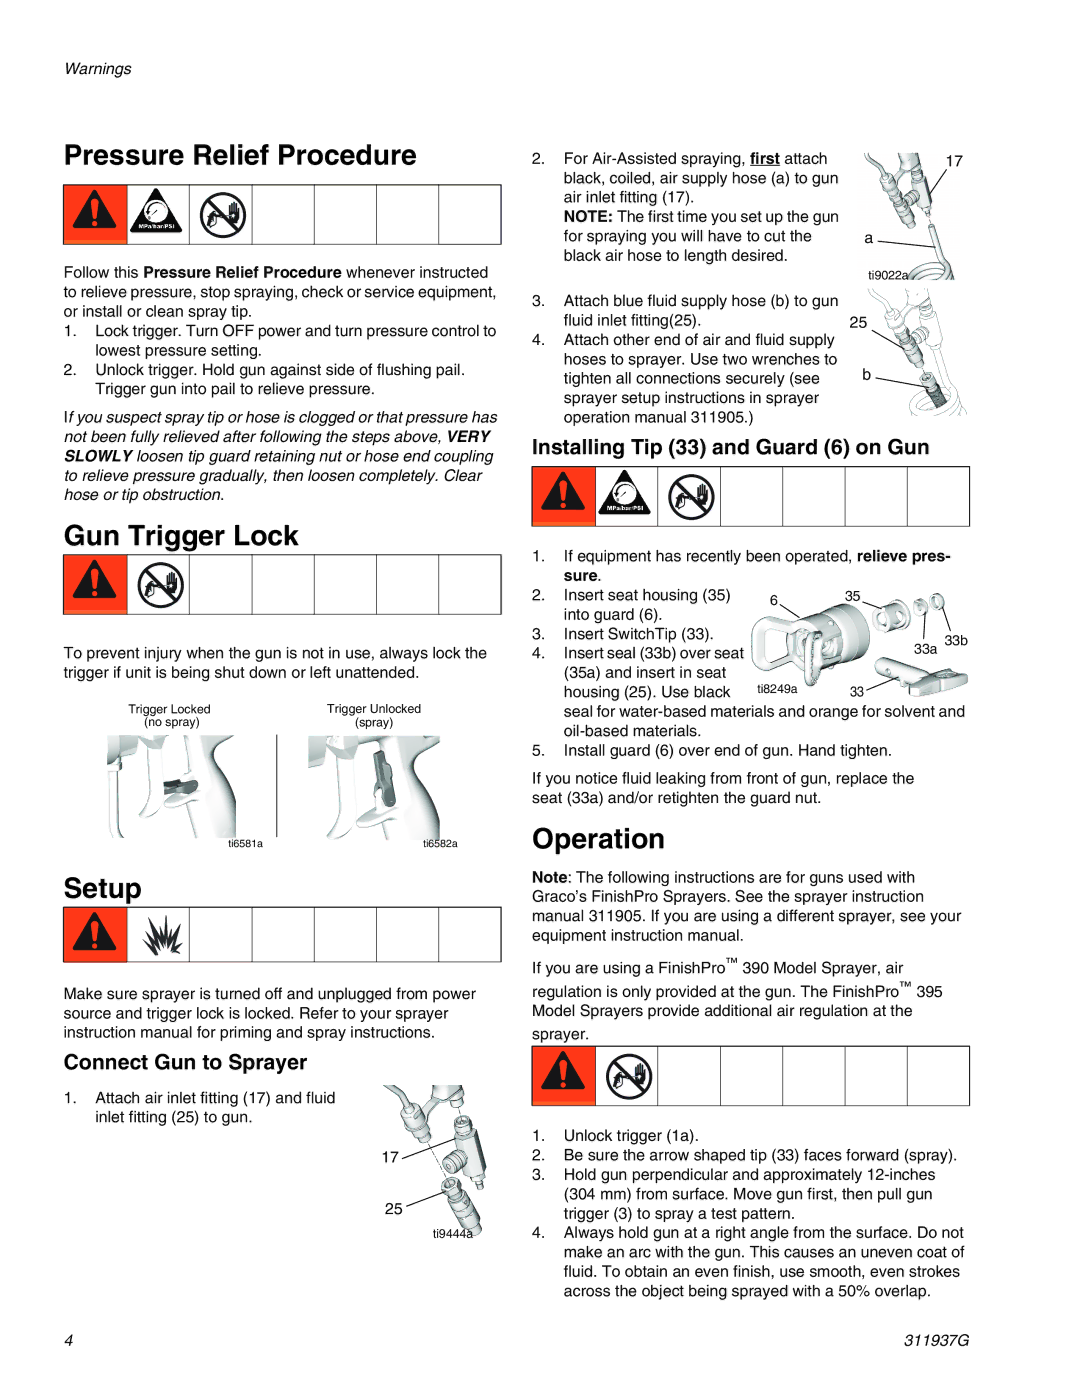
To prevent injury when the gun is not in use, always lock the trigger if unit is being shut down or left unattended.

Trigger Locked

Trigger Unlocked

(no spray)

(spray)

ti6581a

ti6582a

Setup

Make sure sprayer is turned off and unplugged from power source and trigger lock is locked. Refer to your sprayer instruction manual for priming and spray instructions.

Connect Gun to Sprayer

1.Attach air inlet fitting (17) and fluid inlet fitting (25) to gun.

17

25

ti9444a

2. For Air-Assisted spraying, first attach

17

black, coiled, air supply hose (a) to gun


air inlet fitting (17).


NOTE: The first time you set up the gun


for spraying you will have to cut the

a

black air hose to length desired.


ti9022a

3.Attach blue fluid supply hose (b) to gun

fluid inlet fitting(25).

25

4. Attach other end of air and fluid supply


hoses to sprayer. Use two wrenches to

b

tighten all connections securely (see

sprayer setup instructions in sprayer


operation manual 311905.)


Installing Tip (33) and Guard (6) on Gun

1.If equipment has recently been operated, relieve pres-


sure.


2.

Insert seat housing (35)

6

35


into guard (6).


3.

Insert SwitchTip (33).


33a 33b

4.

Insert seal (33b) over seat


(35a) and insert in seat


housing (25). Use black

ti8249a

33

seal for water-based materials and orange for solvent and oil-based materials.

5.Install guard (6) over end of gun. Hand tighten.

If you notice fluid leaking from front of gun, replace the seat (33a) and/or retighten the guard nut.

Operation

Note: The following instructions are for guns used with Graco’s FinishPro Sprayers. See the sprayer instruction manual 311905. If you are using a different sprayer, see your equipment instruction manual.

If you are using a FinishPro390 Model Sprayer, air

regulation is only provided at the gun. The FinishPro395 Model Sprayers provide additional air regulation at the

sprayer.

1.Unlock trigger (1a).

2.Be sure the arrow shaped tip (33) faces forward (spray).

3.Hold gun perpendicular and approximately 12-inches (304 mm) from surface. Move gun first, then pull gun trigger (3) to spray a test pattern.

4.Always hold gun at a right angle from the surface. Do not make an arc with the gun. This causes an uneven coat of fluid. To obtain an even finish, use smooth, even strokes across the object being sprayed with a 50% overlap.

4

311937G

Page 4
Image 4
Graco 289604, 288513 important safety instructions Pressure Relief Procedure, Gun Trigger Lock, Setup, Operation

288513, 289604 specifications

Graco is renowned for producing high-quality paint sprayers, and among their notable offerings are the Graco 289604 and 288513 models. These sprayers are designed for both professional contractors and DIY enthusiasts looking for efficiency and precision in their paint applications.

The Graco 289604 features a next-generation design that ensures durability while maintaining a lightweight profile. One of its standout technologies is the FlexLiner bag system, which allows for easy cleaning and prevents material waste by enabling users to spray all the contents without needing to switch containers. The model is also compatible with various paint types, including latex, oil-based paints, and stains, making it a versatile choice for any project.

This sprayer offers a powerful motor that delivers a consistent spray pattern at various speeds, allowing users to cover large surfaces quickly without sacrificing quality. The pressure control knob provides the ability to adjust the flow of paint, ensuring that intricate projects can also be tackled with precision. Additionally, the Graco 289604 includes a reversible spray tip, which dramatically reduces clogs and enhances the sprayer’s overall efficiency.

On the other hand, the Graco 288513 is equally impressive, focusing mainly on airless spraying technology. Its robust design makes it ideal for larger projects, significantly reducing the time required to complete tasks. The EasyPrime feature ensures that users can quickly start painting with minimal setup. Like its counterpart, the 288513 boasts the FlexLiner bag system, ensuring ease of use and reduced cleanup time.

Both models are equipped with a user-friendly interface, making them accessible for both novice and experienced painters alike. The lightweight design of both sprayers contributes to easier maneuverability and reduced fatigue during extended use. Moreover, Graco’s commitment to safety is evident in these sprayers, which come with built-in safety features to prevent malfunction and misuse.

In conclusion, the Graco 289604 and 288513 paint sprayers are excellent choices for anyone serious about achieving a professional finish. With cutting-edge technologies, superior design characteristics, and user-friendly features, these models stand out in the competitive world of paint application tools, ensuring that every project can be completed efficiently and effectively.