Service
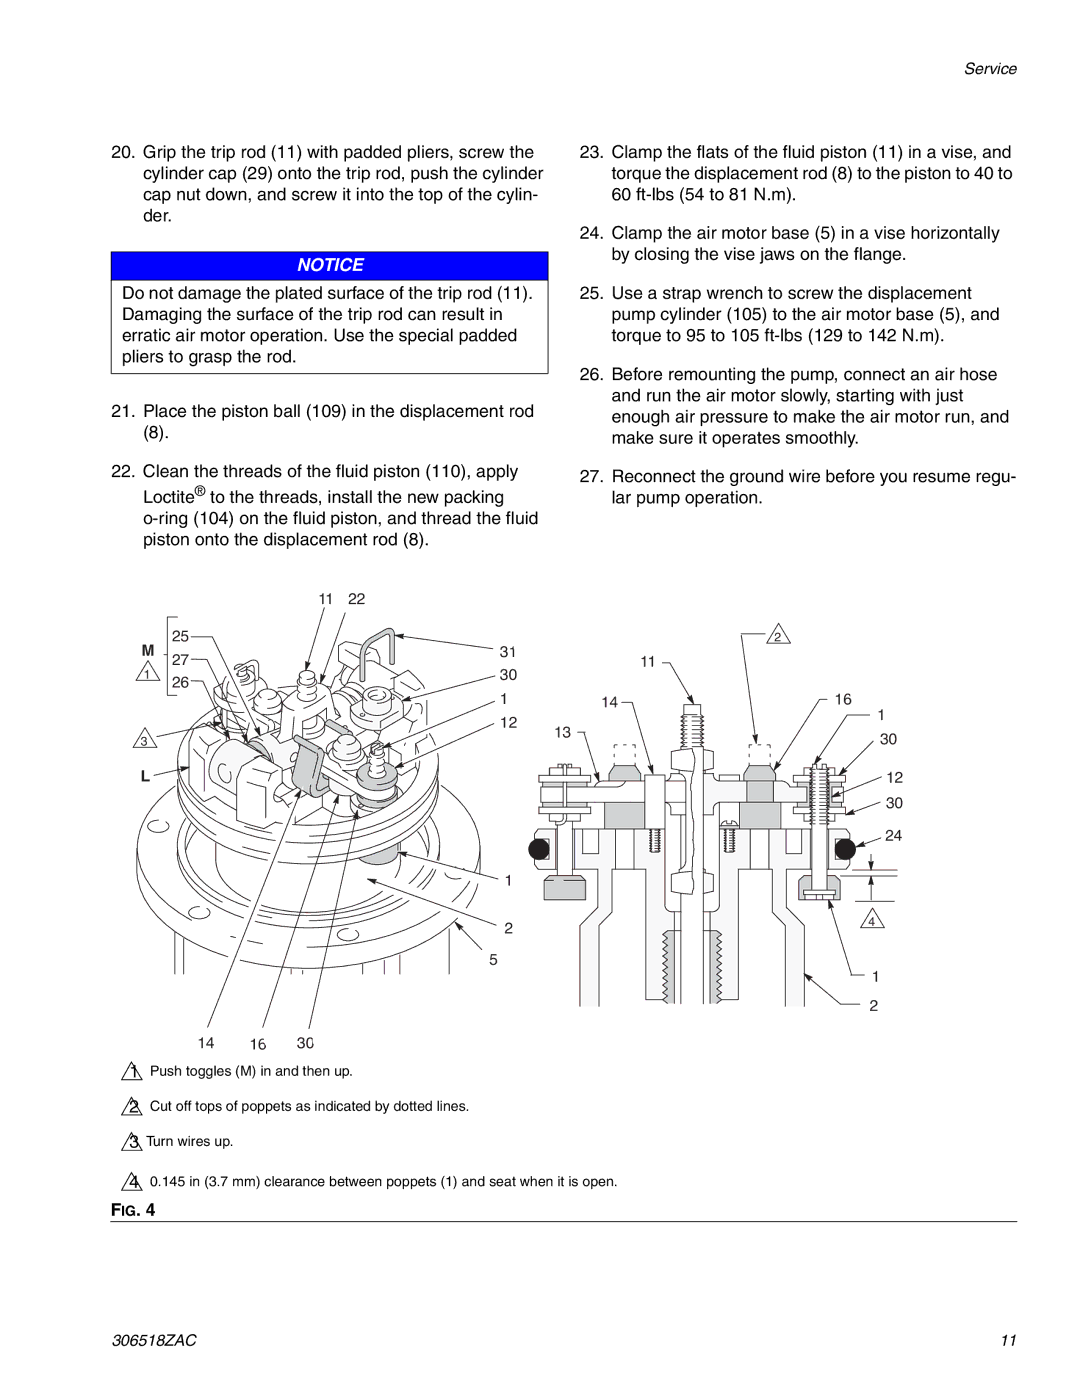
20.Grip the trip rod (11) with padded pliers, screw the cylinder cap (29) onto the trip rod, push the cylinder cap nut down, and screw it into the top of the cylin- der.
NOTICE
Do not damage the plated surface of the trip rod (11). Damaging the surface of the trip rod can result in erratic air motor operation. Use the special padded pliers to grasp the rod.
21.Place the piston ball (109) in the displacement rod
(8).
22.Clean the threads of the fluid piston (110), apply Loctite® to the threads, install the new packing
11 22
23.Clamp the flats of the fluid piston (11) in a vise, and torque the displacement rod (8) to the piston to 40 to 60
24.Clamp the air motor base (5) in a vise horizontally by closing the vise jaws on the flange.
25.Use a strap wrench to screw the displacement pump cylinder (105) to the air motor base (5), and torque to 95 to 105
26.Before remounting the pump, connect an air hose and run the air motor slowly, starting with just enough air pressure to make the air motor run, and make sure it operates smoothly.
27.Reconnect the ground wire before you resume regu- lar pump operation.
| 25 |
M 27 | |
1 | 26 |
| |
31*
30*
11
2 |
1* 14
16* |
1* |
3
L ![]()
14 16* 30*
12*
1*
2
5
13
30* |
12* |
30* |
24* |
4 |
1* |
2 |
![]() 1 Push toggles (M) in and then up.
1 Push toggles (M) in and then up.
2 | Cut off tops of poppets as indicated by dotted lines. |
3 Turn wires up. | |
4 | 0.145 in (3.7 mm) clearance between poppets (1) and seat when it is open. |
FIG. 4
306518ZAC | 11 |