Service
6.Using wrenches on the flats of the displacement rod
(8) and on the flats of the fluid piston (110), unscrew the fluid piston from the displacement rod. Remove the ball (111) from the end of the displacement rod, and remove the packing
7.Clamp the air motor upright in the vise by closing the vise jaws below the flange.
8.Unscrew the cylinder cap nut (29) from the top of the air motor cylinder (17).
9.Pull up on the cylinder cap nut (29) to expose the trip rod, grasp the trip rod with padded pliers, and unscrew the cylinder cap nut from the trip rod.
NOTICE
Do not damage the plated surface of the trip rod (11). Damaging the surface of the trip rod can result in erratic air motor operation. Use the special padded
11
24
10
9 ![]()
![]() 21
21 ![]()
![]()
![]()
flange
8
29
17
1
![]()
![]()
![]()
![]()
![]() 2
2
![]()
![]()
![]()
![]() 5a
5a
6
5
pliers to grasp the rod.
10.Remove the six screws (21) holding the air motor cylinder (17) to the air motor base (5), and carefully pull the cylinder straight up off the piston (2).
NOTICE
To avoid damaging the cylinder wall, lift the cylinder straight up off the piston. Never tilt the cylinder while you are removing it.
11.Pull the air motor piston/displacement rod assembly (2, 8) clear of the air motor base (5) by pulling up on the air motor piston.
12.Remove the
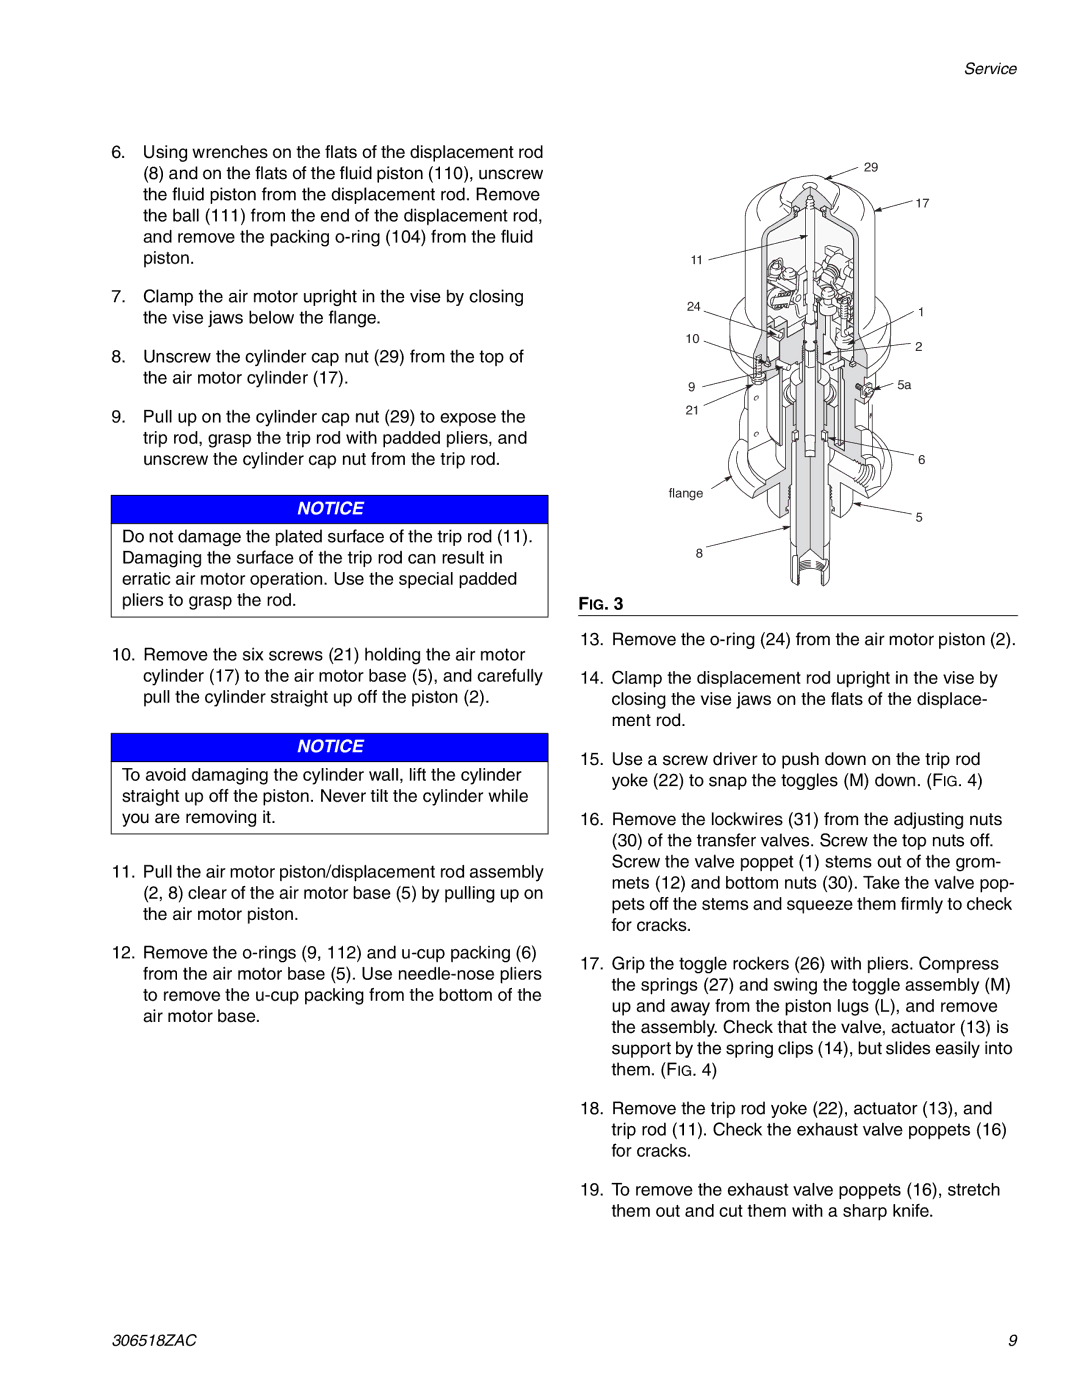
FIG. 3
13.Remove the
14.Clamp the displacement rod upright in the vise by closing the vise jaws on the flats of the displace- ment rod.
15.Use a screw driver to push down on the trip rod yoke (22) to snap the toggles (M) down. (FIG. 4)
16.Remove the lockwires (31) from the adjusting nuts (30) of the transfer valves. Screw the top nuts off. Screw the valve poppet (1) stems out of the grom- mets (12) and bottom nuts (30). Take the valve pop- pets off the stems and squeeze them firmly to check for cracks.
17.Grip the toggle rockers (26) with pliers. Compress the springs (27) and swing the toggle assembly (M) up and away from the piston lugs (L), and remove the assembly. Check that the valve, actuator (13) is support by the spring clips (14), but slides easily into them. (FIG. 4)
18.Remove the trip rod yoke (22), actuator (13), and trip rod (11). Check the exhaust valve poppets (16) for cracks.
19.To remove the exhaust valve poppets (16), stretch them out and cut them with a sharp knife.
306518ZAC | 9 |