Operation
7.Adjust the fluid regulator to the desired setting.
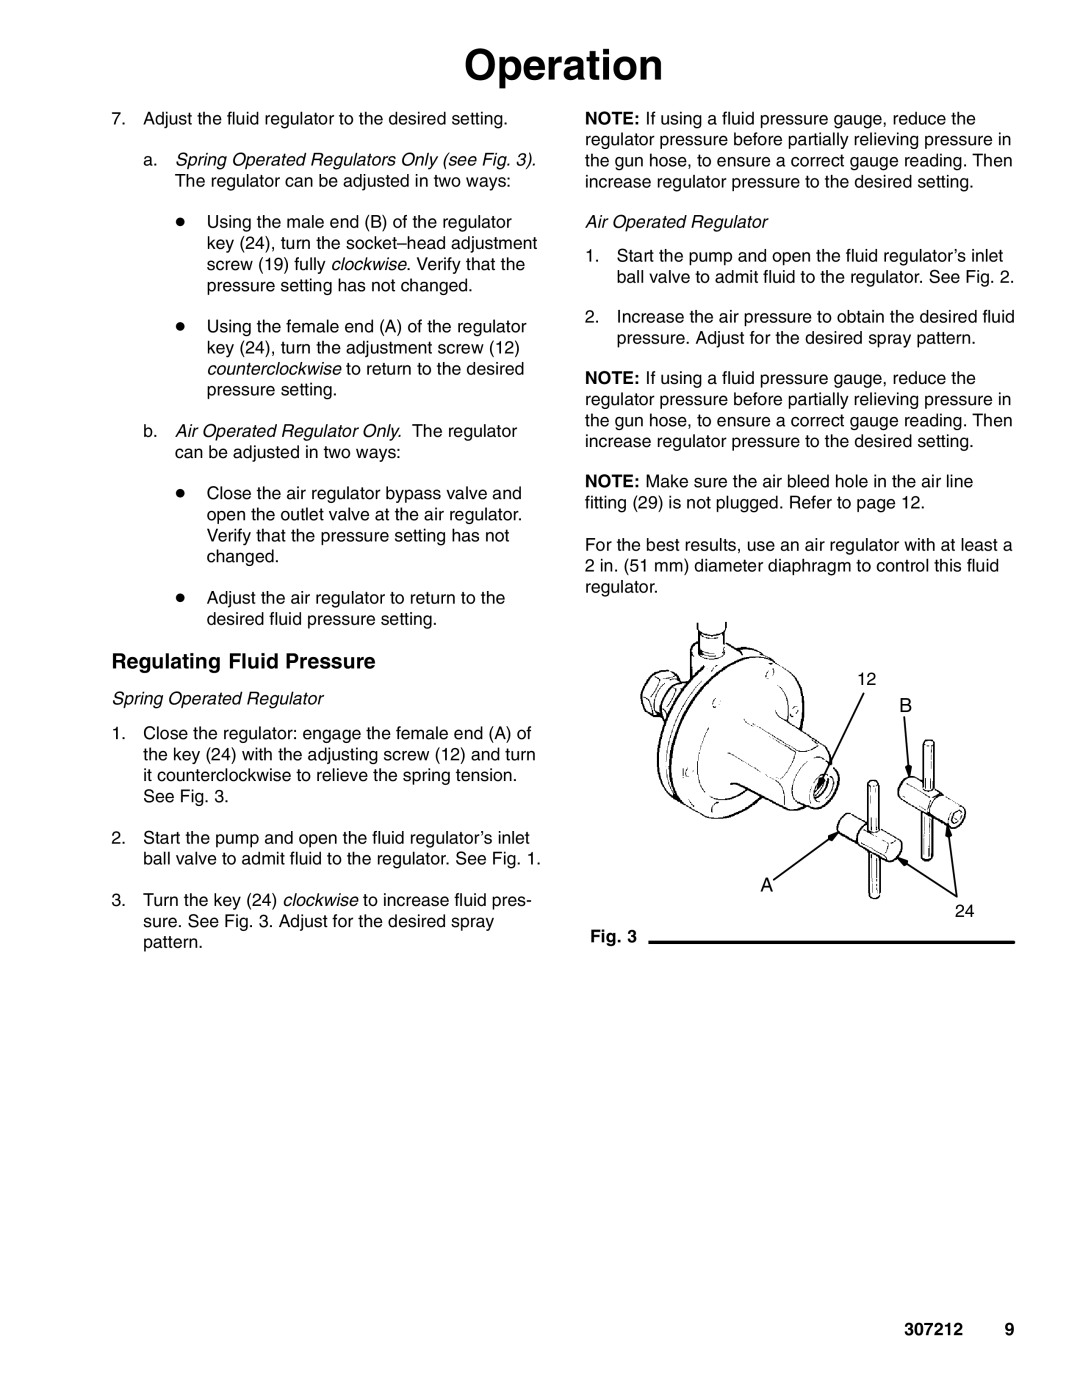
a.Spring Operated Regulators Only (see Fig. 3). The regulator can be adjusted in two ways:
D Using the male end (B) of the regulator key (24), turn the
D Using the female end (A) of the regulator key (24), turn the adjustment screw (12) counterclockwise to return to the desired pressure setting.
b.Air Operated Regulator Only. The regulator can be adjusted in two ways:
D Close the air regulator bypass valve and open the outlet valve at the air regulator. Verify that the pressure setting has not changed.
D Adjust the air regulator to return to the desired fluid pressure setting.
Regulating Fluid Pressure
Spring Operated Regulator
1.Close the regulator: engage the female end (A) of the key (24) with the adjusting screw (12) and turn it counterclockwise to relieve the spring tension.
See Fig. 3.
2.Start the pump and open the fluid regulator’s inlet ball valve to admit fluid to the regulator. See Fig. 1.
3.Turn the key (24) clockwise to increase fluid pres- sure. See Fig. 3. Adjust for the desired spray pattern.
NOTE: If using a fluid pressure gauge, reduce the regulator pressure before partially relieving pressure in the gun hose, to ensure a correct gauge reading. Then increase regulator pressure to the desired setting.
Air Operated Regulator
1.Start the pump and open the fluid regulator’s inlet ball valve to admit fluid to the regulator. See Fig. 2.
2.Increase the air pressure to obtain the desired fluid pressure. Adjust for the desired spray pattern.
NOTE: If using a fluid pressure gauge, reduce the regulator pressure before partially relieving pressure in the gun hose, to ensure a correct gauge reading. Then increase regulator pressure to the desired setting.
NOTE: Make sure the air bleed hole in the air line fitting (29) is not plugged. Refer to page 12.
For the best results, use an air regulator with at least a 2 in. (51 mm) diameter diaphragm to control this fluid regulator.
12
B
A
24
Fig. 3
