Service
Repairing the Air Valve
Tools Required
DTorque wrench
DTorx (T20) screwdriver or 7 mm (9/32”) socket
D
D
DLithium base grease
NOTE: Air Valve Repair Kits 236273 (aluminum center housings) and 255061 (stainless steel center hous- ings) are available. Refer to page 27. Parts included in the kit are marked with a symbol, for example (4{H). Use all the parts in the kit for the best results.
Disassembly
![]() WARNING
WARNING
To reduce the risk of serious injury whenever you are instructed to relieve pressure, always follow the Pressure Relief Procedure on page 12.
1. | Relieve the pressure. |
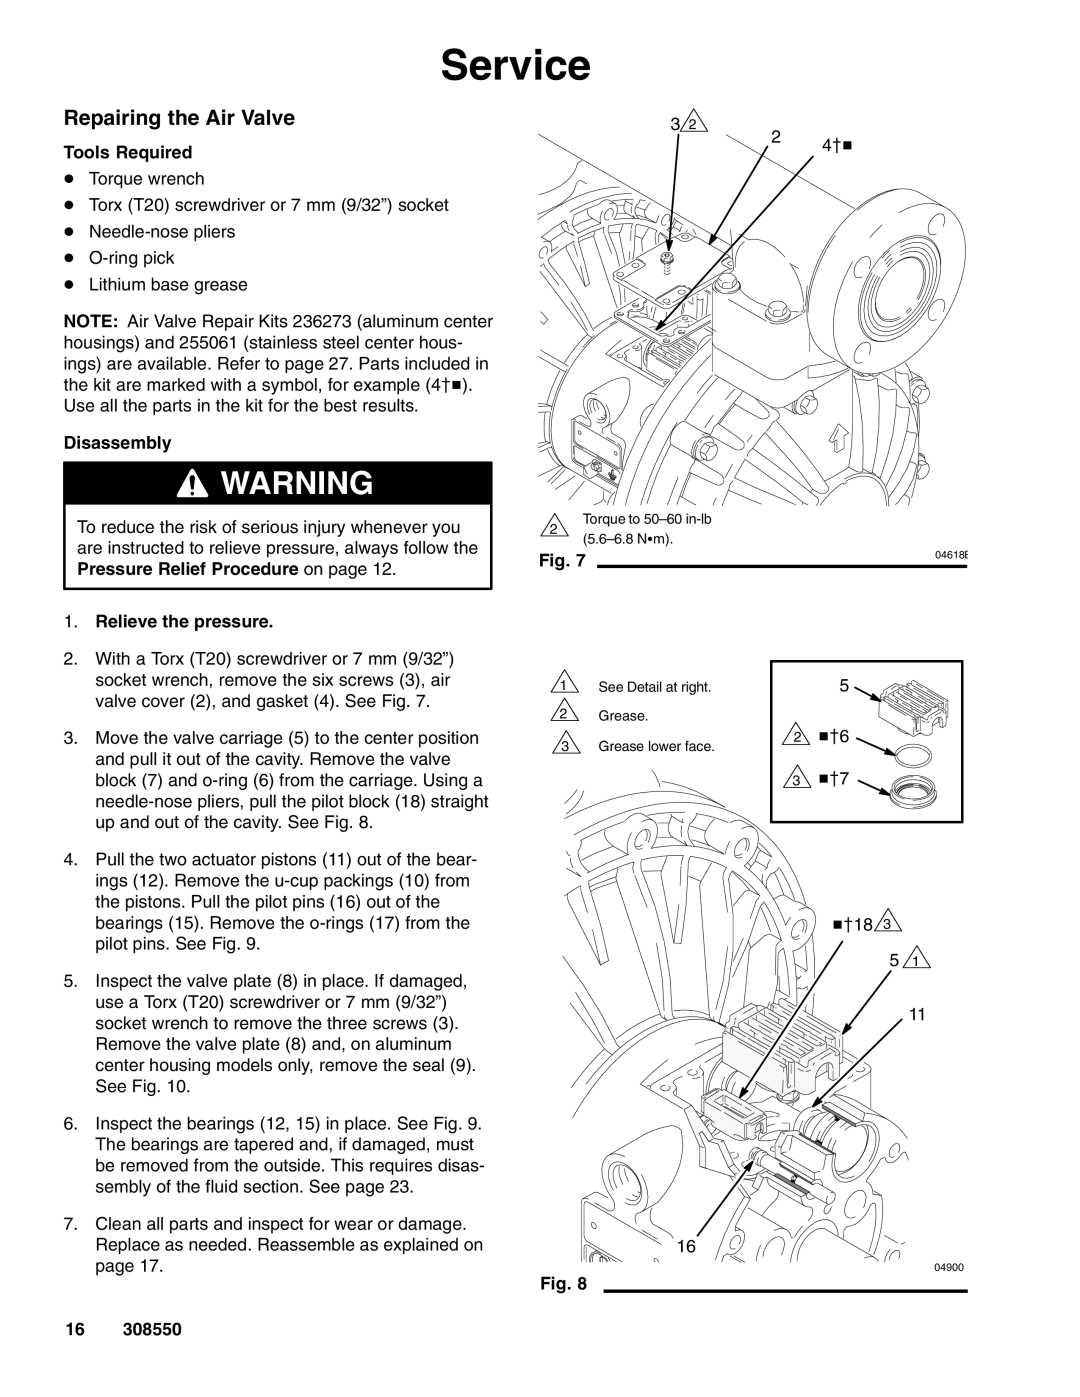
2. | With a Torx (T20) screwdriver or 7 mm (9/32”) |
| socket wrench, remove the six screws (3), air |
| valve cover (2), and gasket (4). See Fig. 7. |
32
2 4{H
Torque to
2 |
|
|
|
|
| ||
|
| 04618B | |
Fig. 7 |
| ||
|
|
| |
|
|
|
|
1 | See Detail at right. | 5 |
3. Move the valve carriage (5) to the center position |
and pull it out of the cavity. Remove the valve |
2 Grease.
3 Grease lower face.
2 H{6
block (7) and |
up and out of the cavity. See Fig. 8. |
4. Pull the two actuator pistons (11) out of the bear- |
ings (12). Remove the |
the pistons. Pull the pilot pins (16) out of the |
bearings (15). Remove the |
pilot pins. See Fig. 9. |
5. Inspect the valve plate (8) in place. If damaged, |
use a Torx (T20) screwdriver or 7 mm (9/32”) |
socket wrench to remove the three screws (3). |
Remove the valve plate (8) and, on aluminum |
center housing models only, remove the seal (9). |
See Fig. 10. |
6. Inspect the bearings (12, 15) in place. See Fig. 9. |
The bearings are tapered and, if damaged, must |
be removed from the outside. This requires disas- |
sembly of the fluid section. See page 23. |
7. Clean all parts and inspect for wear or damage. |
Replace as needed. Reassemble as explained on |
page 17. |
3 H{7
H{18 3
5 1
11
16
04900
Fig. 8
16 308550
