Installation
Grounding
Installation
To maintain grounding continuity when flushing or relieving pressure: hold metal part of the spray gun/dispense valve firmly to the side of a grounded metal pail, then trigger the gun/valve.
The equipment must be grounded. Grounding reduces the risk of static and electric shock by providing an escape wire for the electrical current due to static build up or in the event of a short circuit.
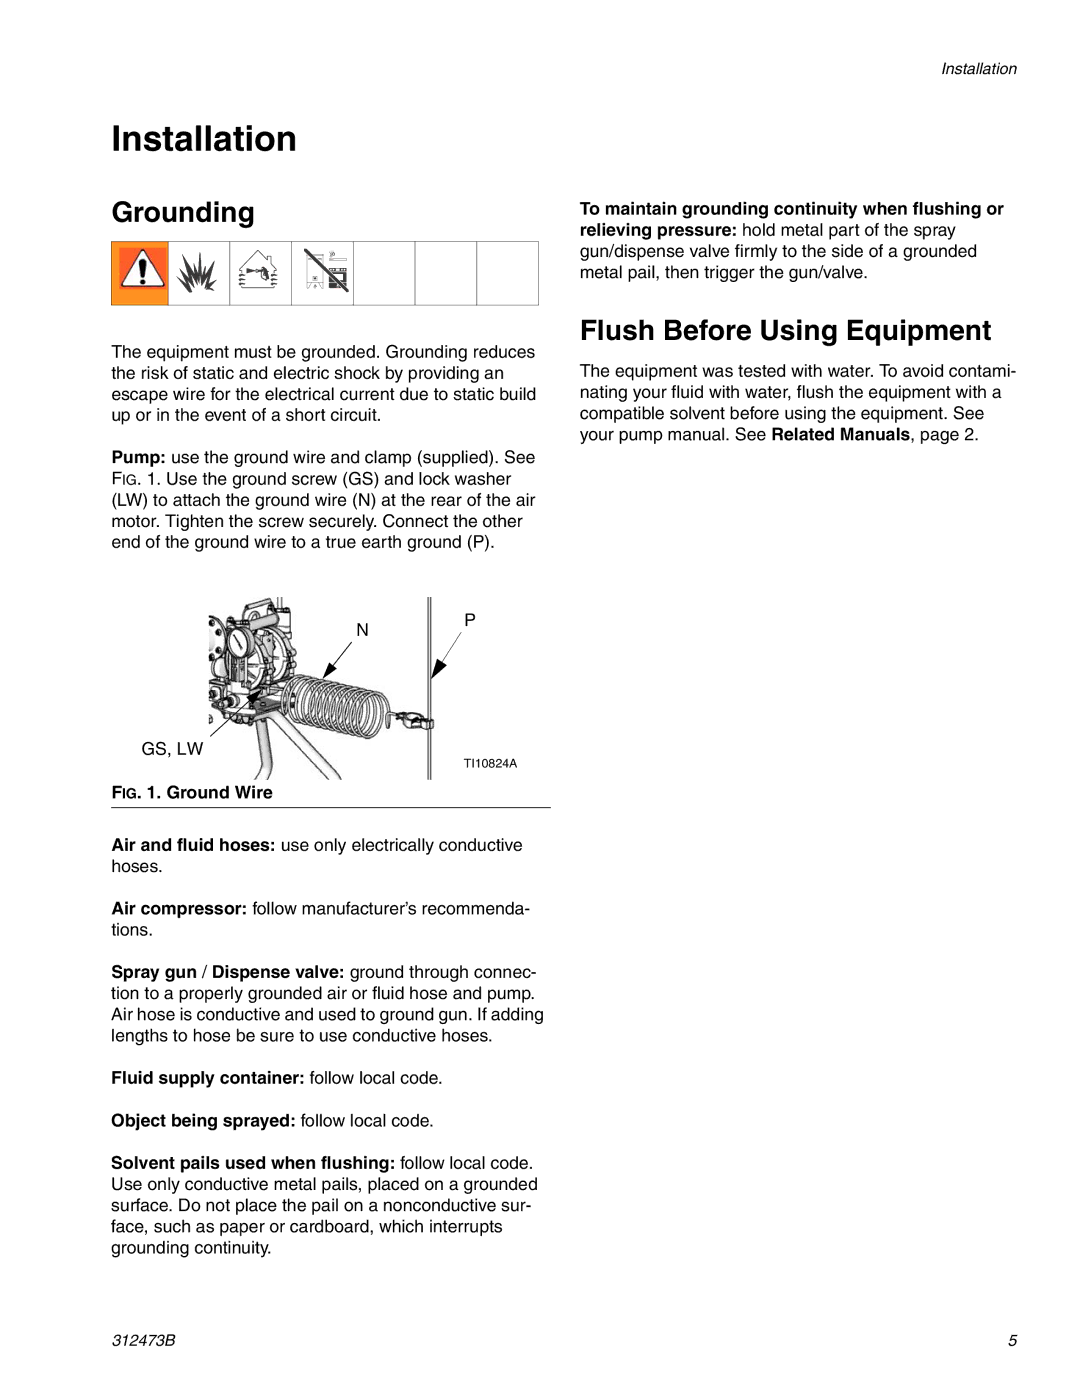
Pump: use the ground wire and clamp (supplied). See FIG. 1. Use the ground screw (GS) and lock washer (LW) to attach the ground wire (N) at the rear of the air motor. Tighten the screw securely. Connect the other end of the ground wire to a true earth ground (P).
Flush Before Using Equipment
The equipment was tested with water. To avoid contami- nating your fluid with water, flush the equipment with a compatible solvent before using the equipment. See your pump manual. See Related Manuals, page 2.
N
GS, LW
P
TI10824A
FIG. 1. Ground Wire
Air and fluid hoses: use only electrically conductive hoses.
Air compressor: follow manufacturer’s recommenda- tions.
Spray gun / Dispense valve: ground through connec- tion to a properly grounded air or fluid hose and pump. Air hose is conductive and used to ground gun. If adding lengths to hose be sure to use conductive hoses.
Fluid supply container: follow local code.
Object being sprayed: follow local code.
Solvent pails used when flushing: follow local code. Use only conductive metal pails, placed on a grounded surface. Do not place the pail on a nonconductive sur- face, such as paper or cardboard, which interrupts grounding continuity.
312473B | 5 |